
New Orleans, Louisiana
Lumina Apartments Balcony Door Replacement & Water Damage Repairs
Commercial Renovation / Multifamily Property Repairs
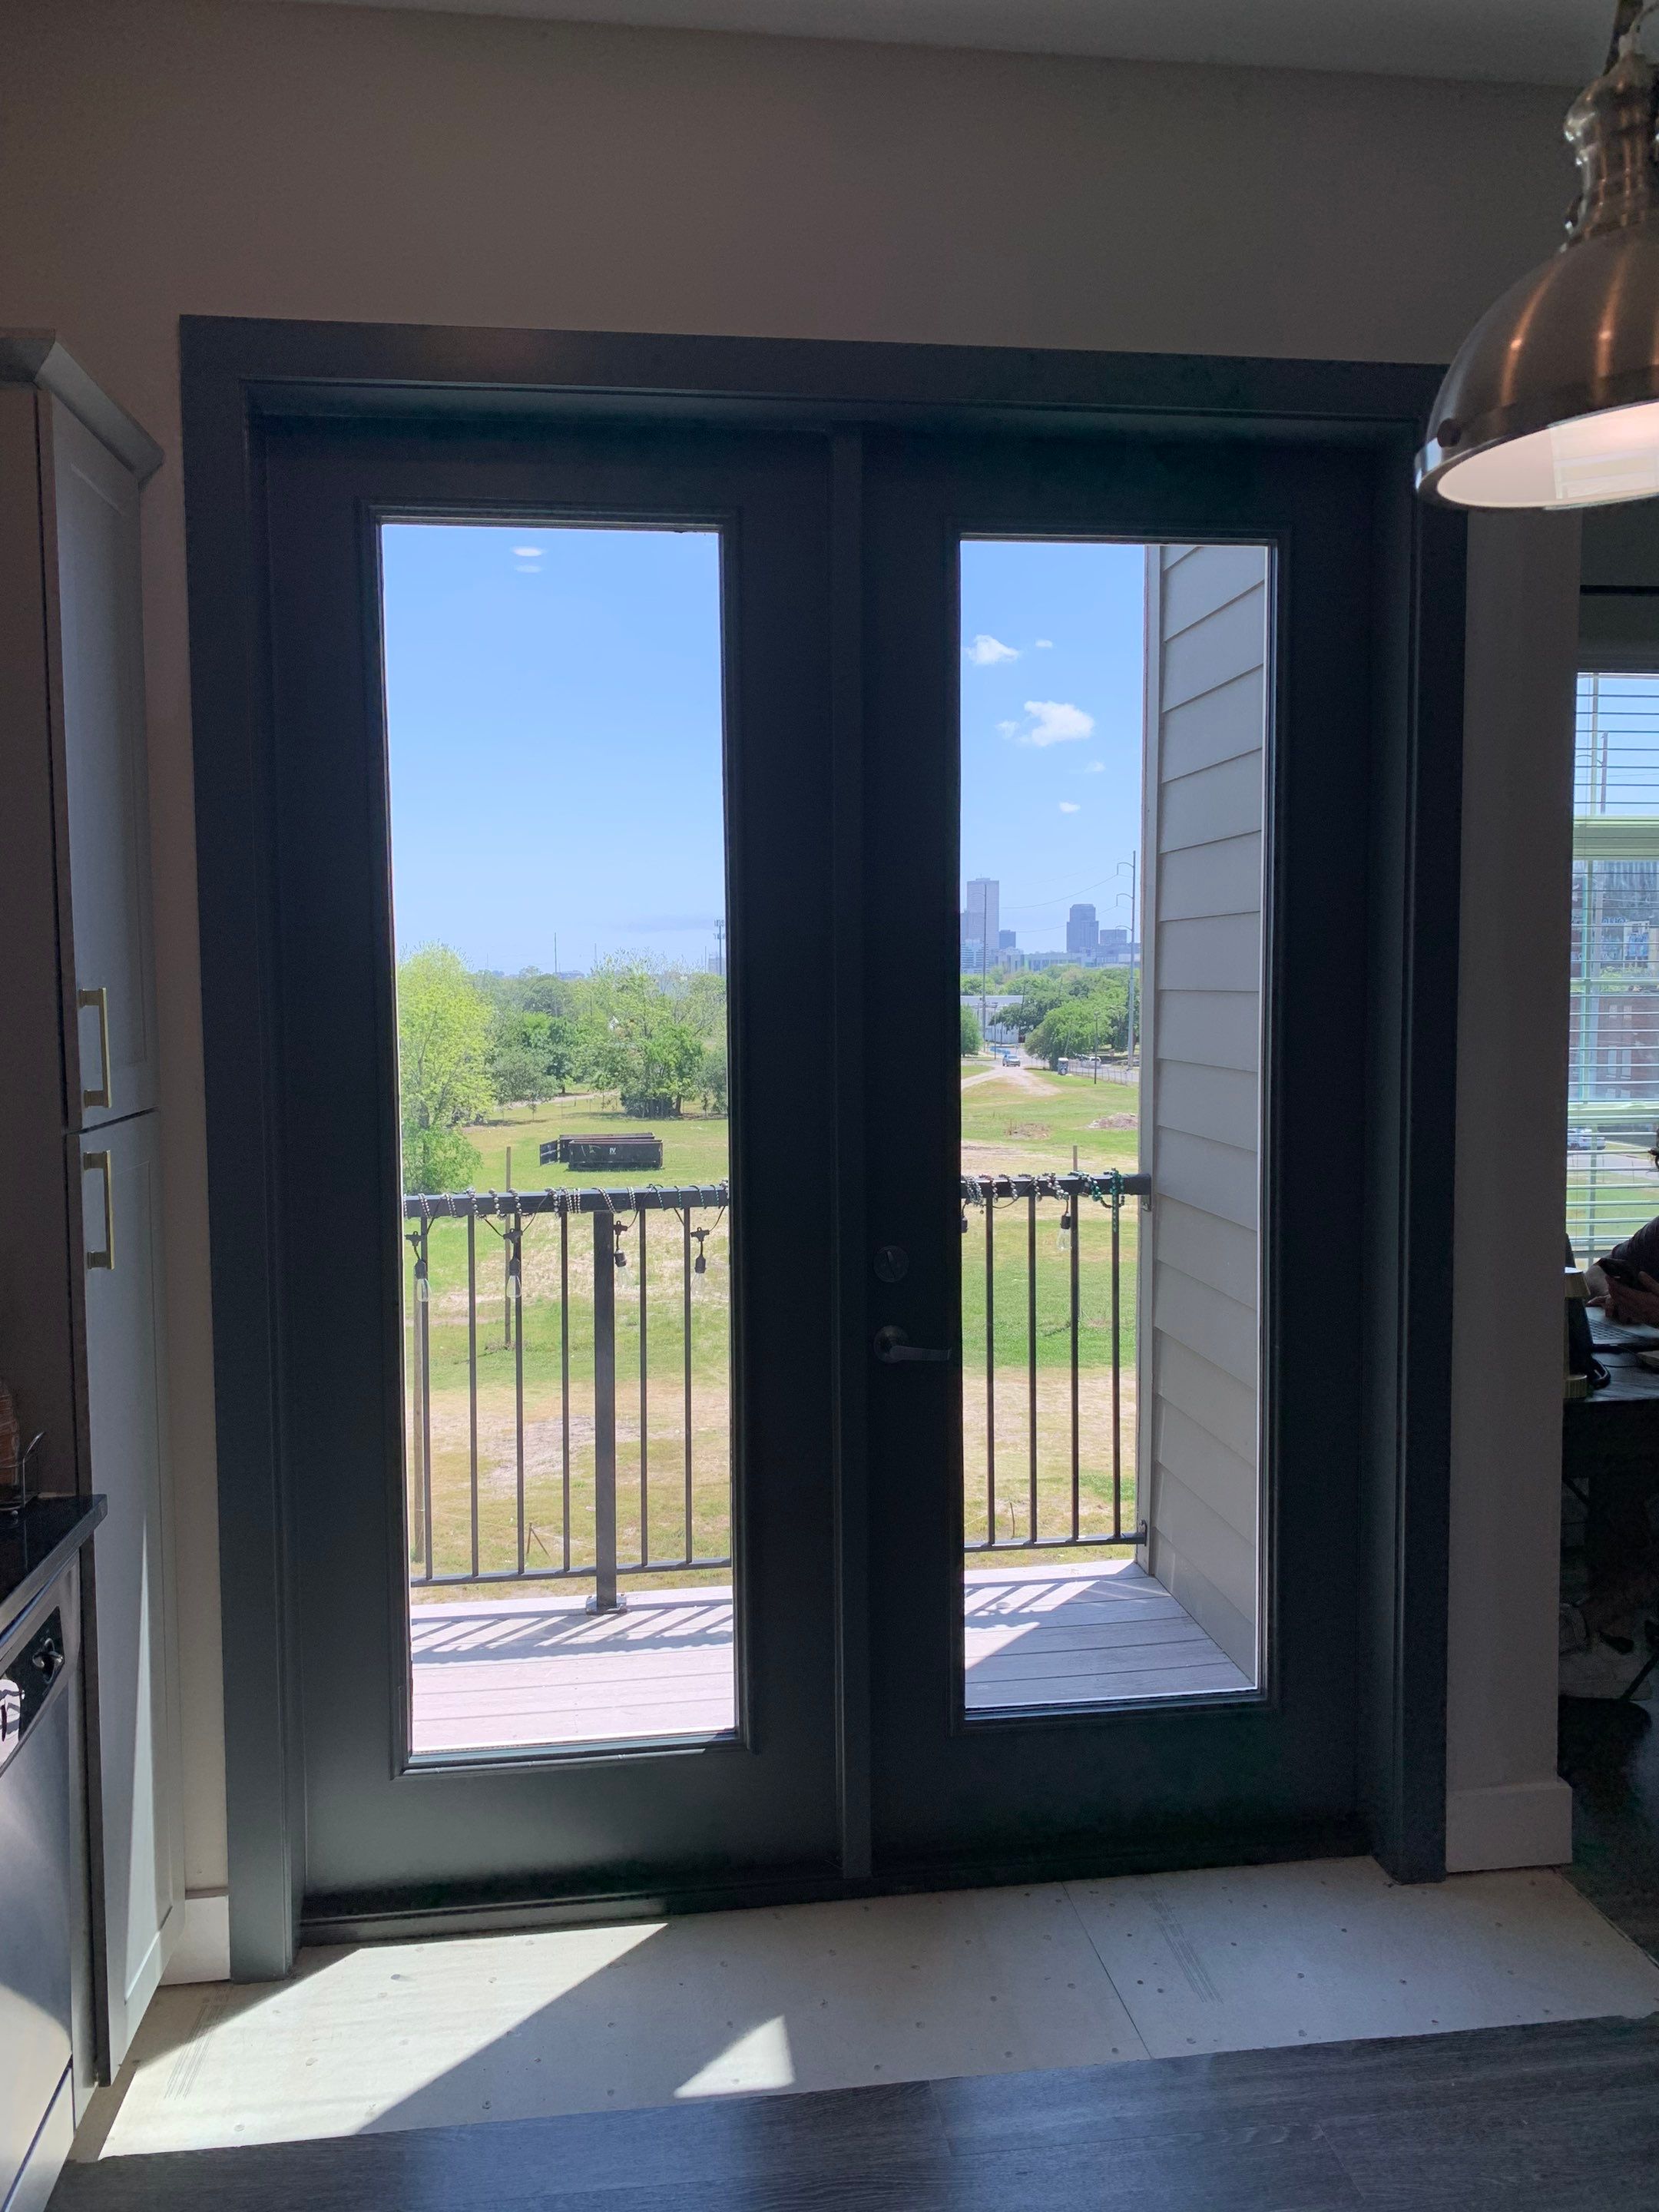
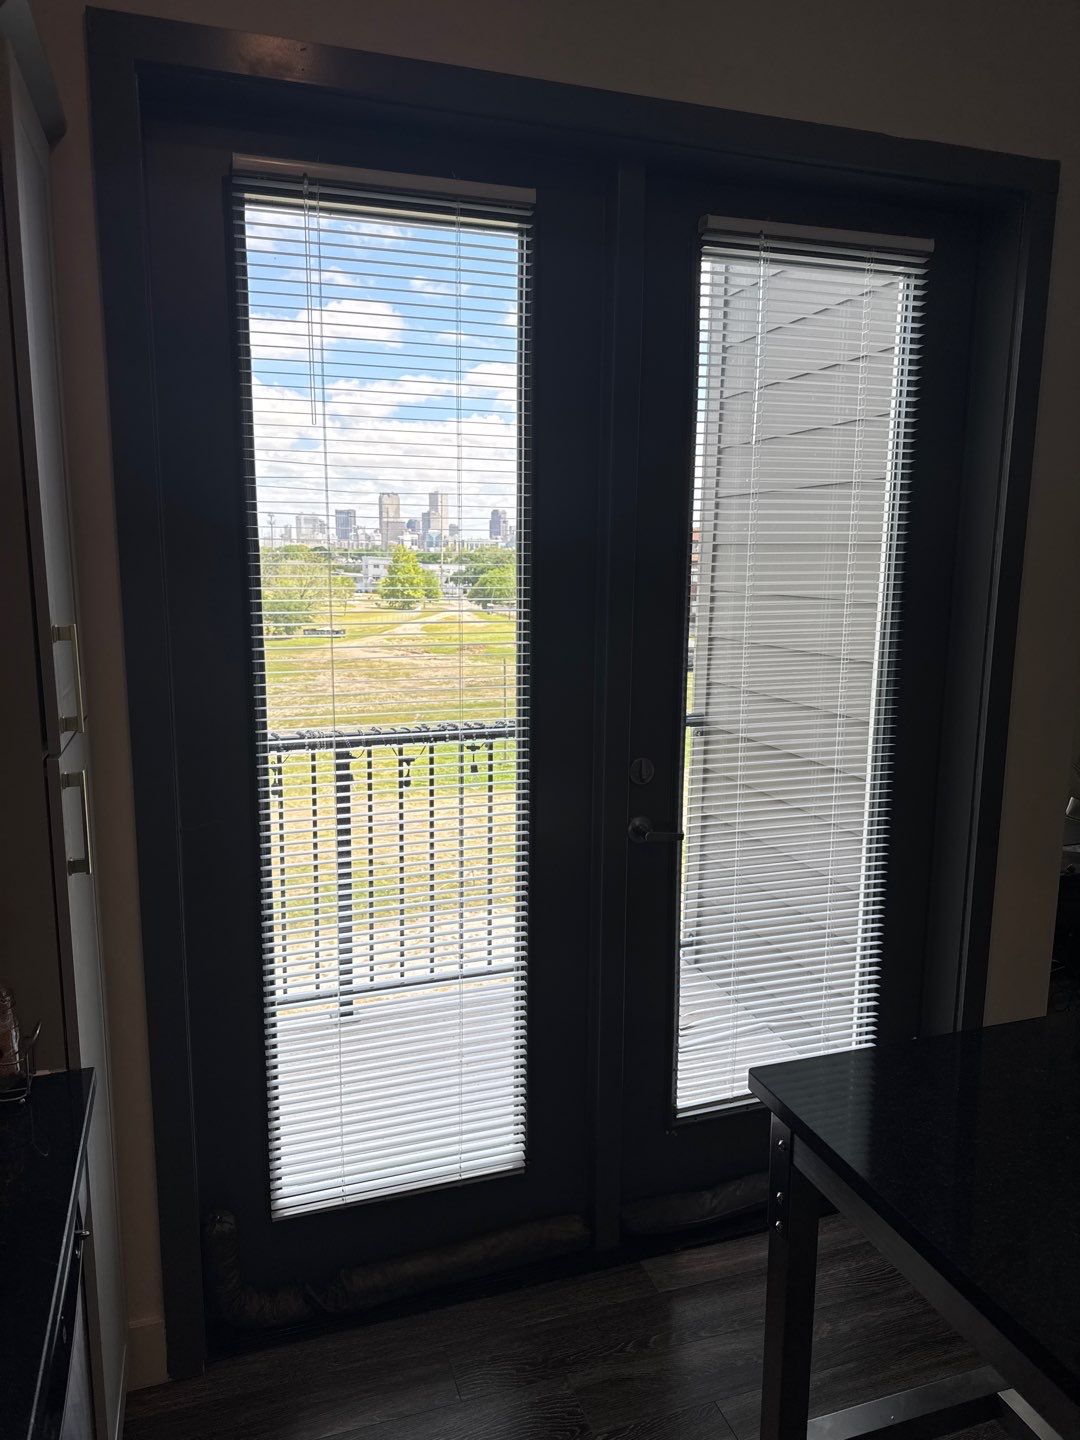
After: Completed dark-finished French doors at Lumina Apartments, replacing the original balcony entry with a refreshed appearance.
Riverbend Renovation completed a large-scale balcony door replacement project at Lumina Apartments in New Orleans. Working within an occupied multifamily property, our crews removed existing French doors, addressed deteriorated framing and subflooring where necessary, and installed new exterior door assemblies with appropriate weatherproofing and trim repairs. The project required coordinating construction across multiple apartments while protecting existing finishes and minimizing disruption to residents.
Replacing Balcony Doors in an Occupied Apartment Community
Replacing exterior doors throughout a multifamily property presents a different set of challenges than completing the same work in a single residence. Each apartment has its own conditions, access requirements, and surrounding finishes, yet the installations must be completed consistently across the property.
At Lumina Apartments in New Orleans, Riverbend Renovation performed balcony door replacements involving multiple residential units. The project required an organized approach to scheduling, demolition, repairs, and installation while working around the daily activities of an occupied apartment community.
Our responsibility extended beyond installing new doors. We also addressed conditions discovered during the work and completed the associated carpentry and finish repairs necessary to properly restore the openings.
Planning and Coordinating Work Across Multiple Units
A project involving numerous apartments requires considerable coordination before construction begins. Crews must have access to individual units, materials must be available when needed, and the work must be organized to avoid leaving unnecessary disruption behind. Unlike a vacant commercial building, an occupied apartment community requires particular attention to residents' living spaces. Furniture, flooring, walls, and other finished surfaces must be protected while crews move materials and equipment through the property.
At Lumina, our crews worked within these constraints while carrying out the door replacements. Protective coverings helped separate the construction activity from the surrounding interiors, and the work progressed through the necessary stages of removal, repairs, installation, and finishing. The challenge was maintaining an efficient process while recognizing that the conditions encountered in one apartment might differ from those in another.
Preparing the Openings for New Doors
Removing the existing balcony doors provided an opportunity to evaluate the surrounding construction before the replacements were installed. The photographs document deterioration in portions of the wood surrounding some openings, including areas near the thresholds and adjoining floors. Where damaged materials were encountered, our crews opened the affected areas and completed the necessary repairs before proceeding.
Some installations required repairs to framing and sections of subflooring. These conditions added work to individual openings, reinforcing the importance of allowing for variations when renovating an existing multifamily property. Proper preparation was essential. Each opening needed to provide a suitable foundation for the replacement door assembly, regardless of the condition of the materials encountered during removal.
Installing and Weatherproofing the Replacement Doors
Once the openings were prepared, Riverbend installed the new French doors and addressed the transitions between the door assemblies and surrounding construction. Exterior door installation requires attention to alignment, operation, weather protection, and the connection between interior living areas and exterior balconies. These details are particularly important in Southeast Louisiana, where frequent heavy rainfall places considerable demands on exterior building components.
Our crews incorporated flashing and weather-resistant materials as part of the installation process, with attention to the threshold and perimeter conditions. The work also included repairing the surrounding trim and finishes disturbed during removal and replacement.
While the basic installation process was repeated across multiple apartments, the repairs needed at each opening could vary. Maintaining consistent workmanship while accommodating those differences was an important part of the project.
Working Around Residents and Existing Finishes
Construction inside an occupied apartment calls for careful consideration of the people living there. Balcony door replacement affects both the interior and exterior of a unit. Crews need room to remove the original assemblies, perform repairs, position the replacements, and complete the surrounding finish work.
At Lumina Apartments, protecting existing surfaces and organizing the work areas were important parts of that process. The photographic record shows interior floor protection, active construction around balcony openings, and the repairs necessary before the doors could be finished.
Managing these details matters to property owners and managers. A successful multifamily renovation involves not only the quality of the completed construction but also how the work is carried out throughout the property.
Consistent Workmanship Across a Larger Property
One of the defining characteristics of the Lumina Apartments project was the need to repeat a detailed construction process across multiple locations. Each balcony door installation involved several interconnected steps, from removing the existing assembly and evaluating the opening to completing any necessary repairs, installing the replacement, and restoring the surrounding finishes.
That consistency is important on larger properties. Even relatively modest differences i
Every photograph from this job
43 photographs
- Before
Original balcony doors at Lumina Apartments before replacement and surrounding repairs.
 Before
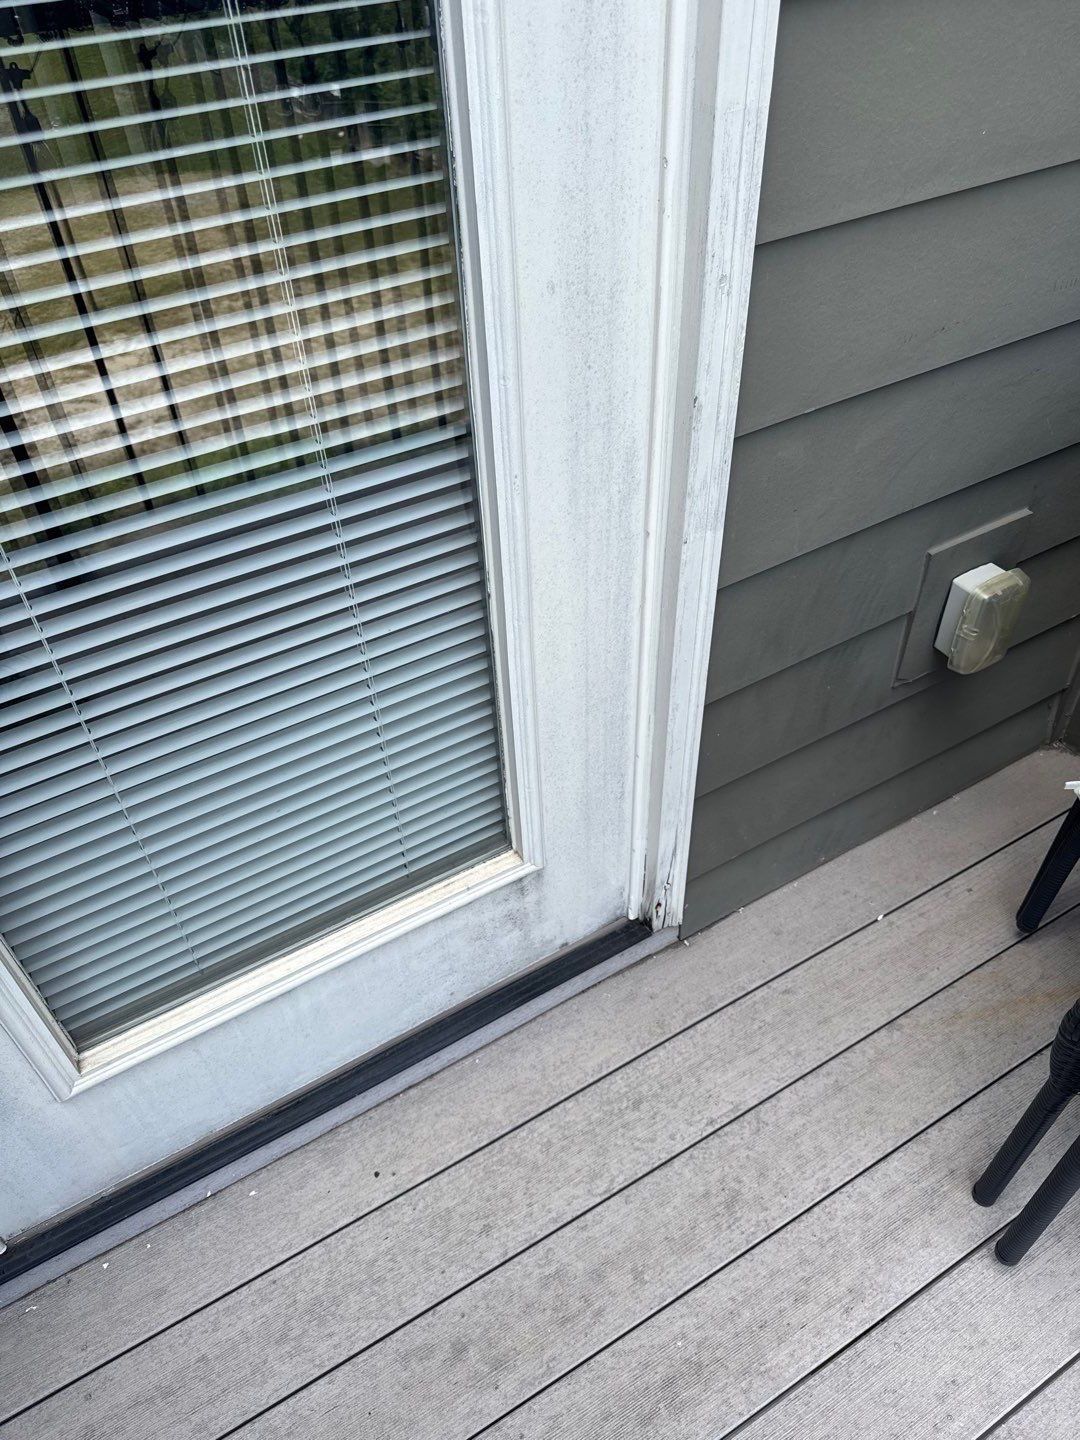
Close-up of the existing balcony door threshold and exterior trim before removal.
 Before
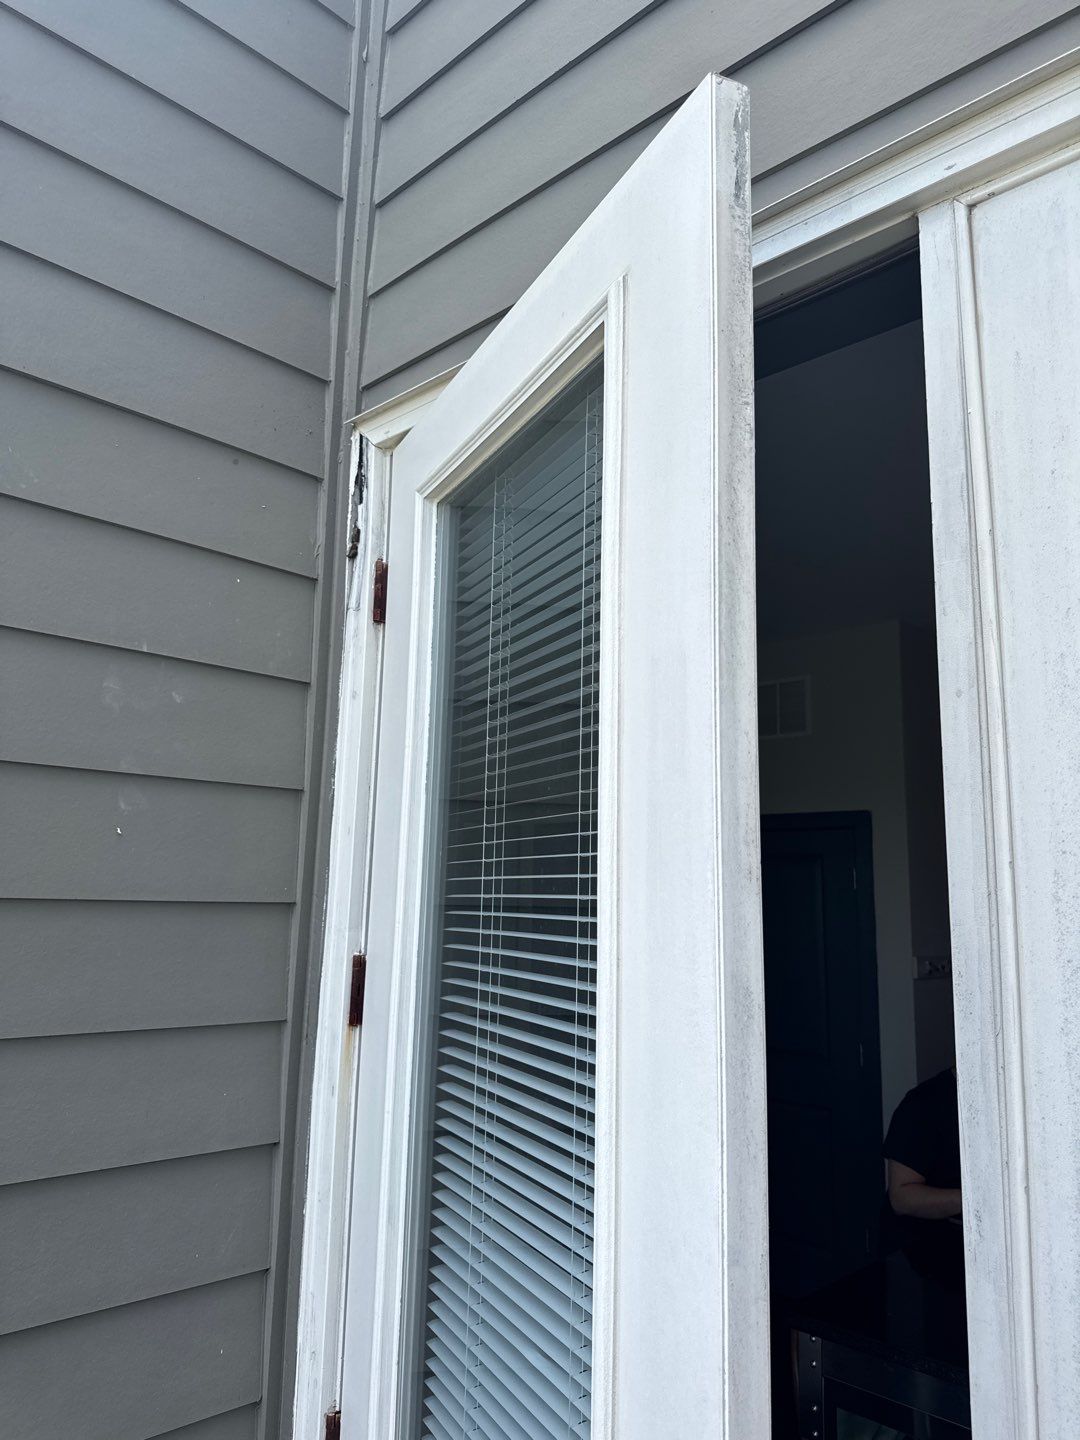
Existing balcony door and frame viewed from outside, showing the original installation.
 During
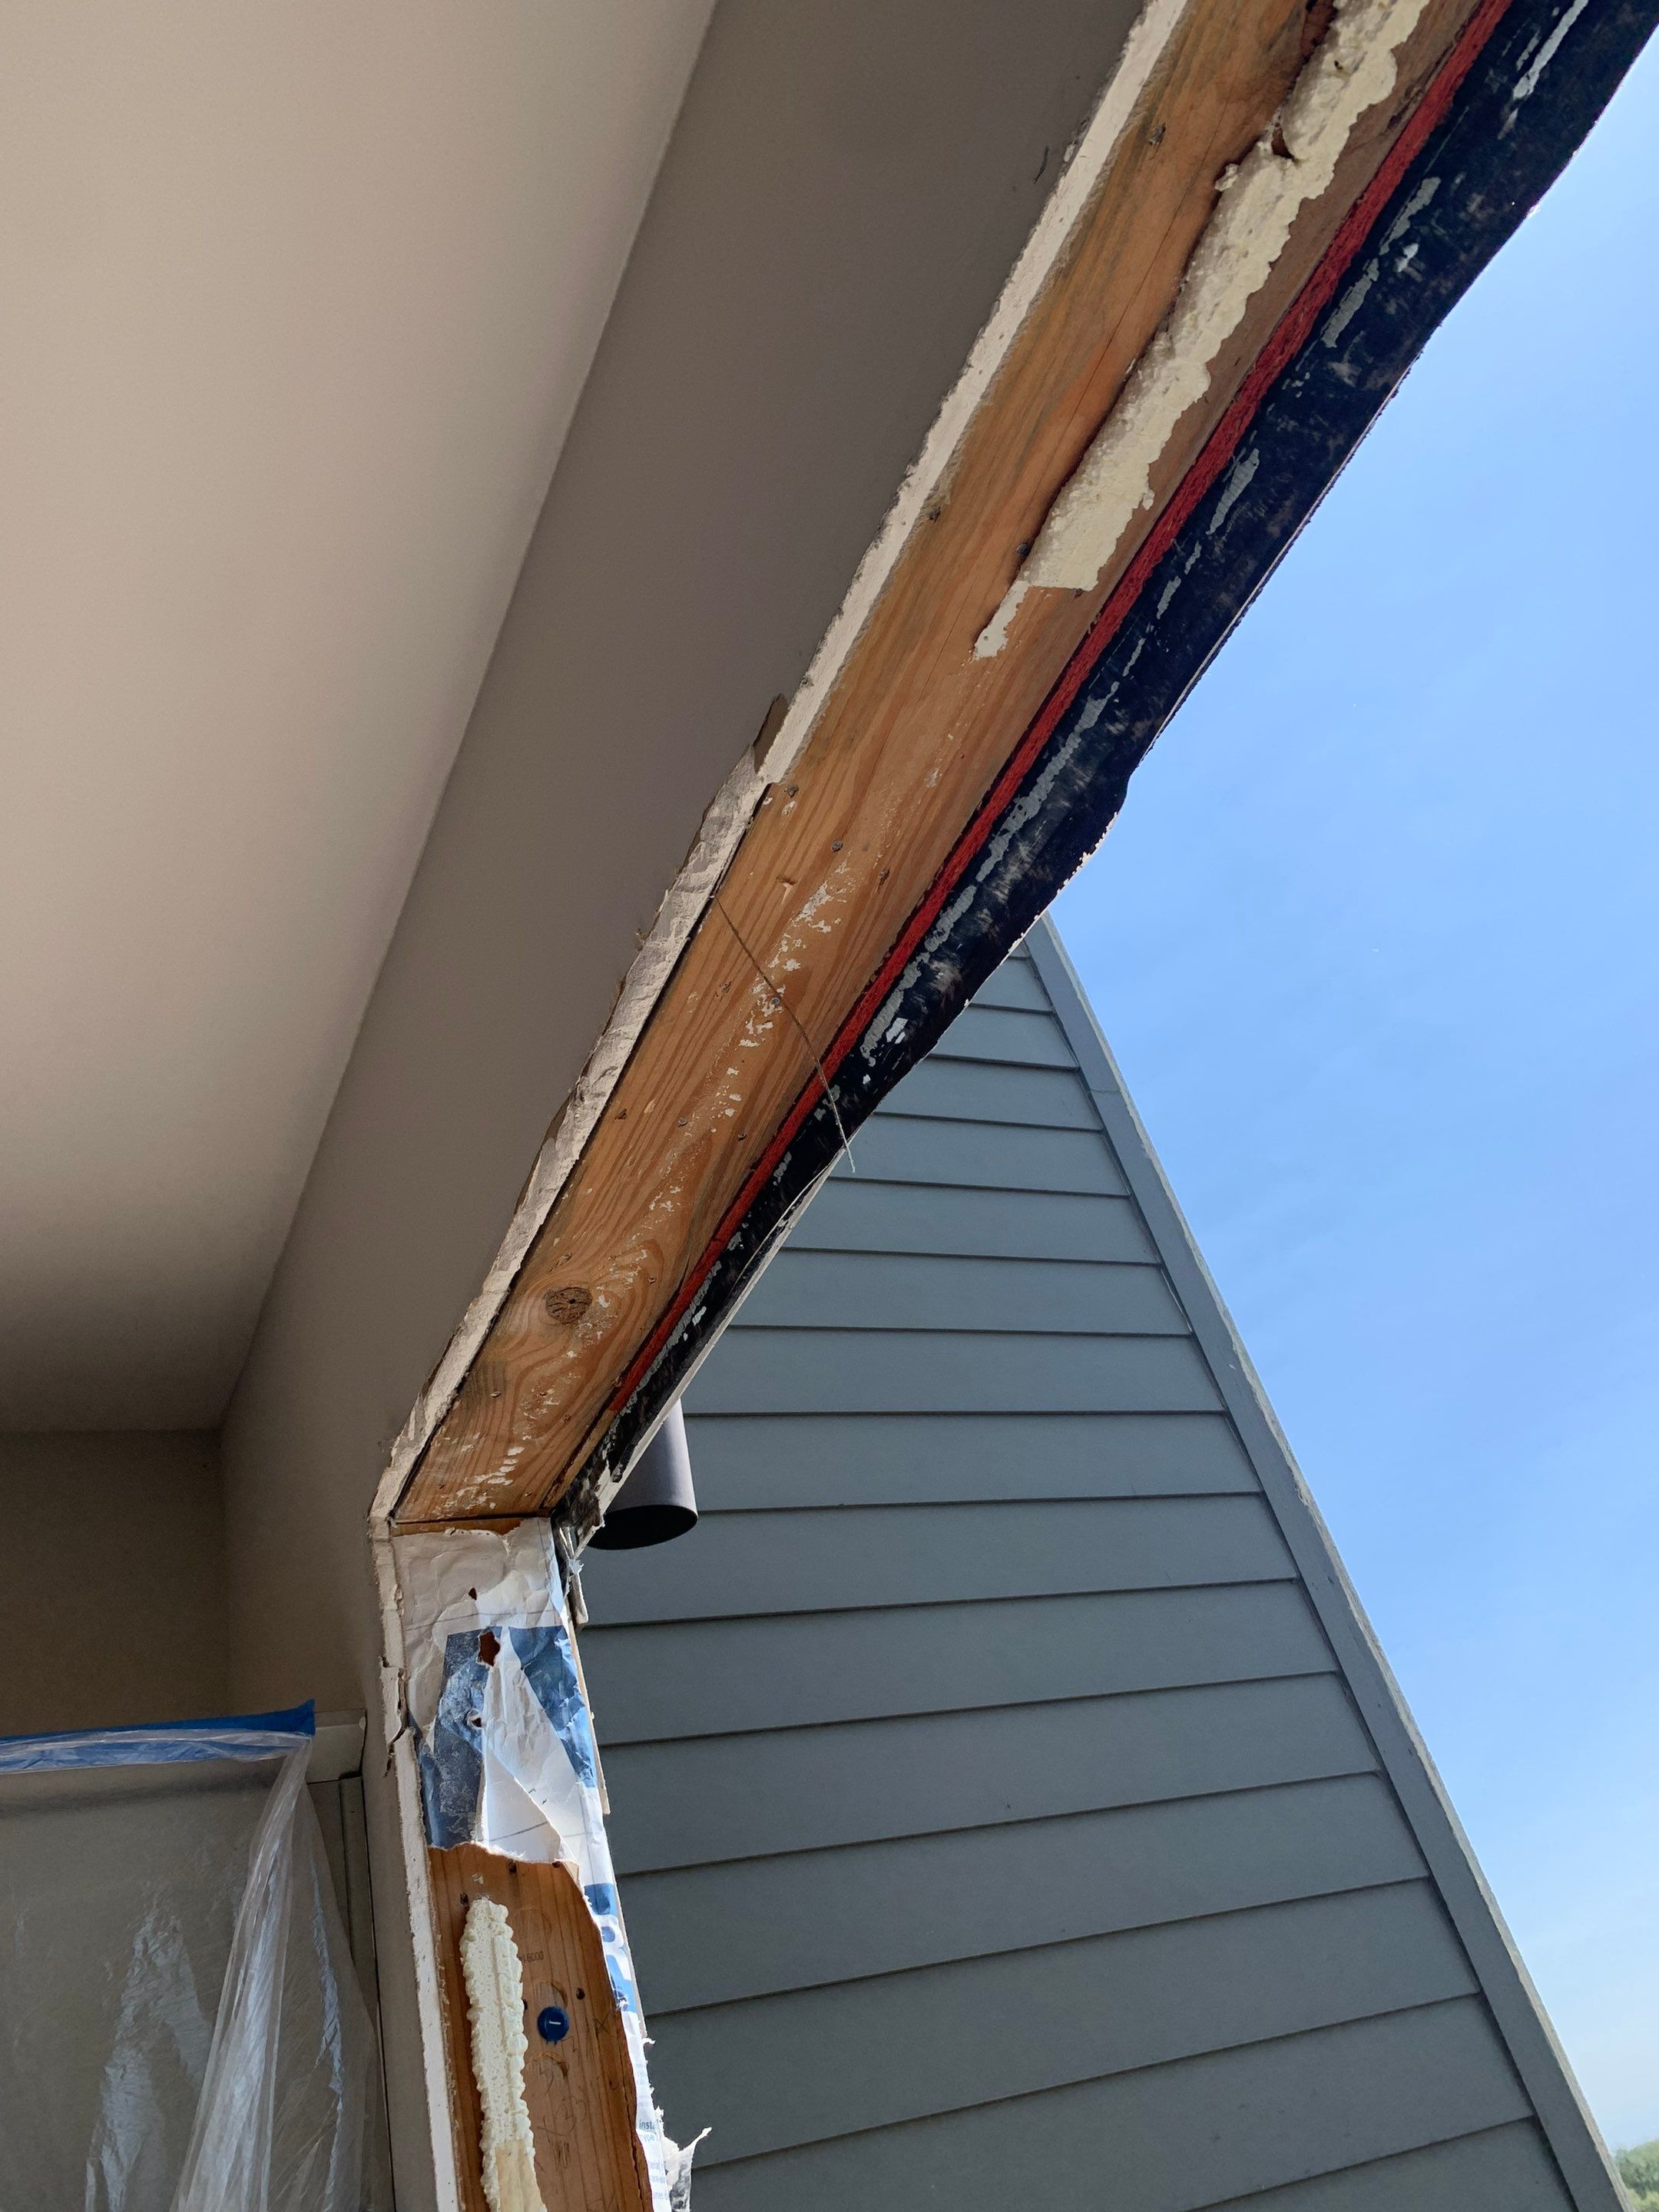
Upper door framing exposed after removing the original unit, revealing existing installation materials.
 During
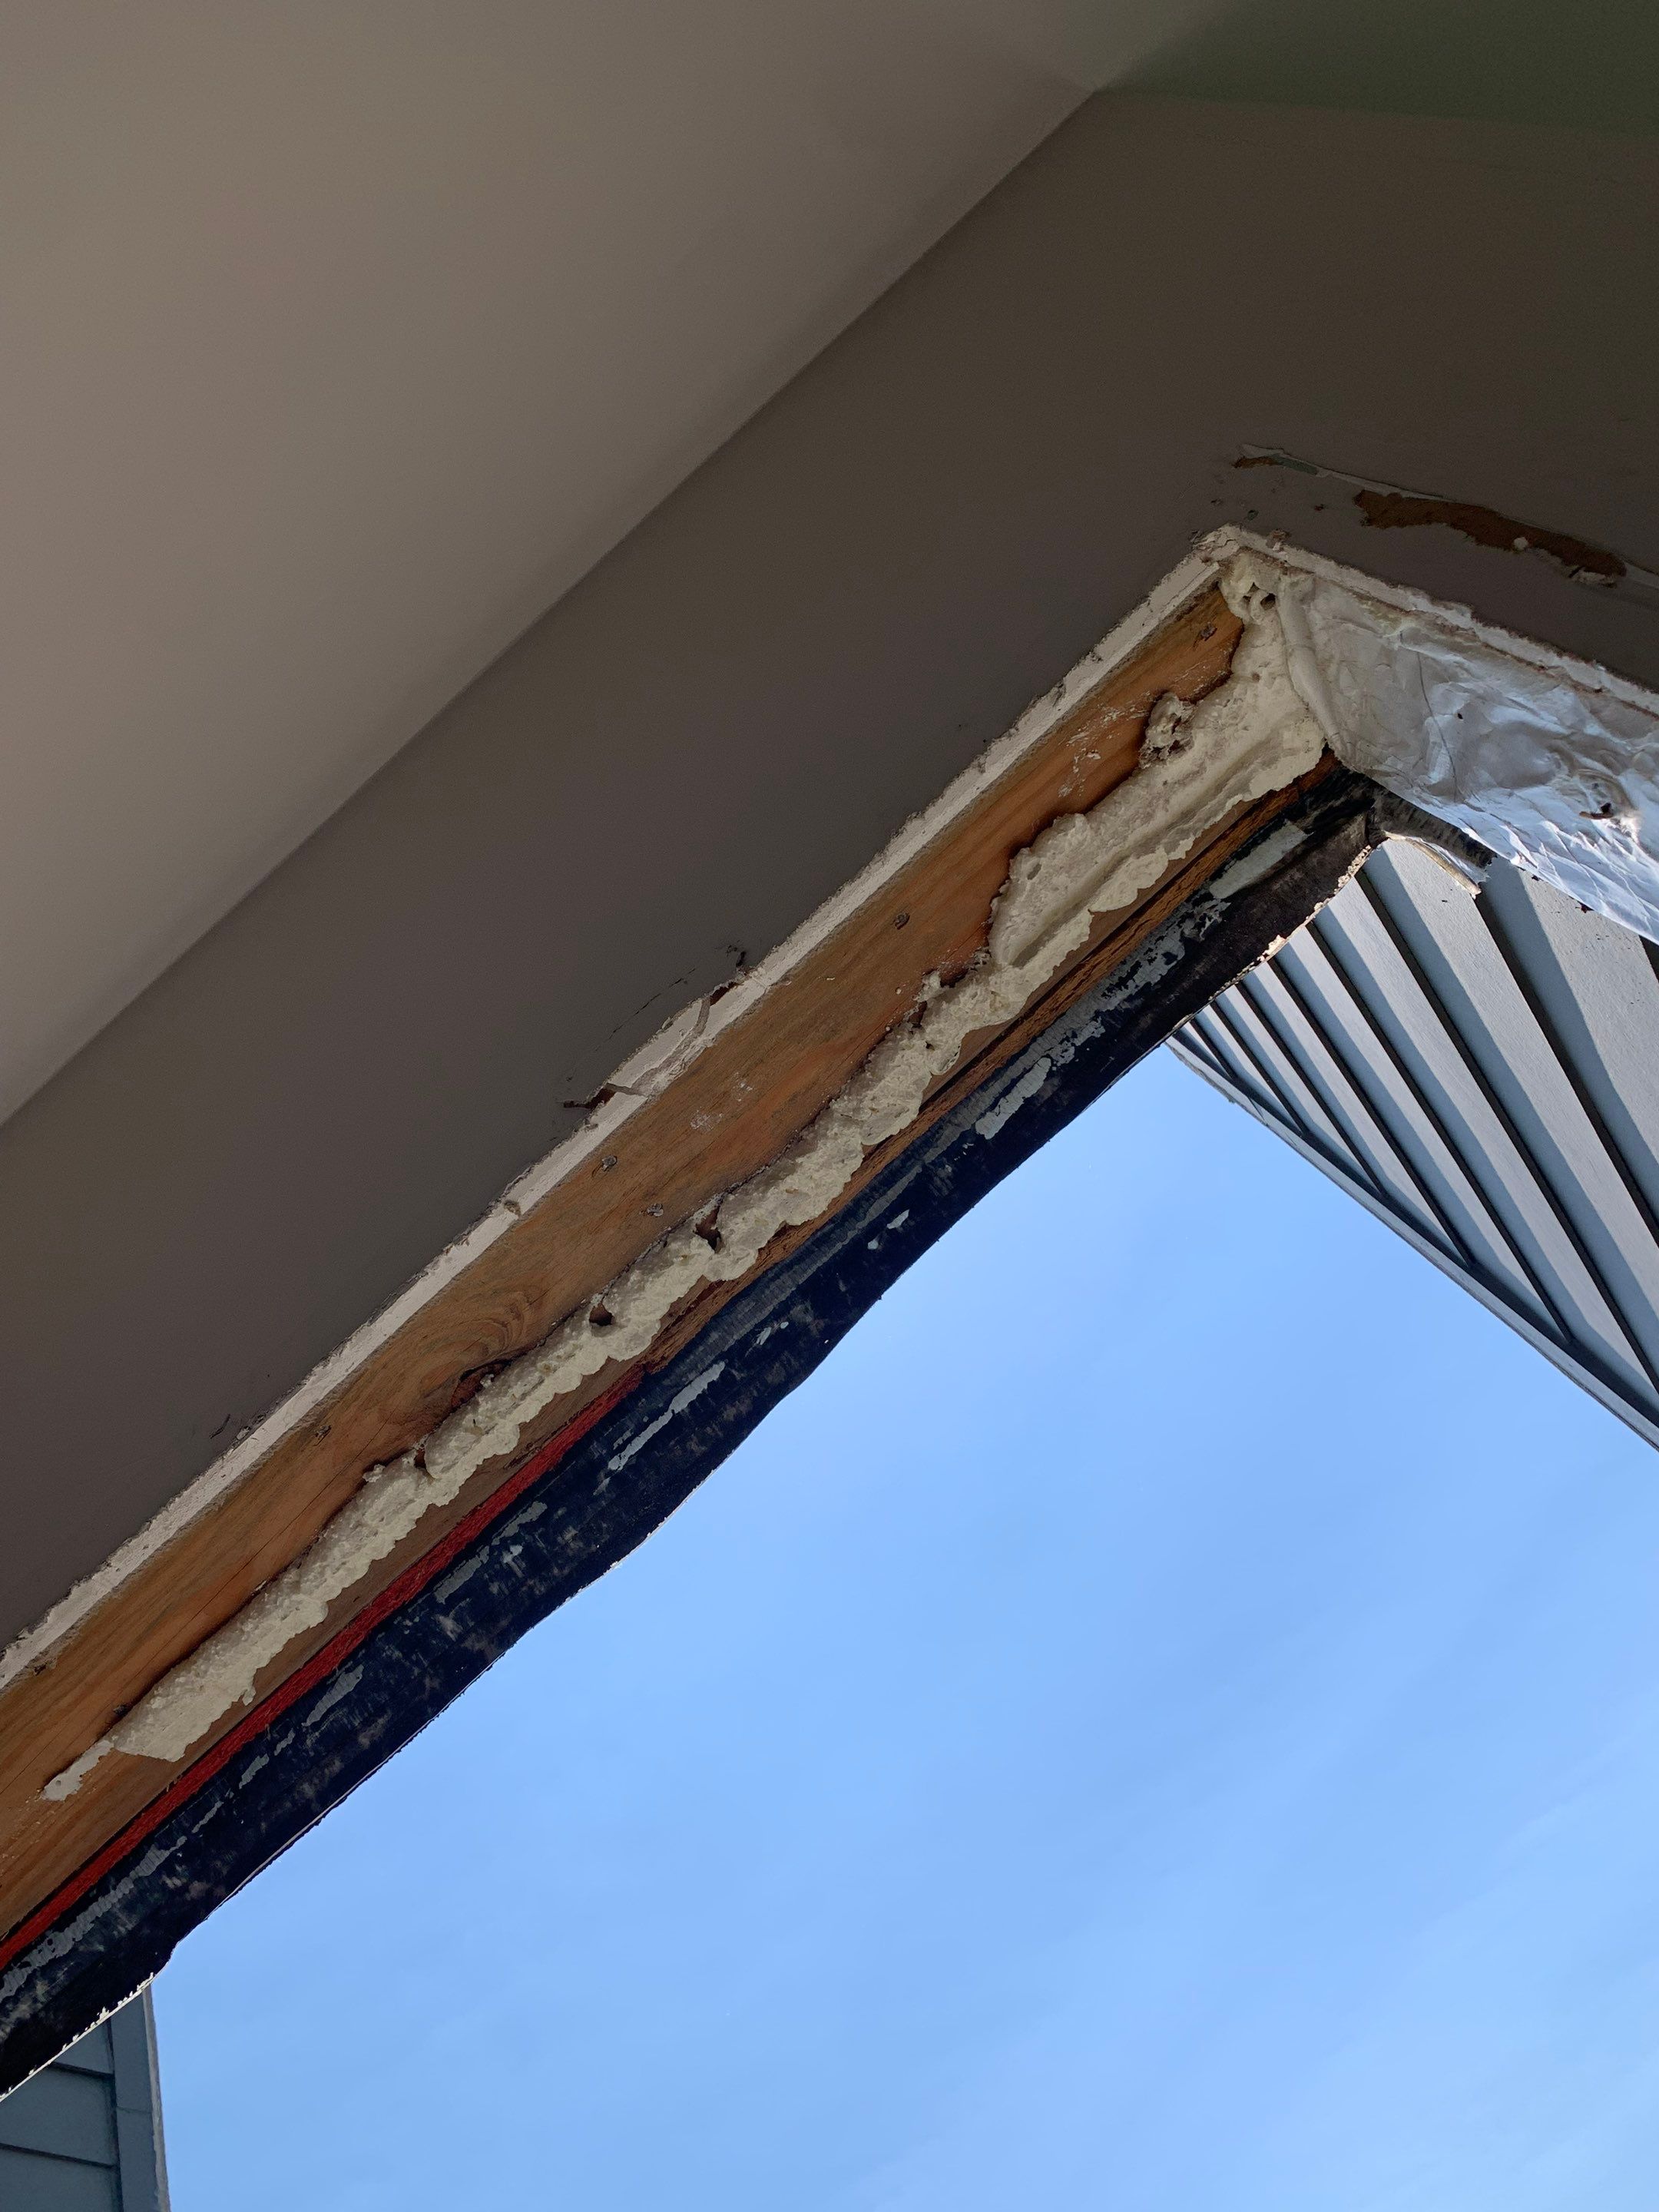
Another view of the exposed header area during balcony door demolition and preparation.
 During
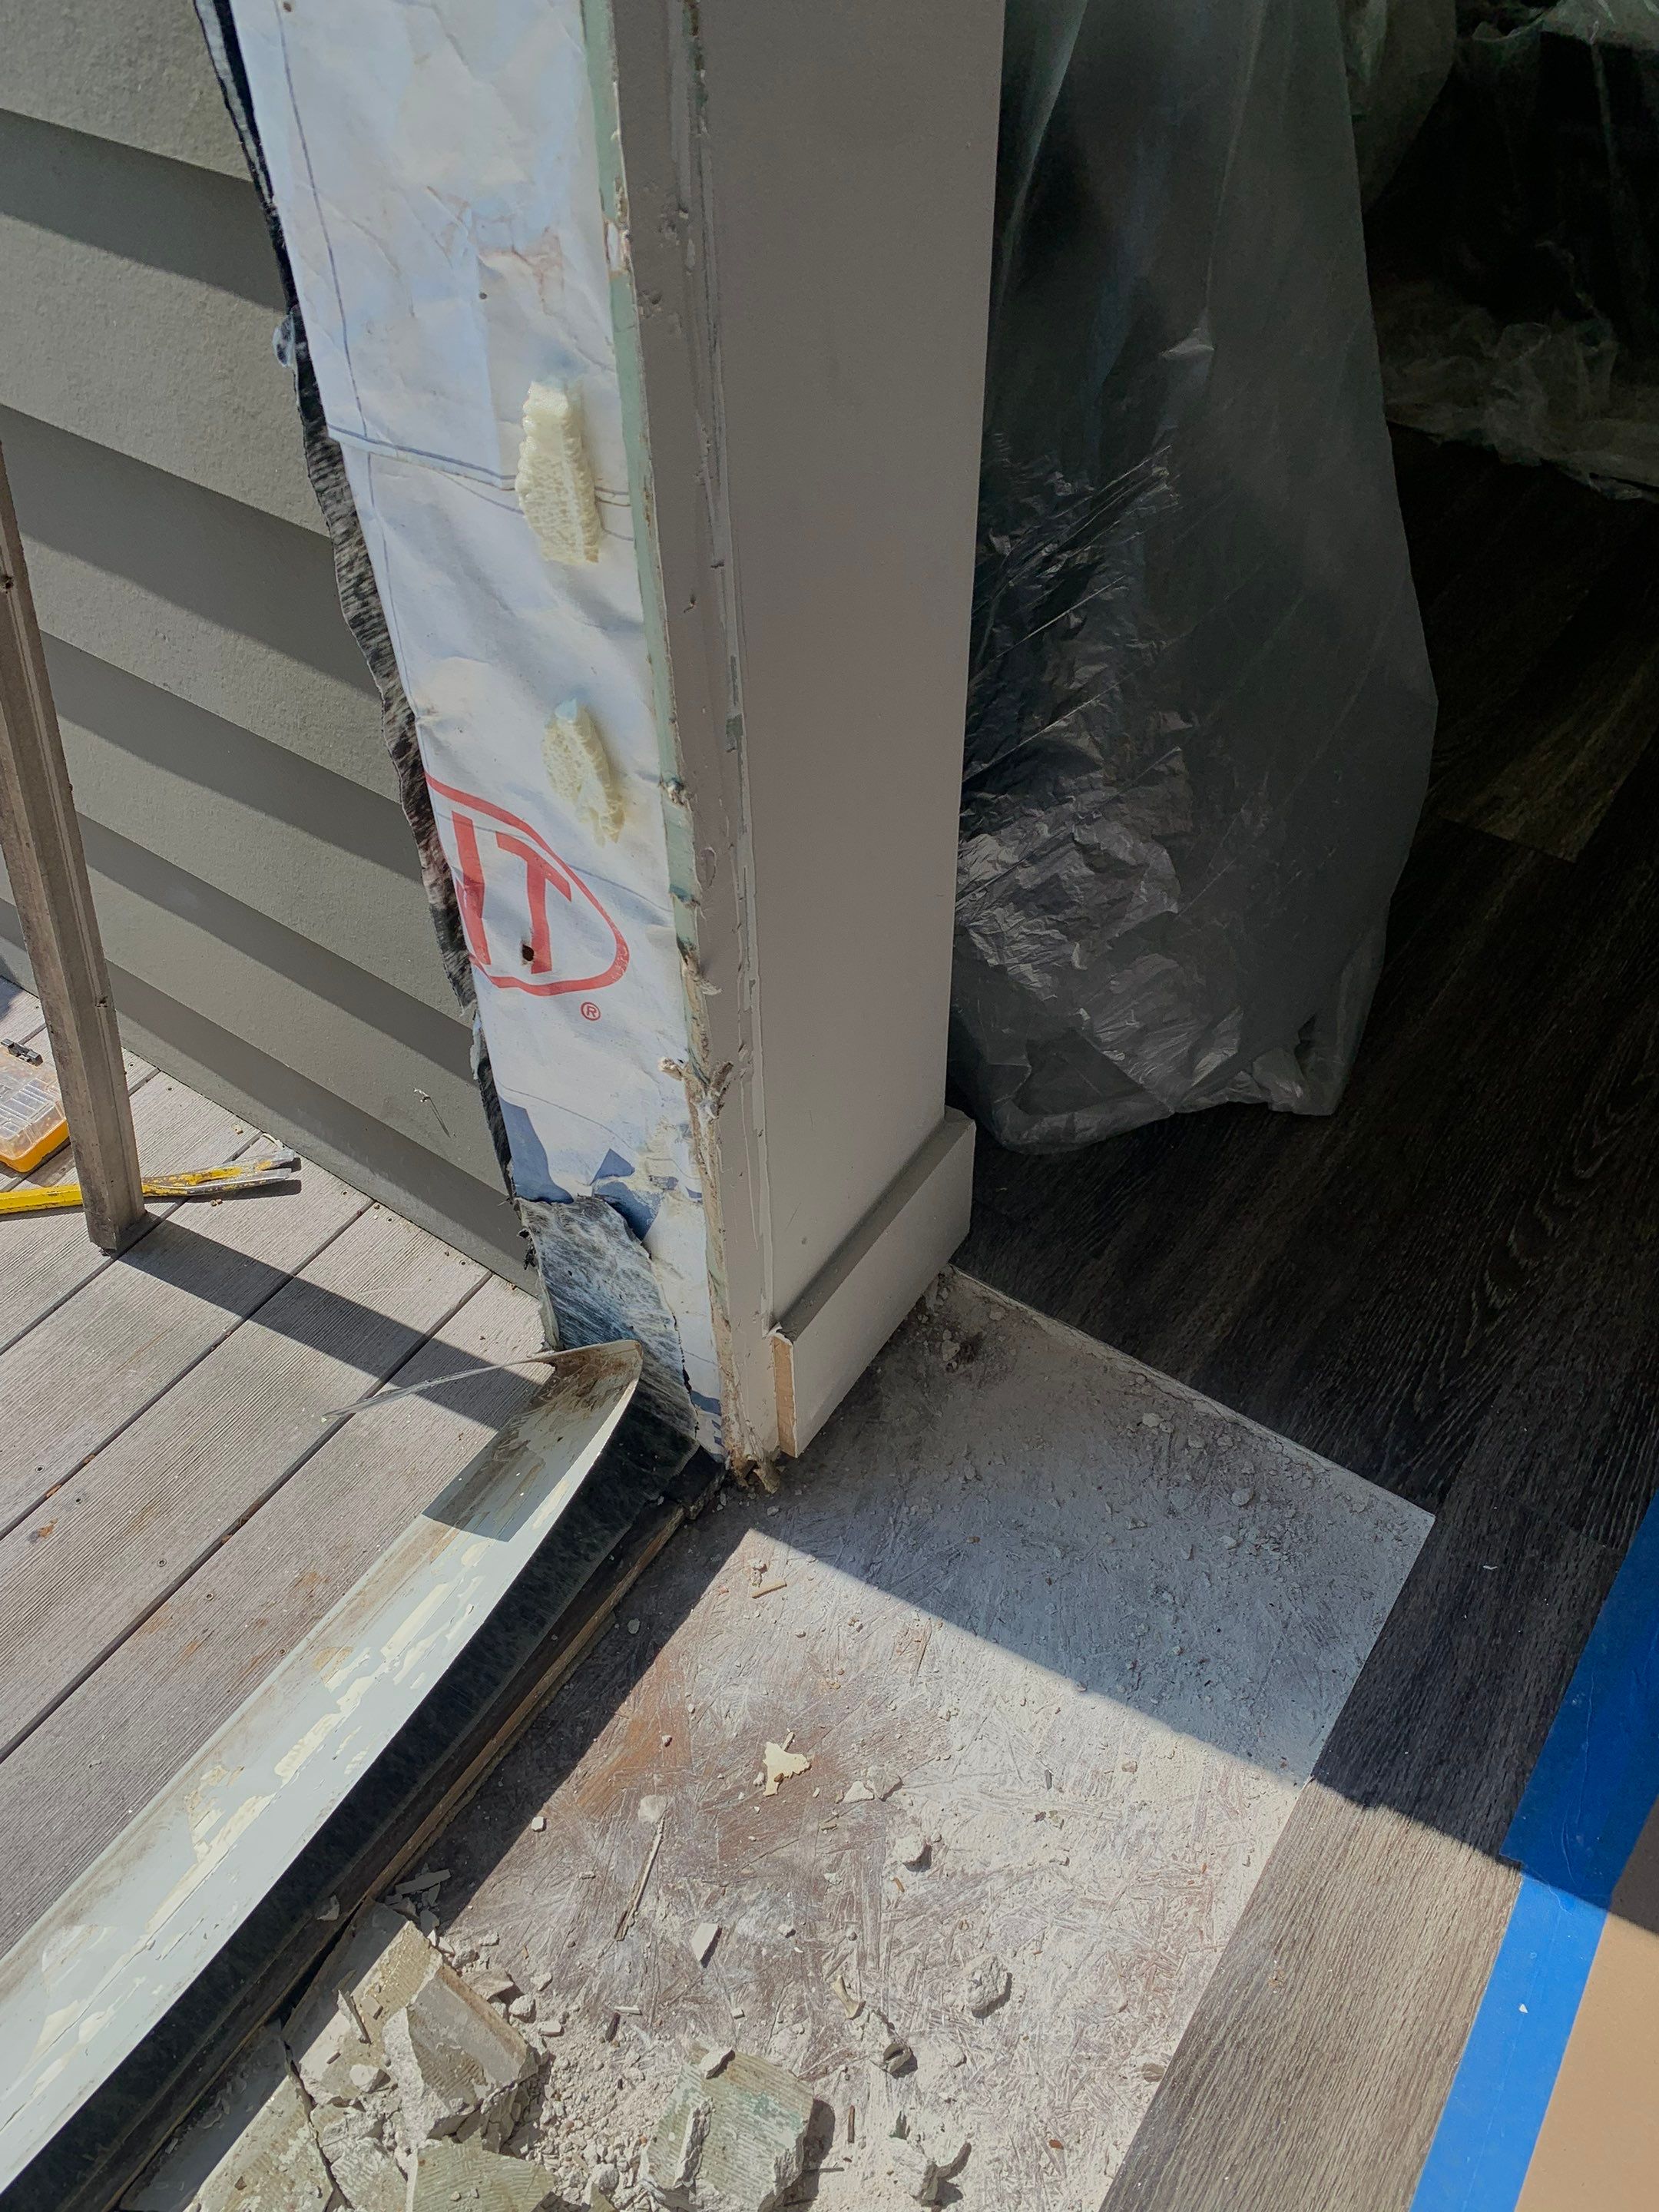
Lower door jamb with exterior weather barrier exposed for inspection and repair.
 During
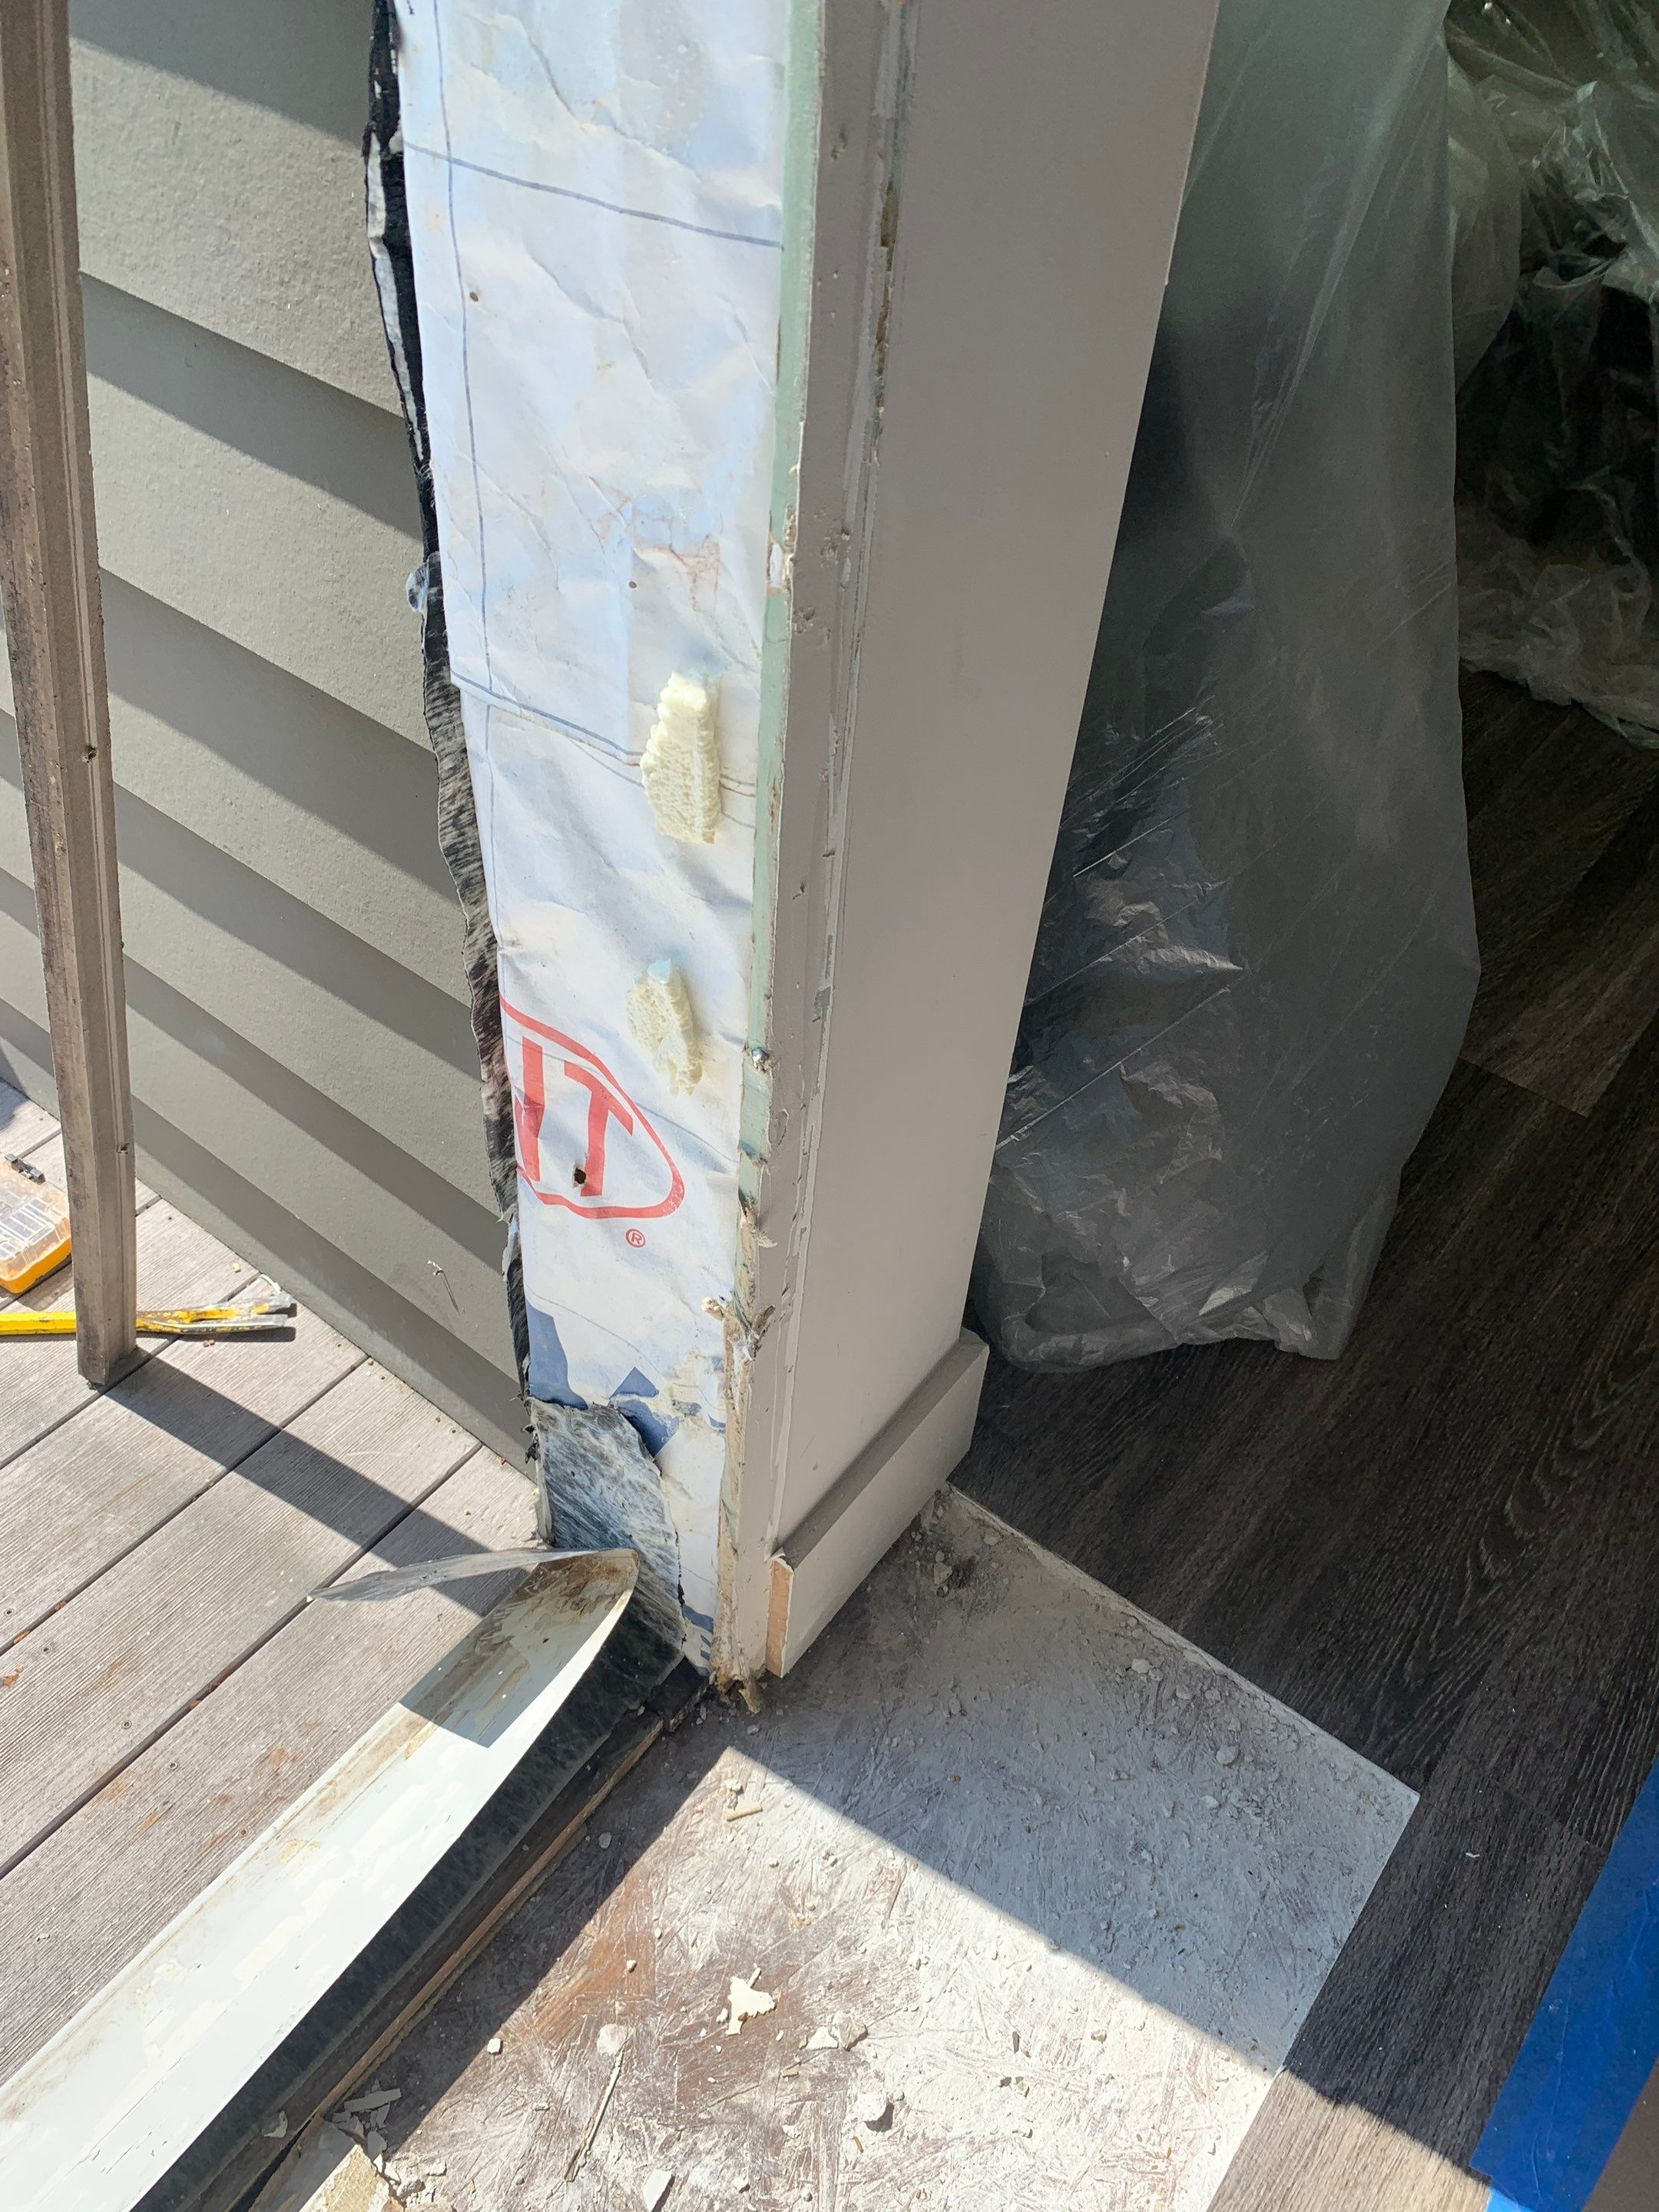
Close-up of the lower jamb and weather barrier during preparation of the replacement opening.
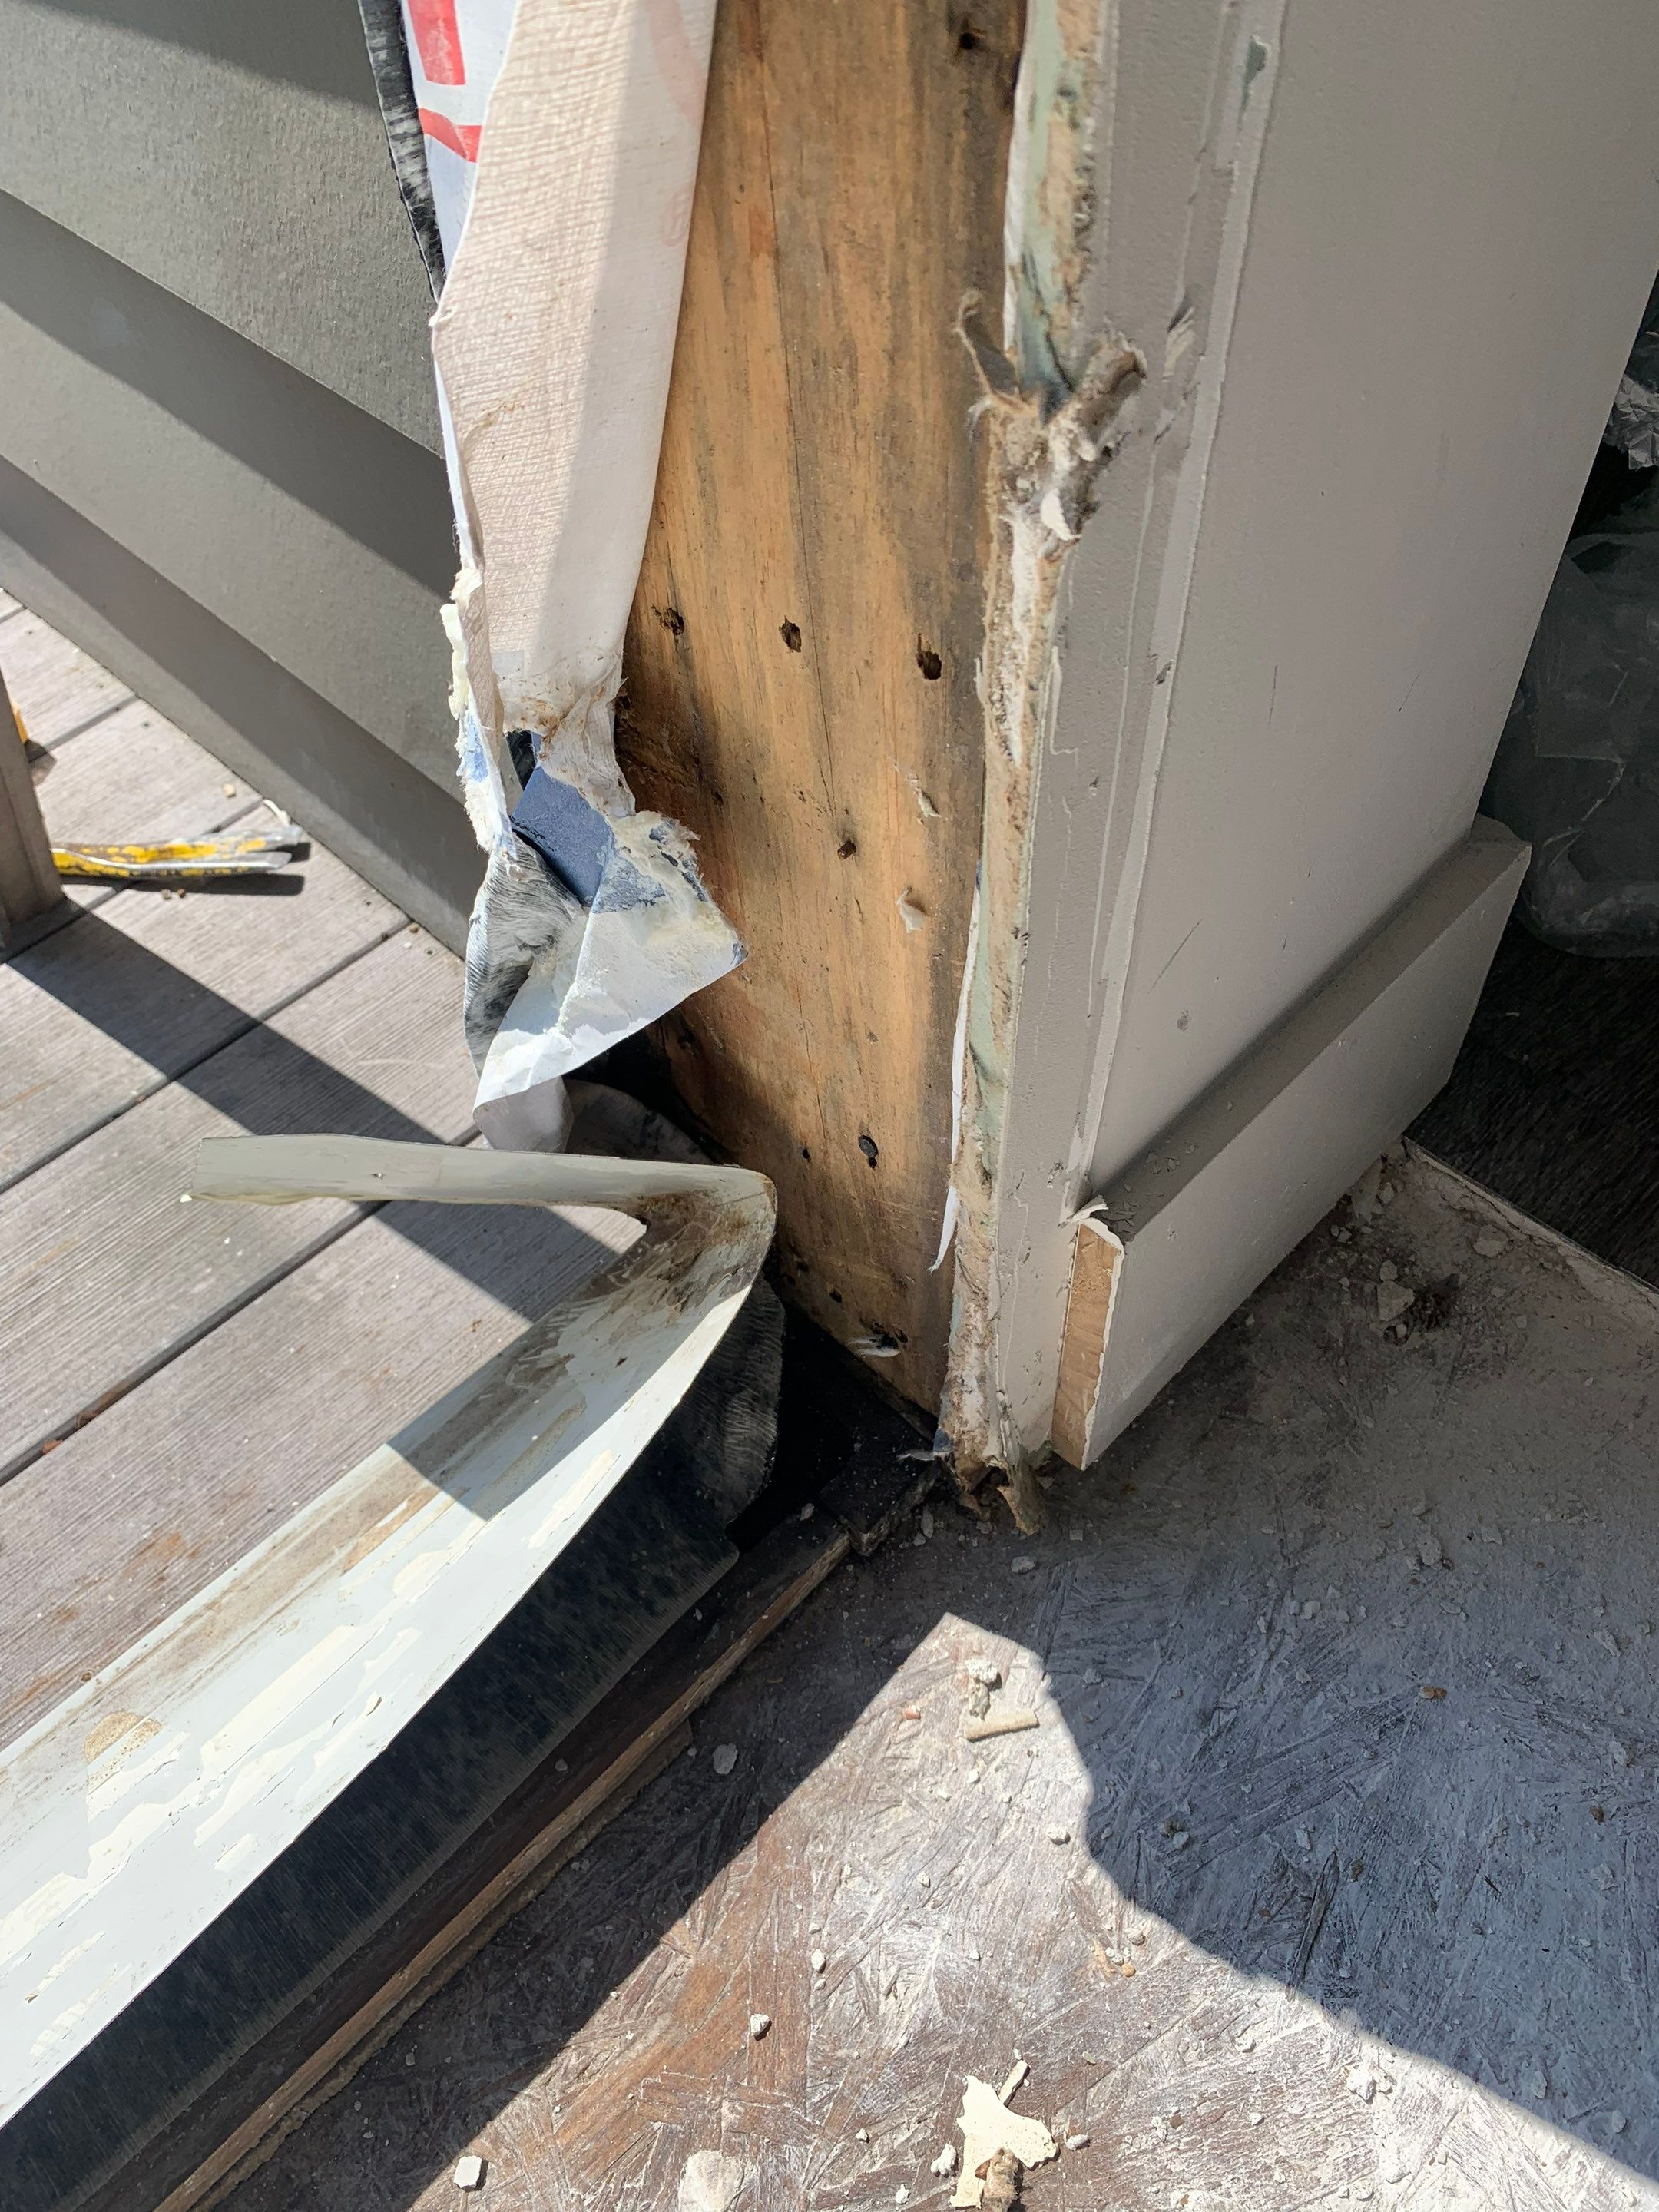 During
Existing framing exposed at the lower corner of the balcony doorway.
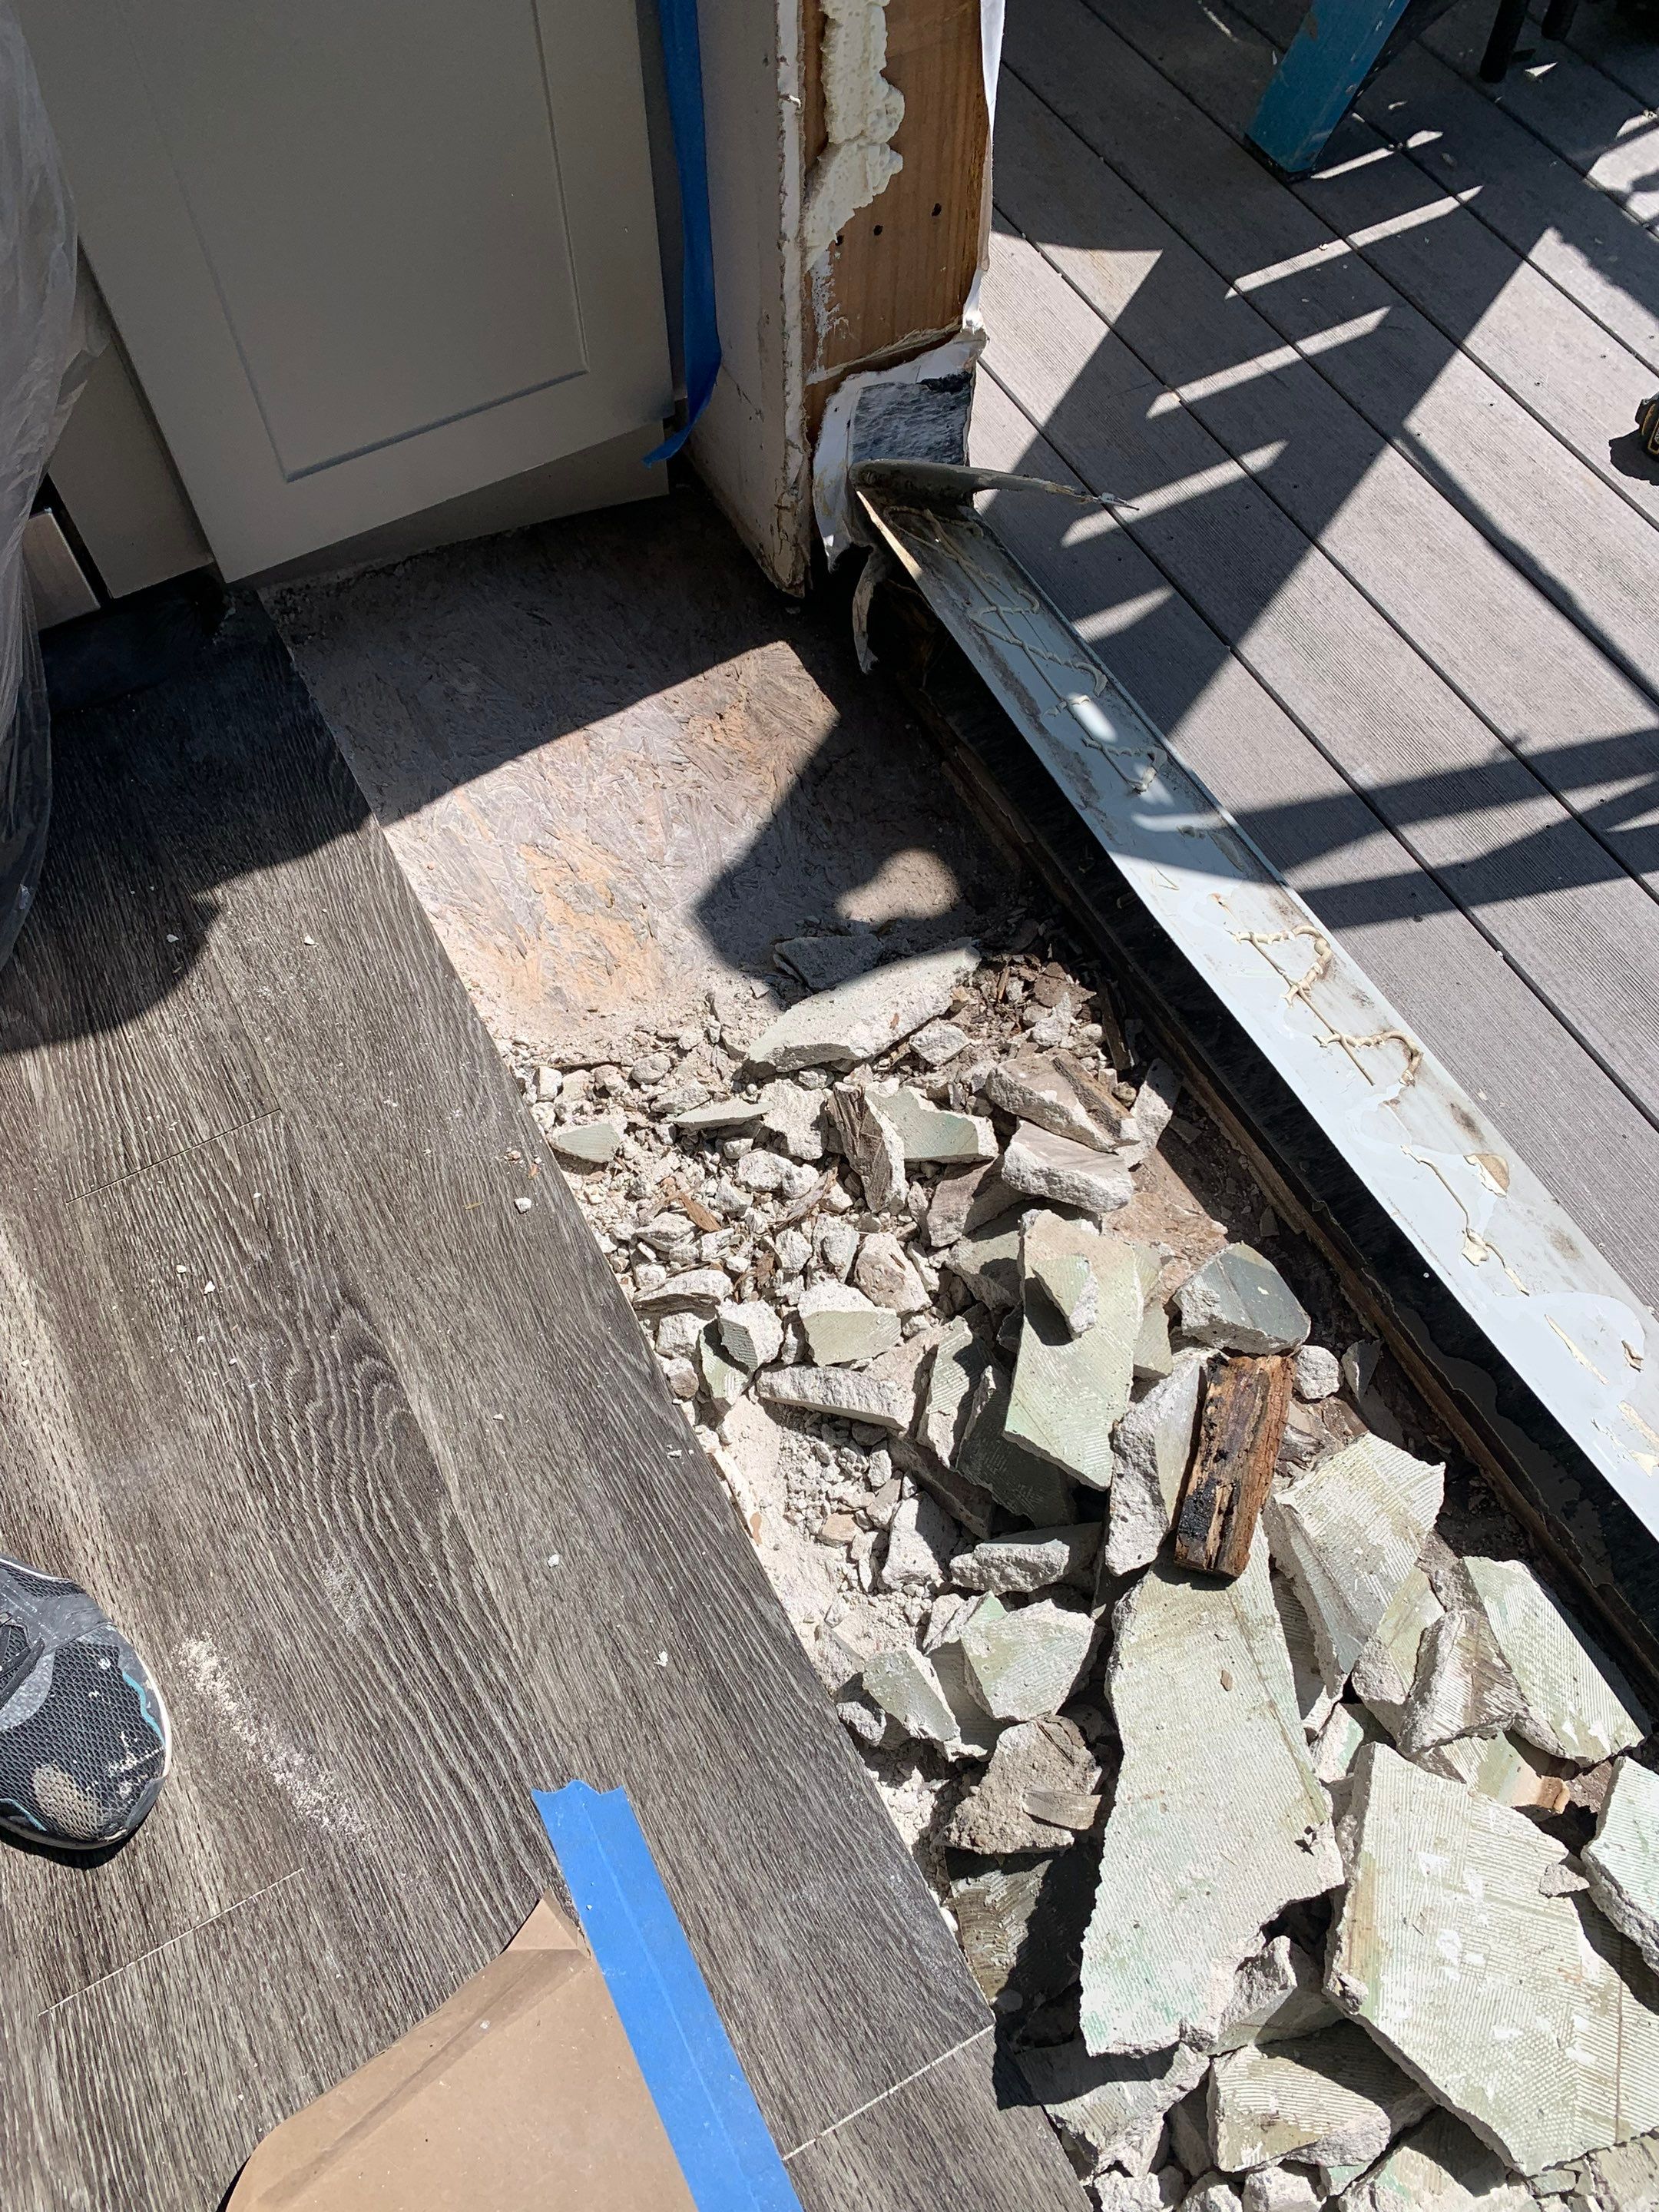 During
Damaged flooring and underlayment removed near the balcony threshold to access the underlying subfloor.
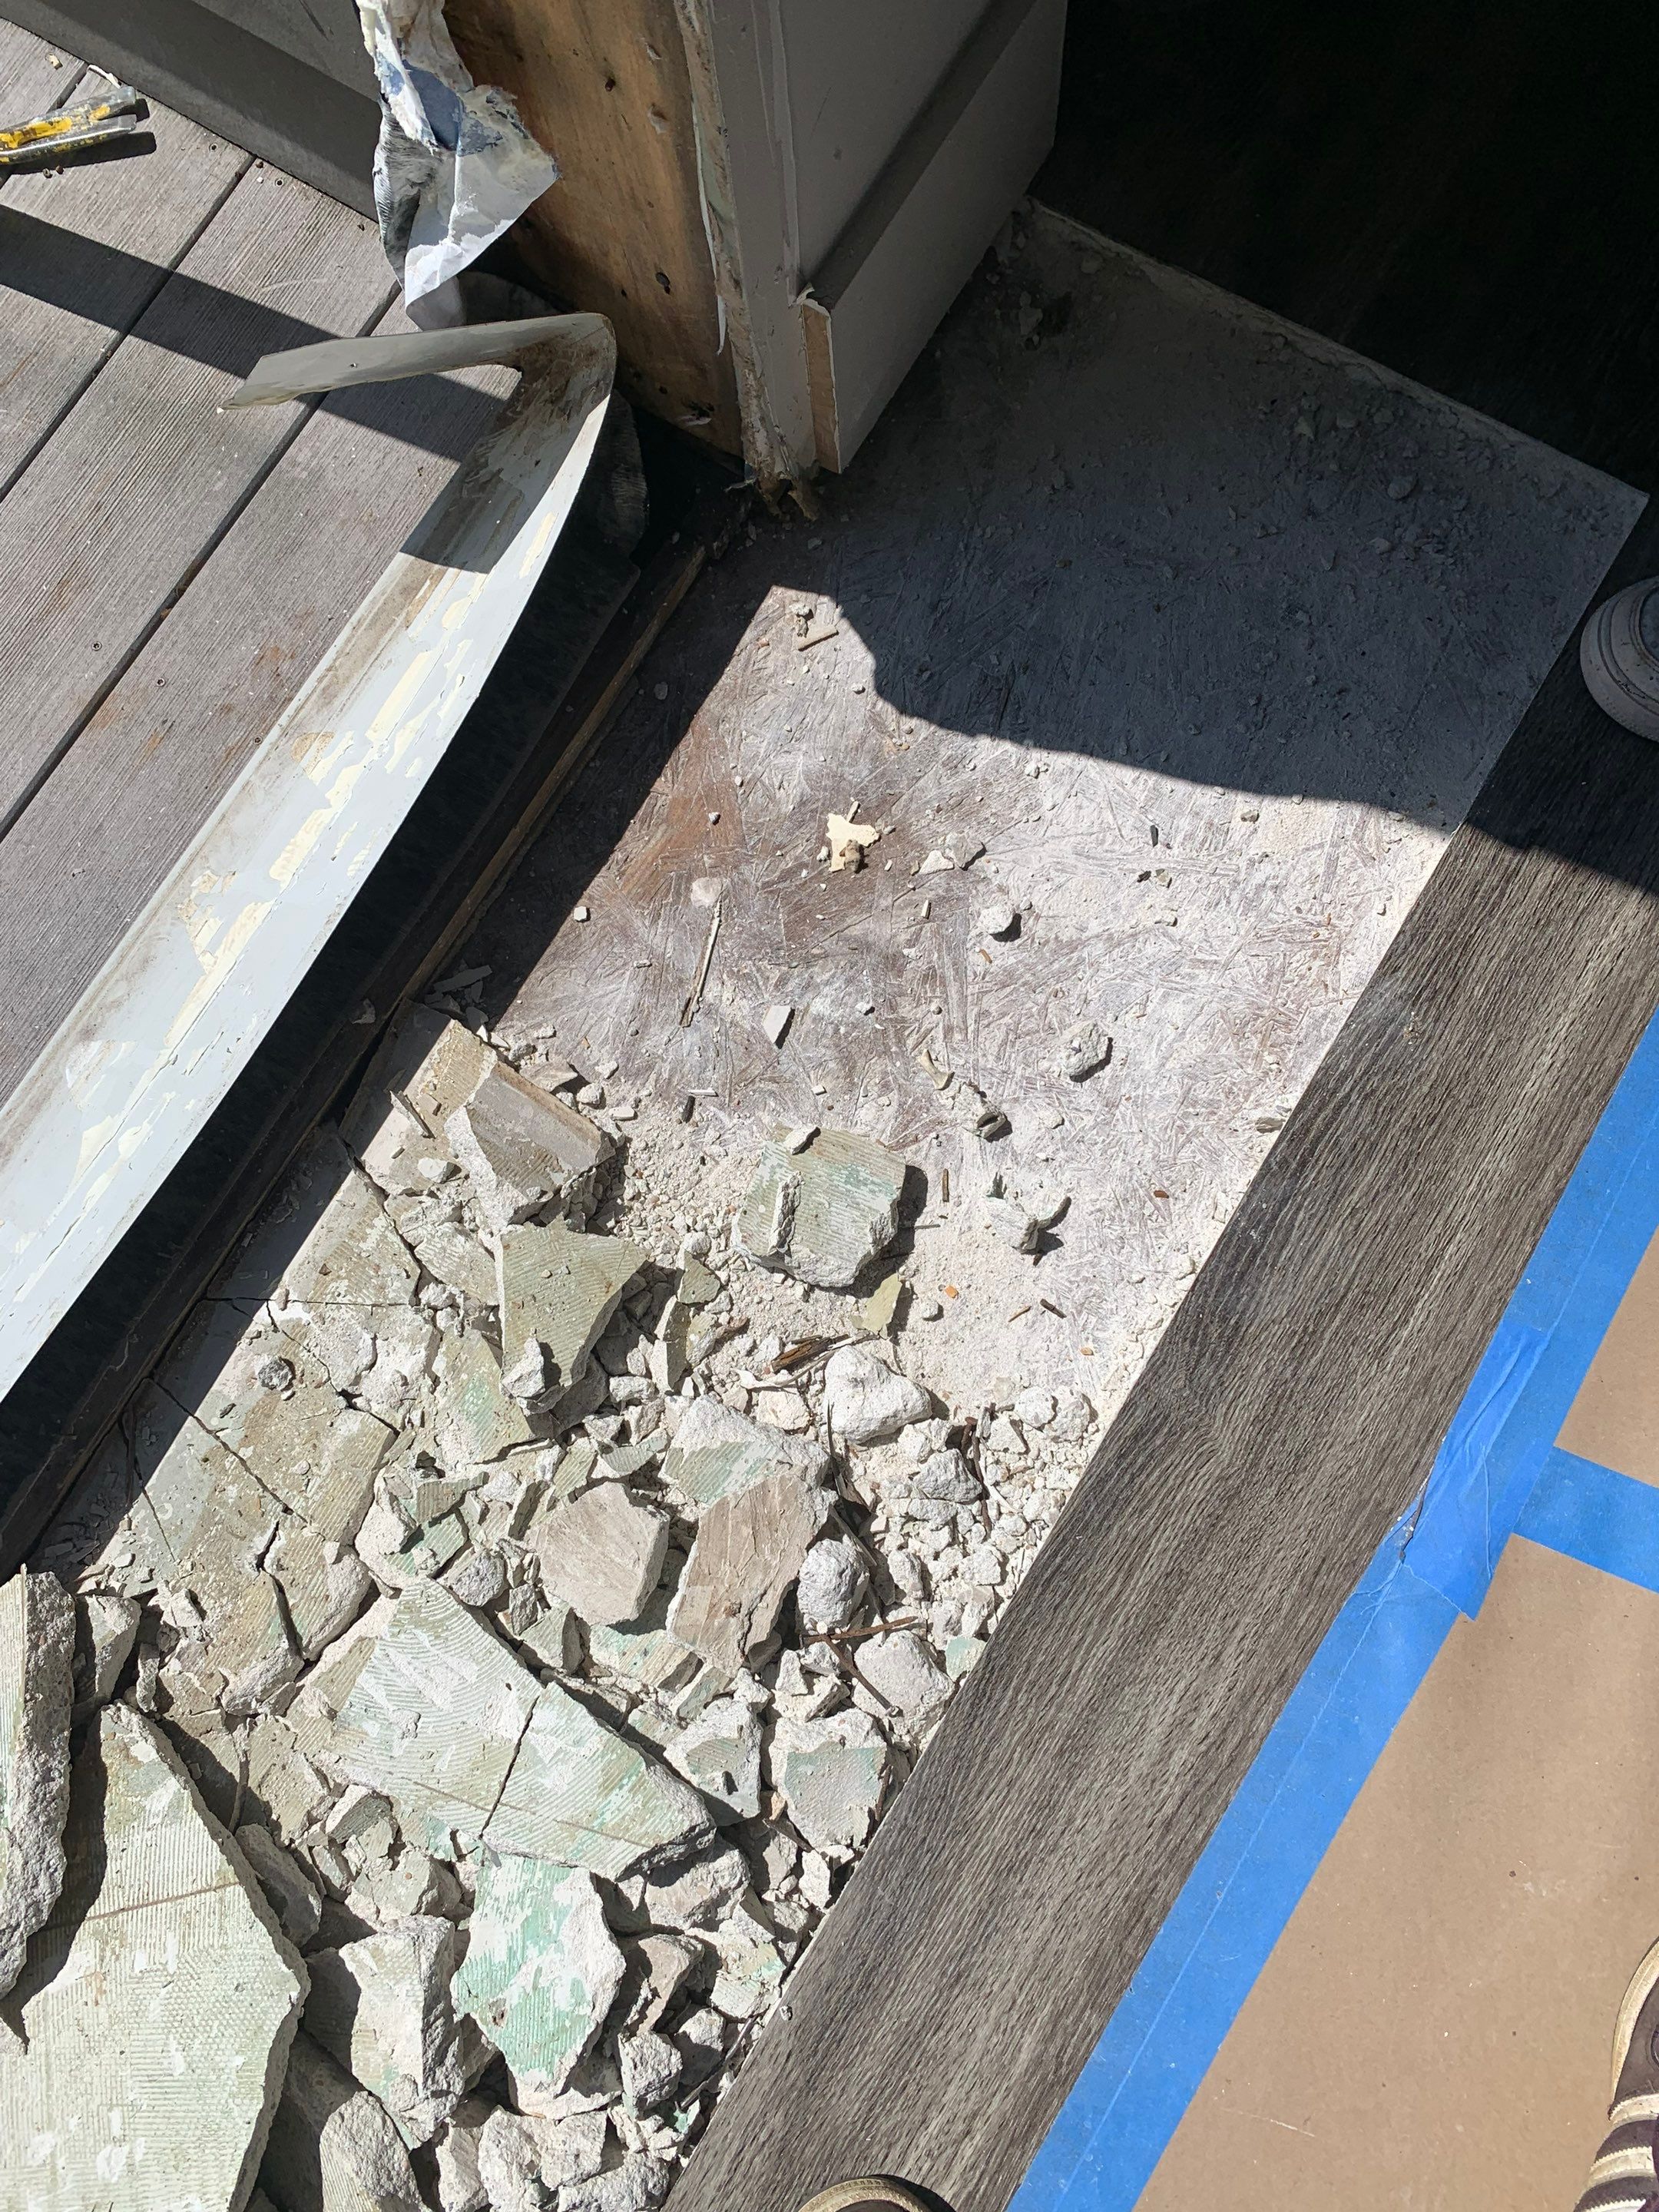 During
Additional demolition at the doorway exposes deteriorated material beneath the original flooring.
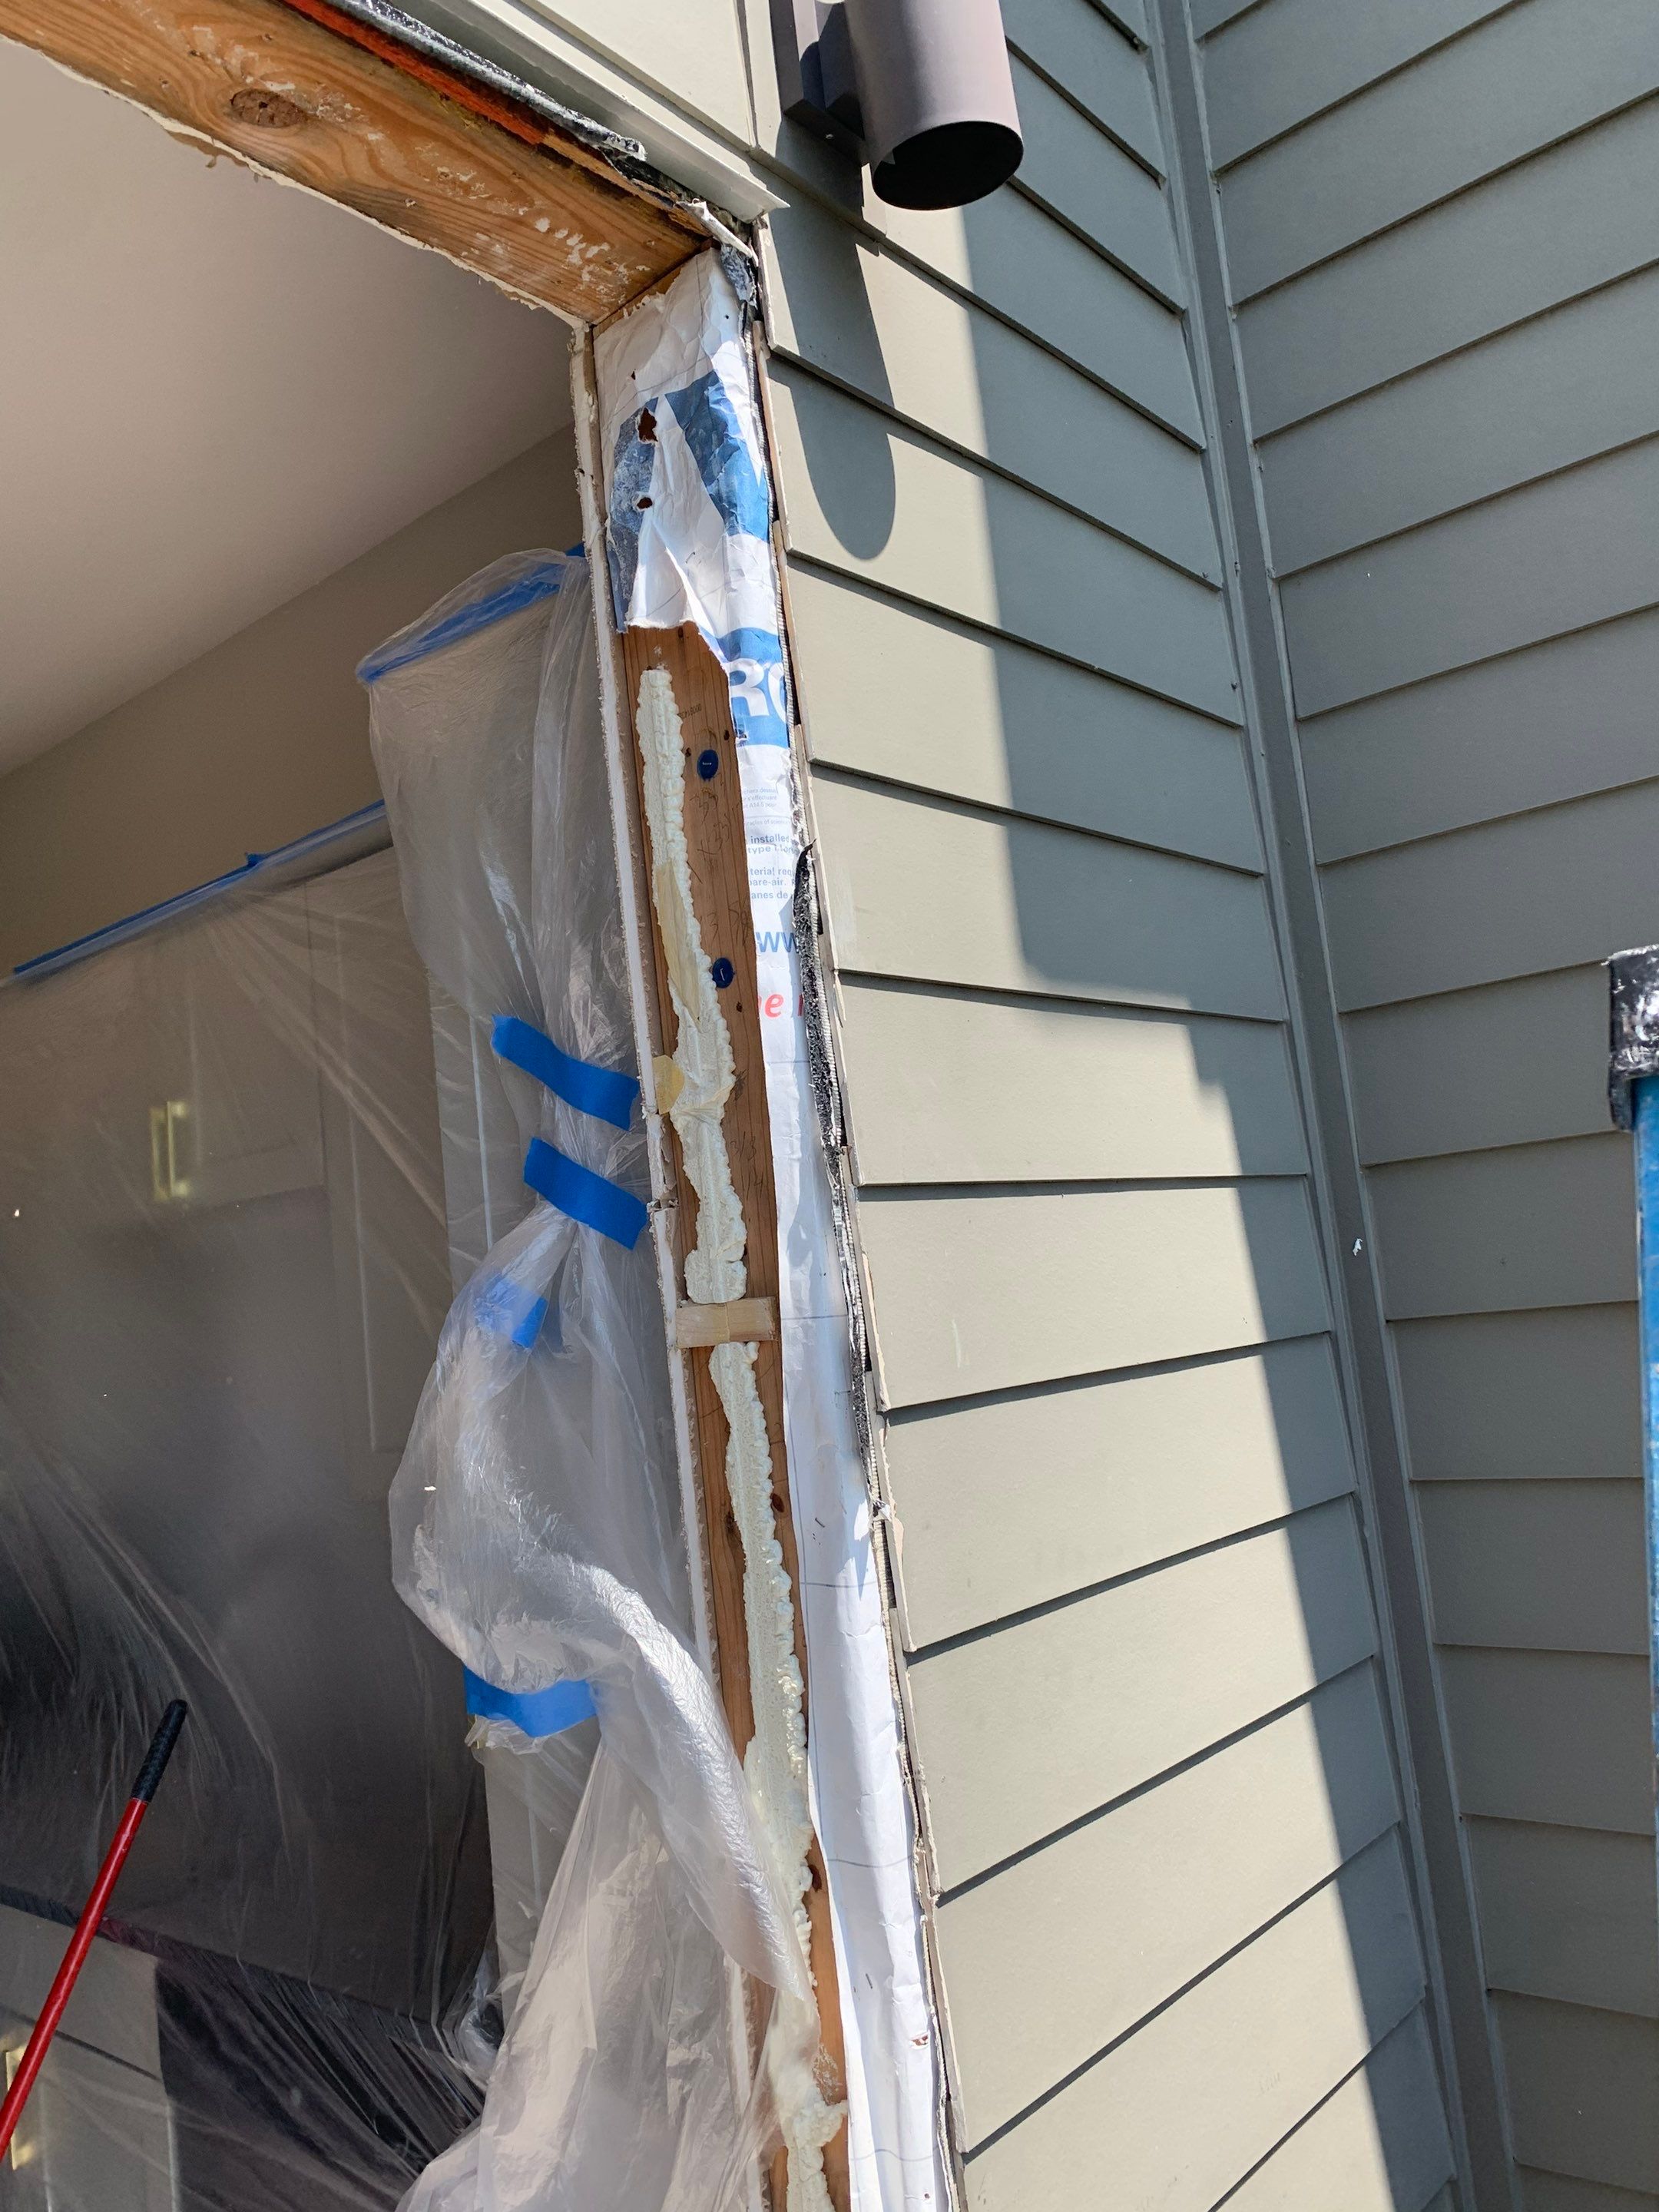 During
Exterior jamb framing and weather barrier exposed as the opening is prepared for the replacement doors.
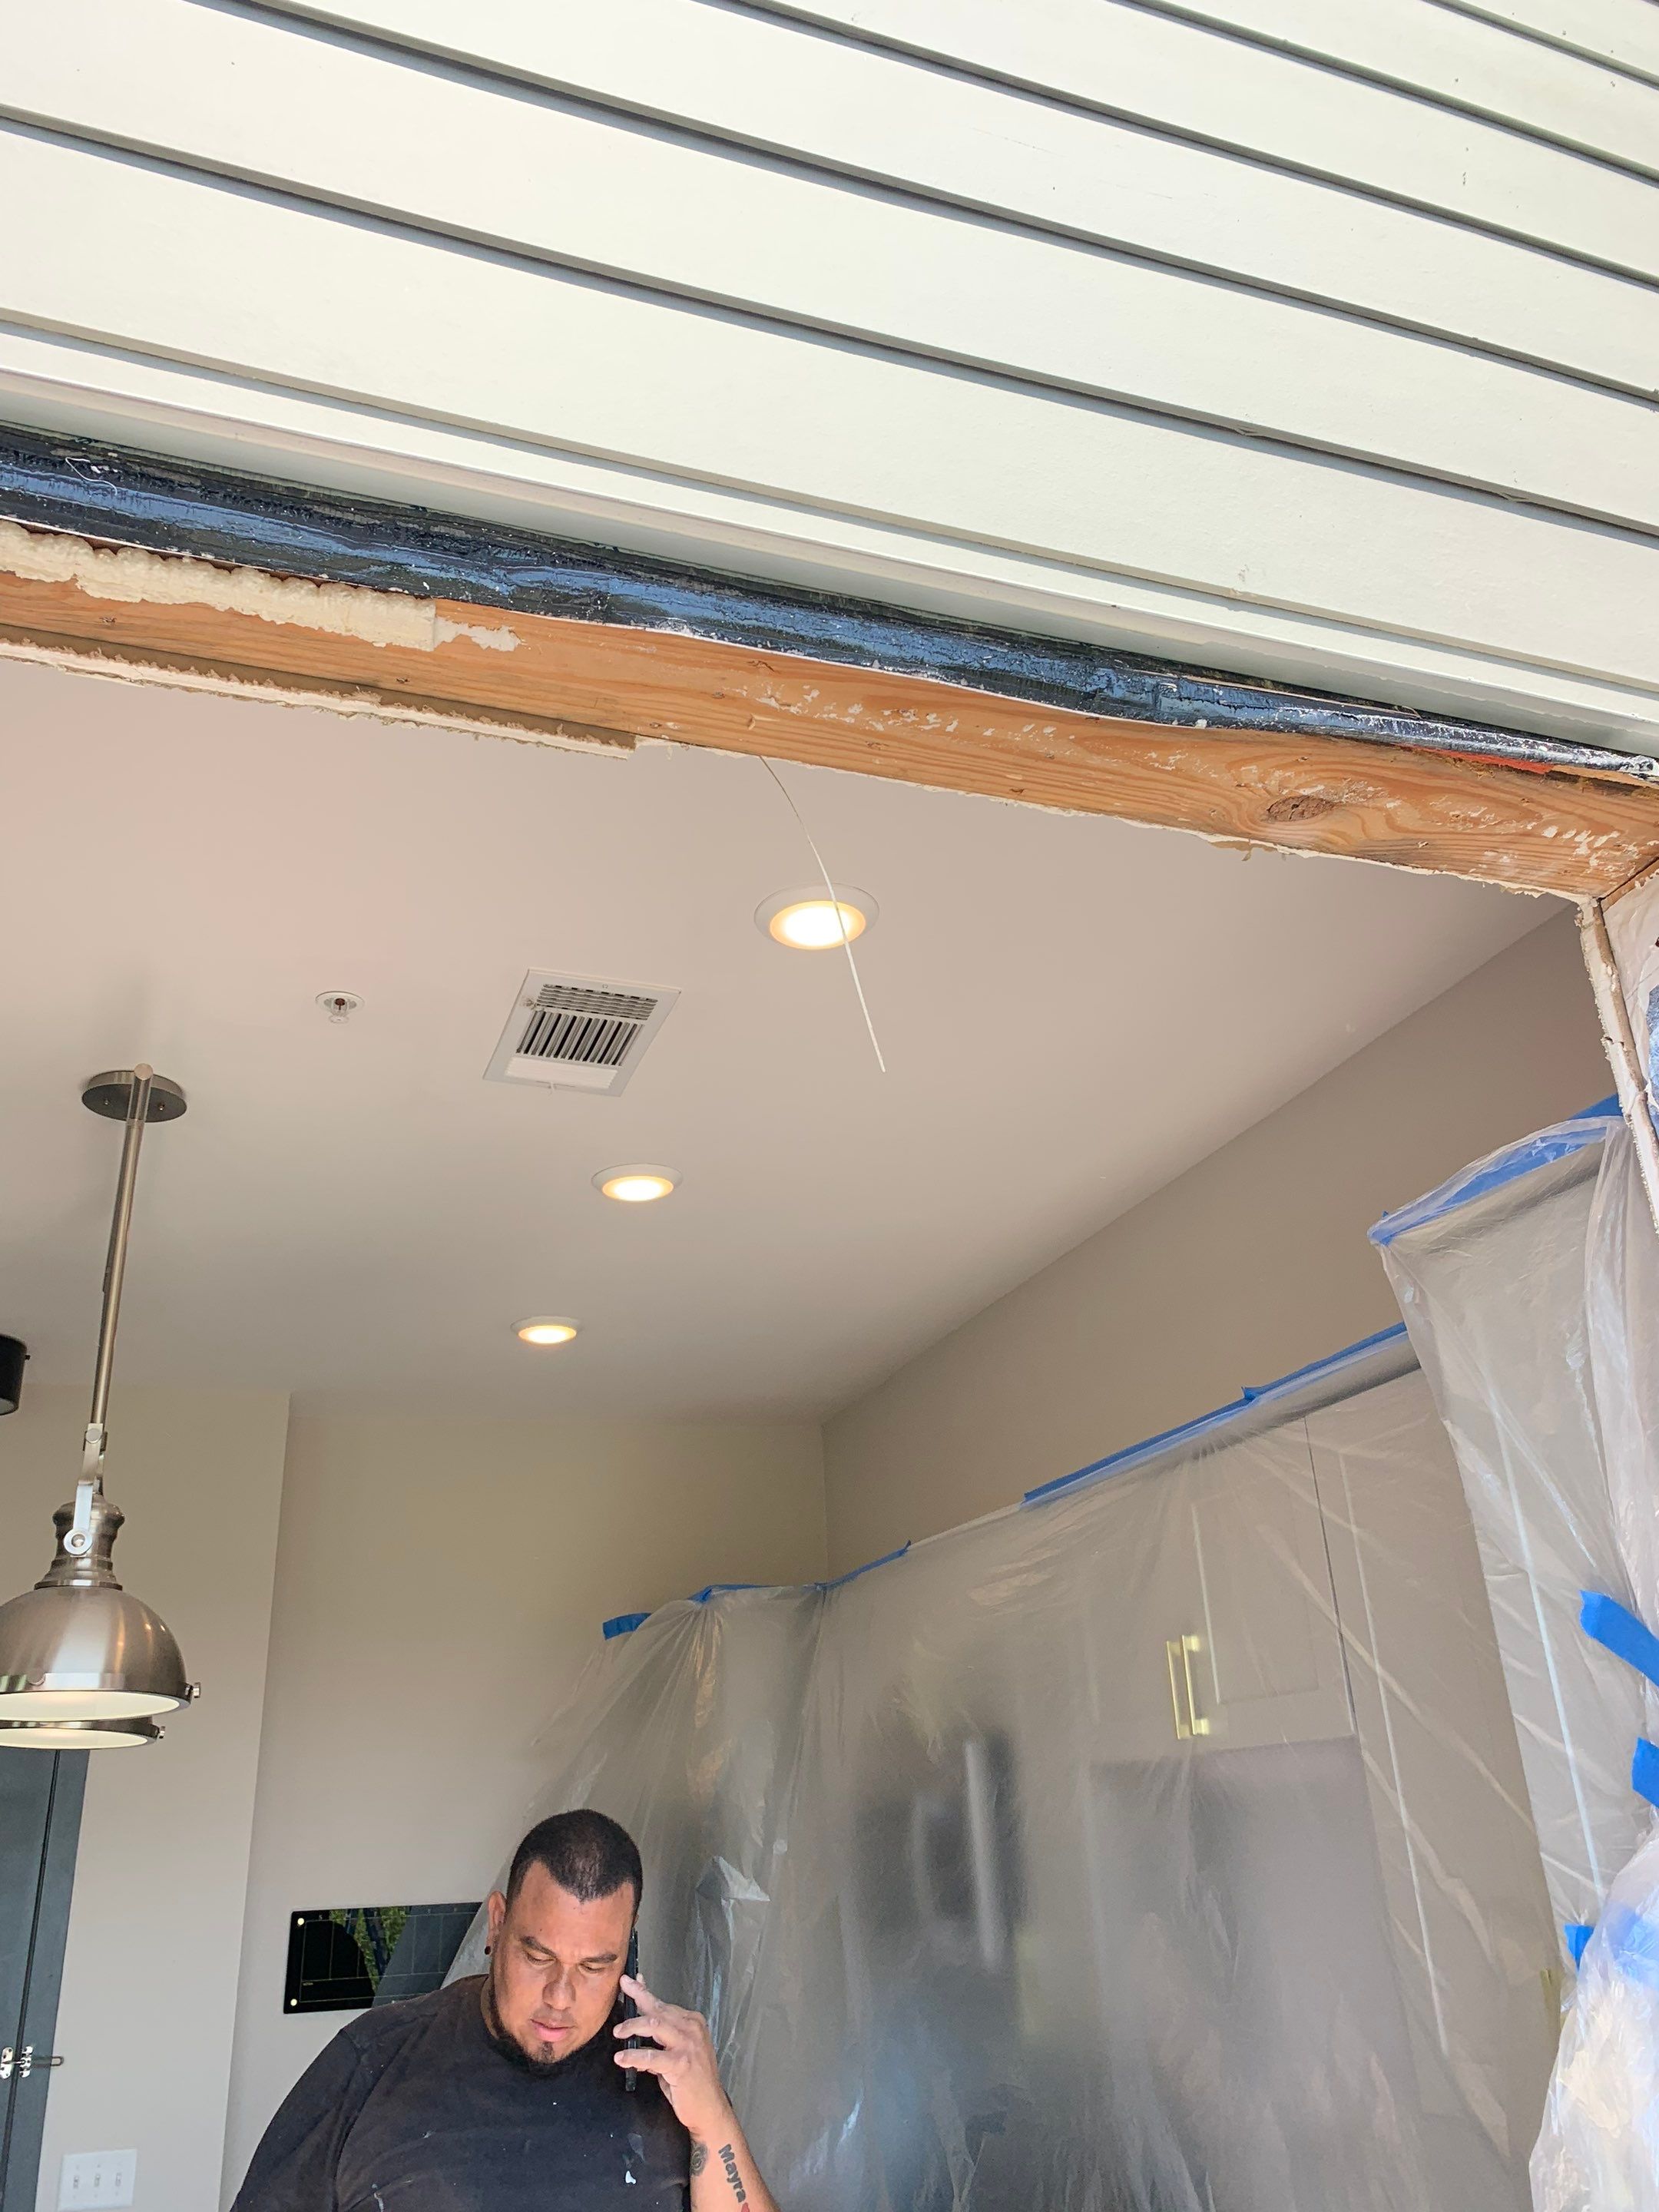 During
Interior view of the exposed door header with surrounding kitchen cabinets protected during construction.
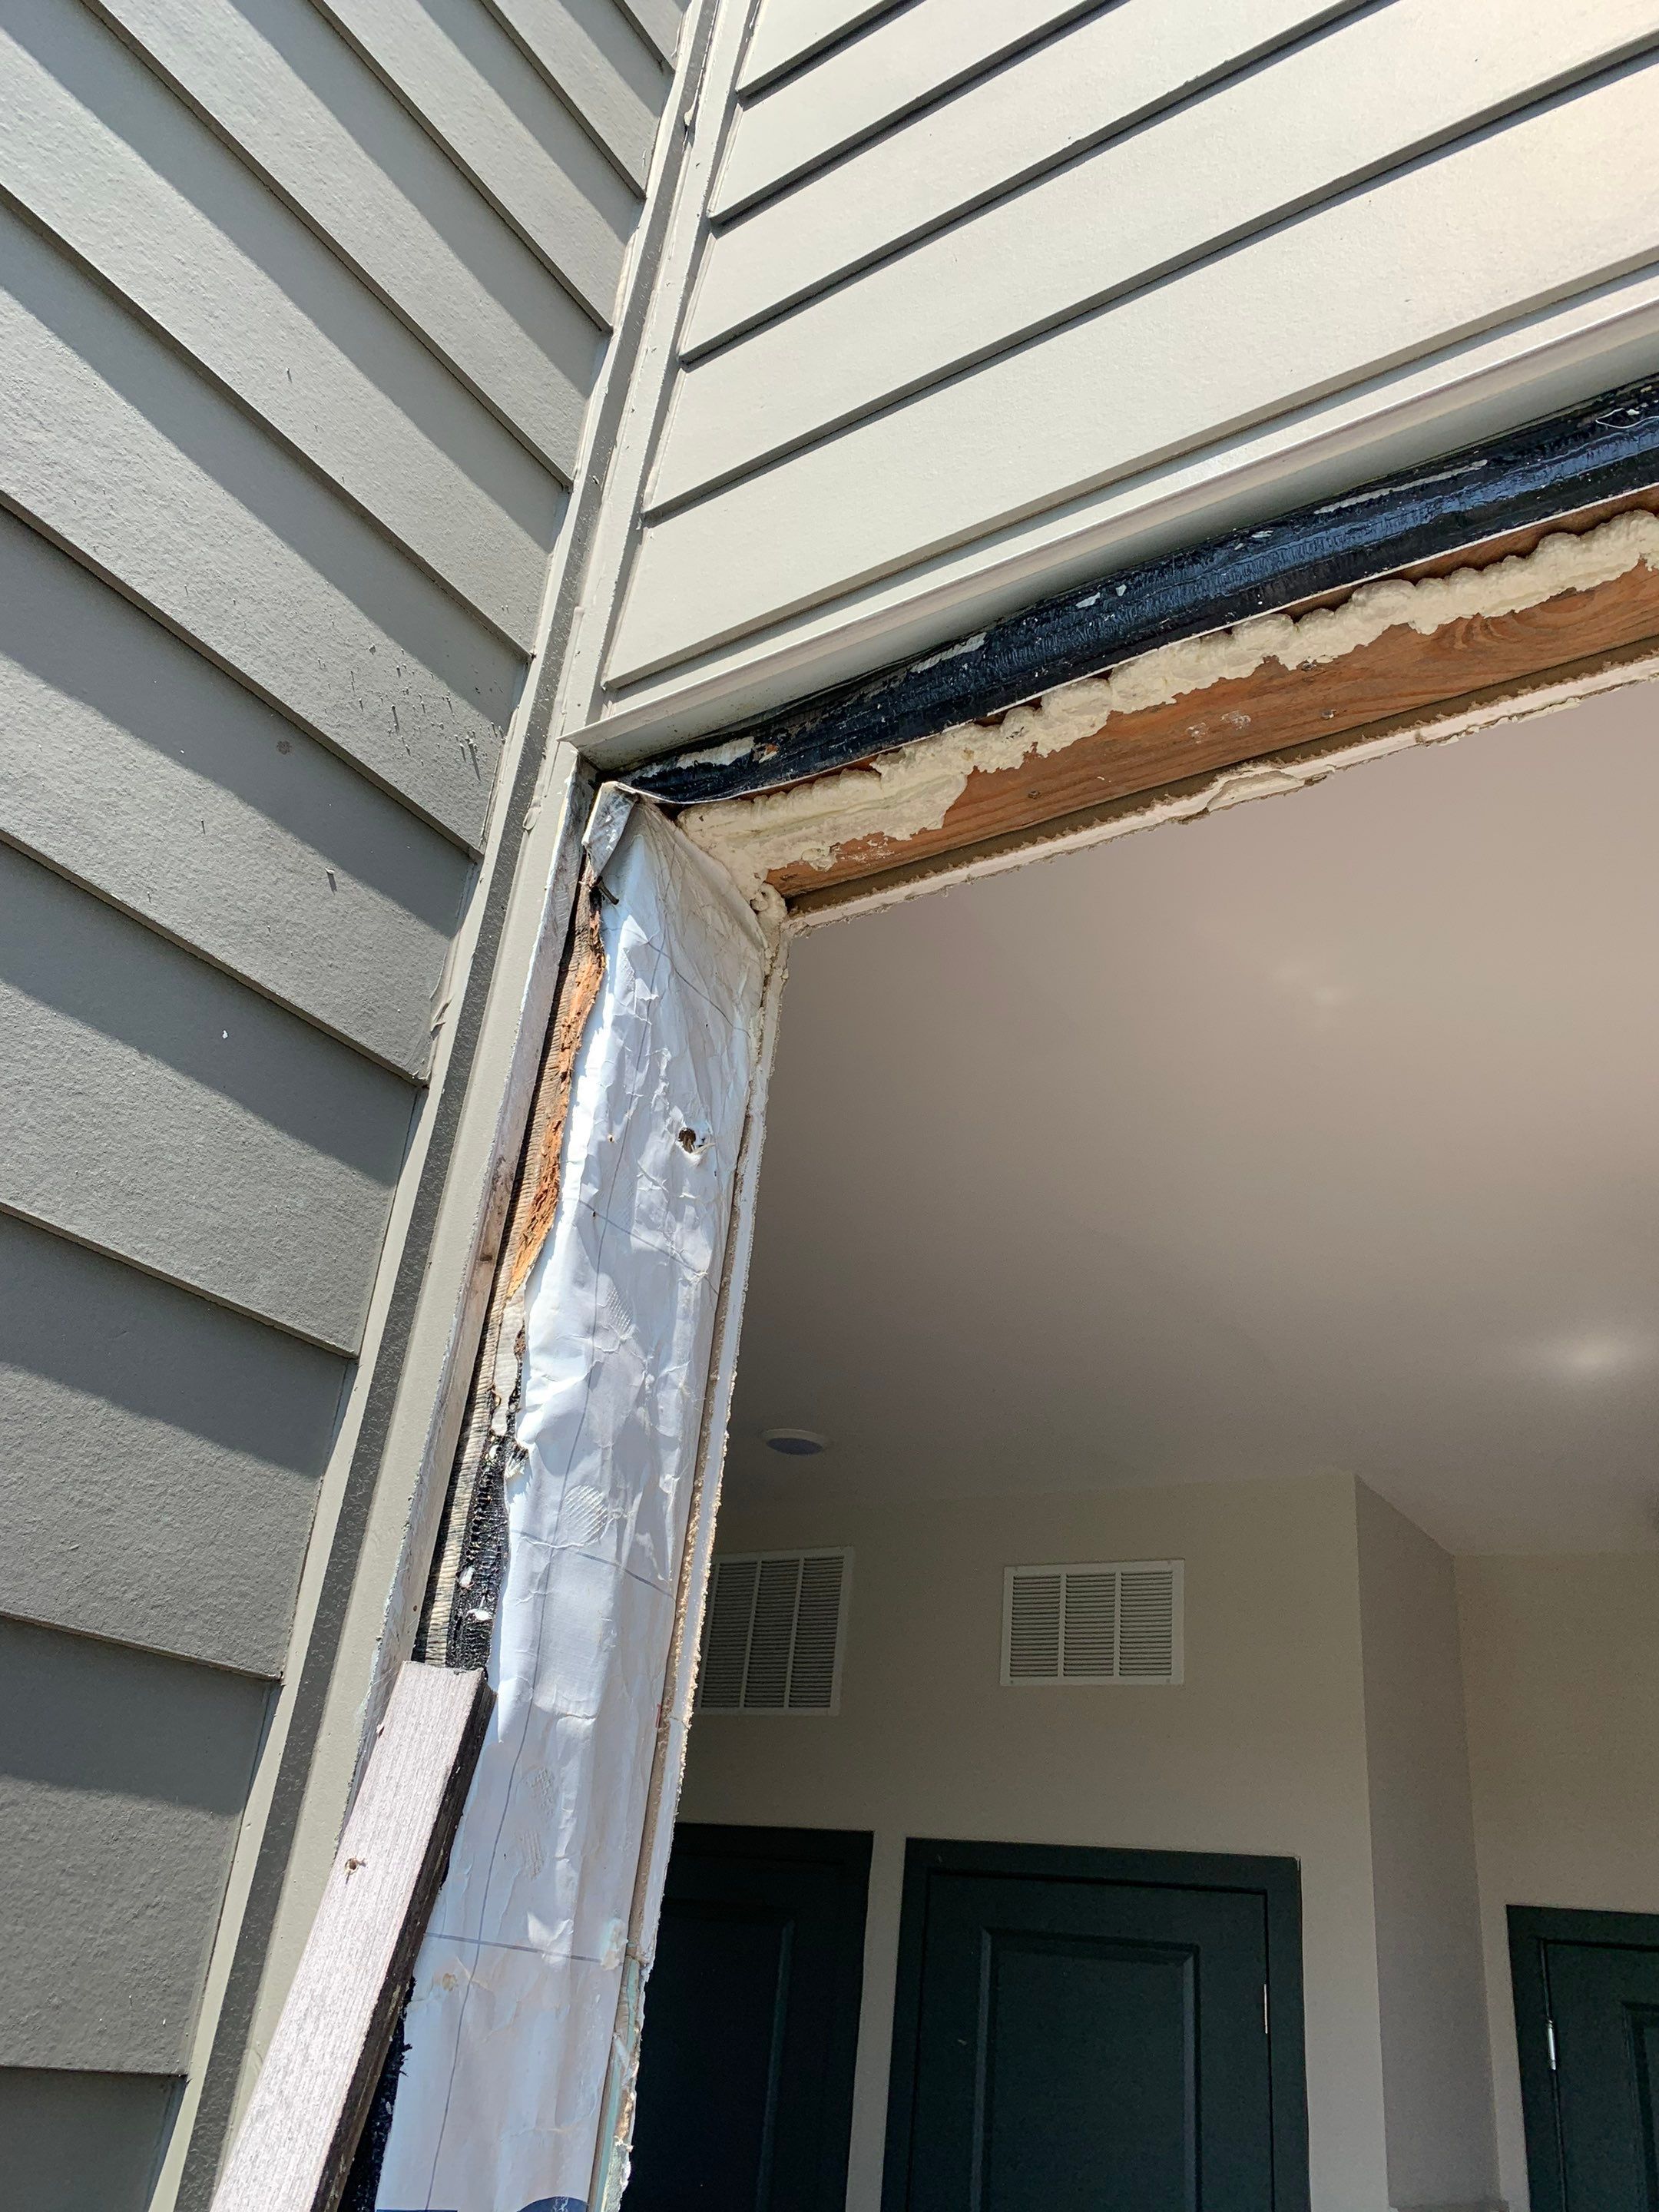 During
Exterior view of the upper door opening after removing the original doors and trim.
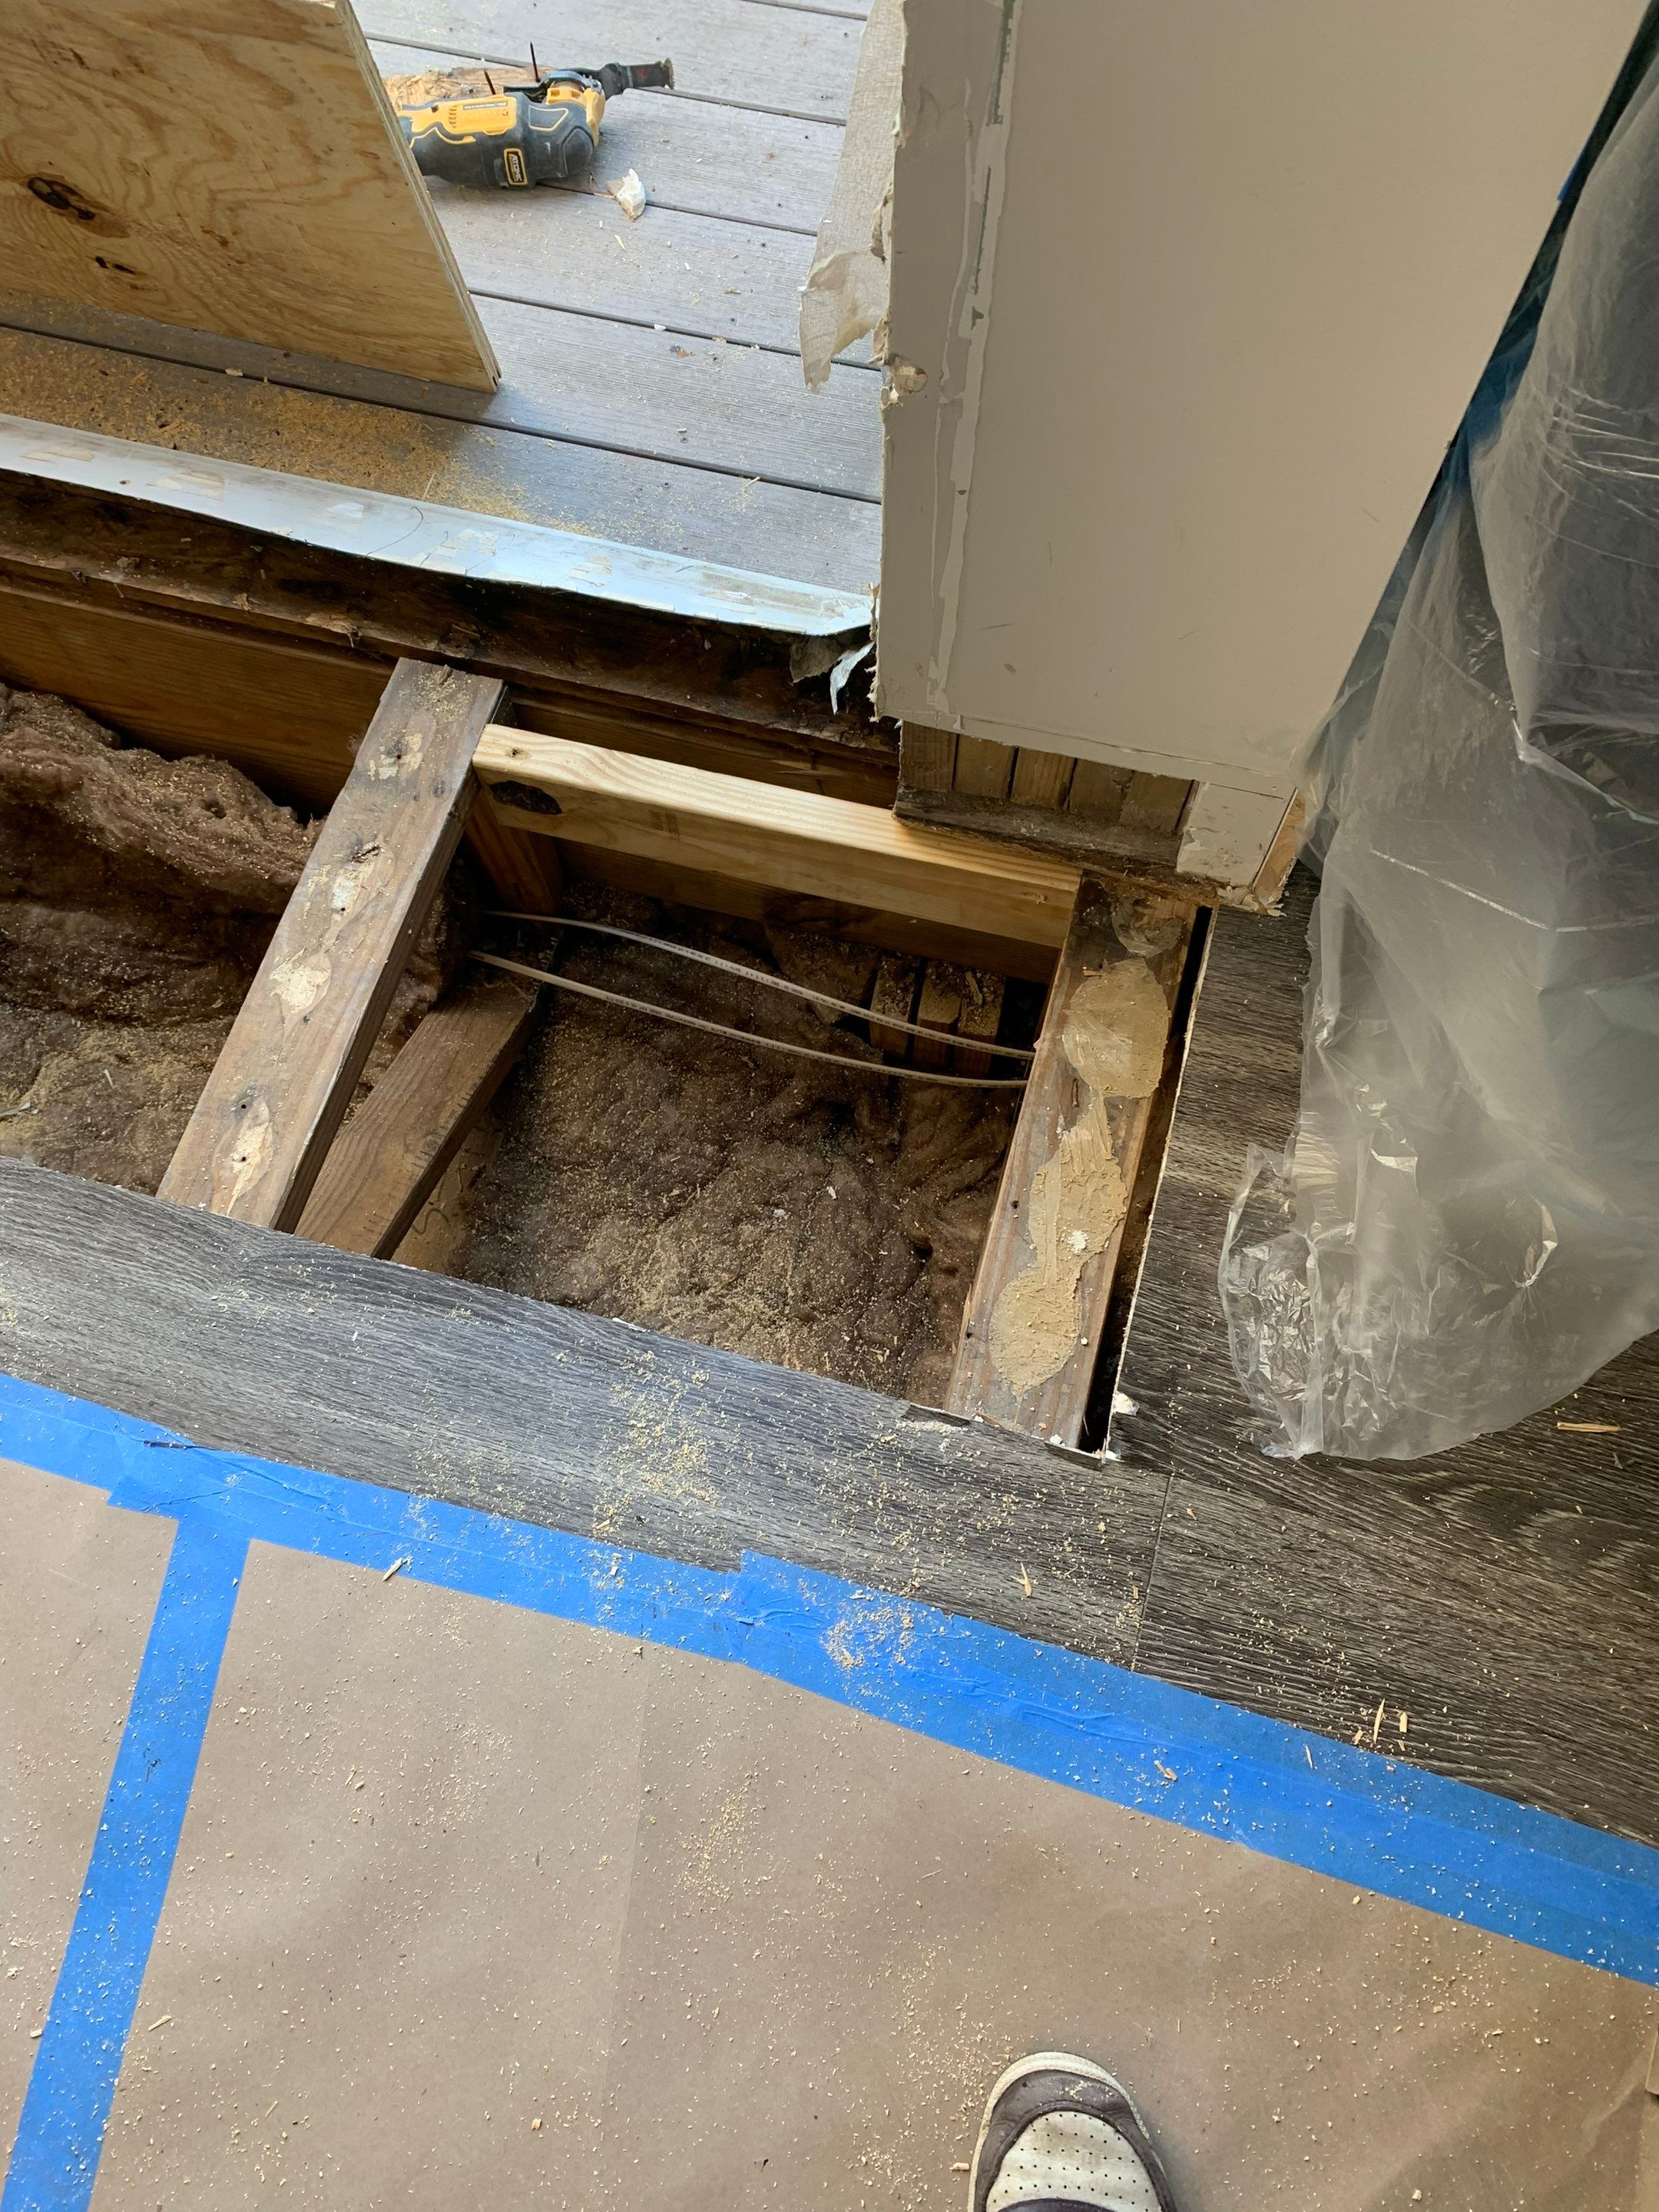 During
Subfloor opened beside the balcony threshold to inspect framing and underlying conditions.
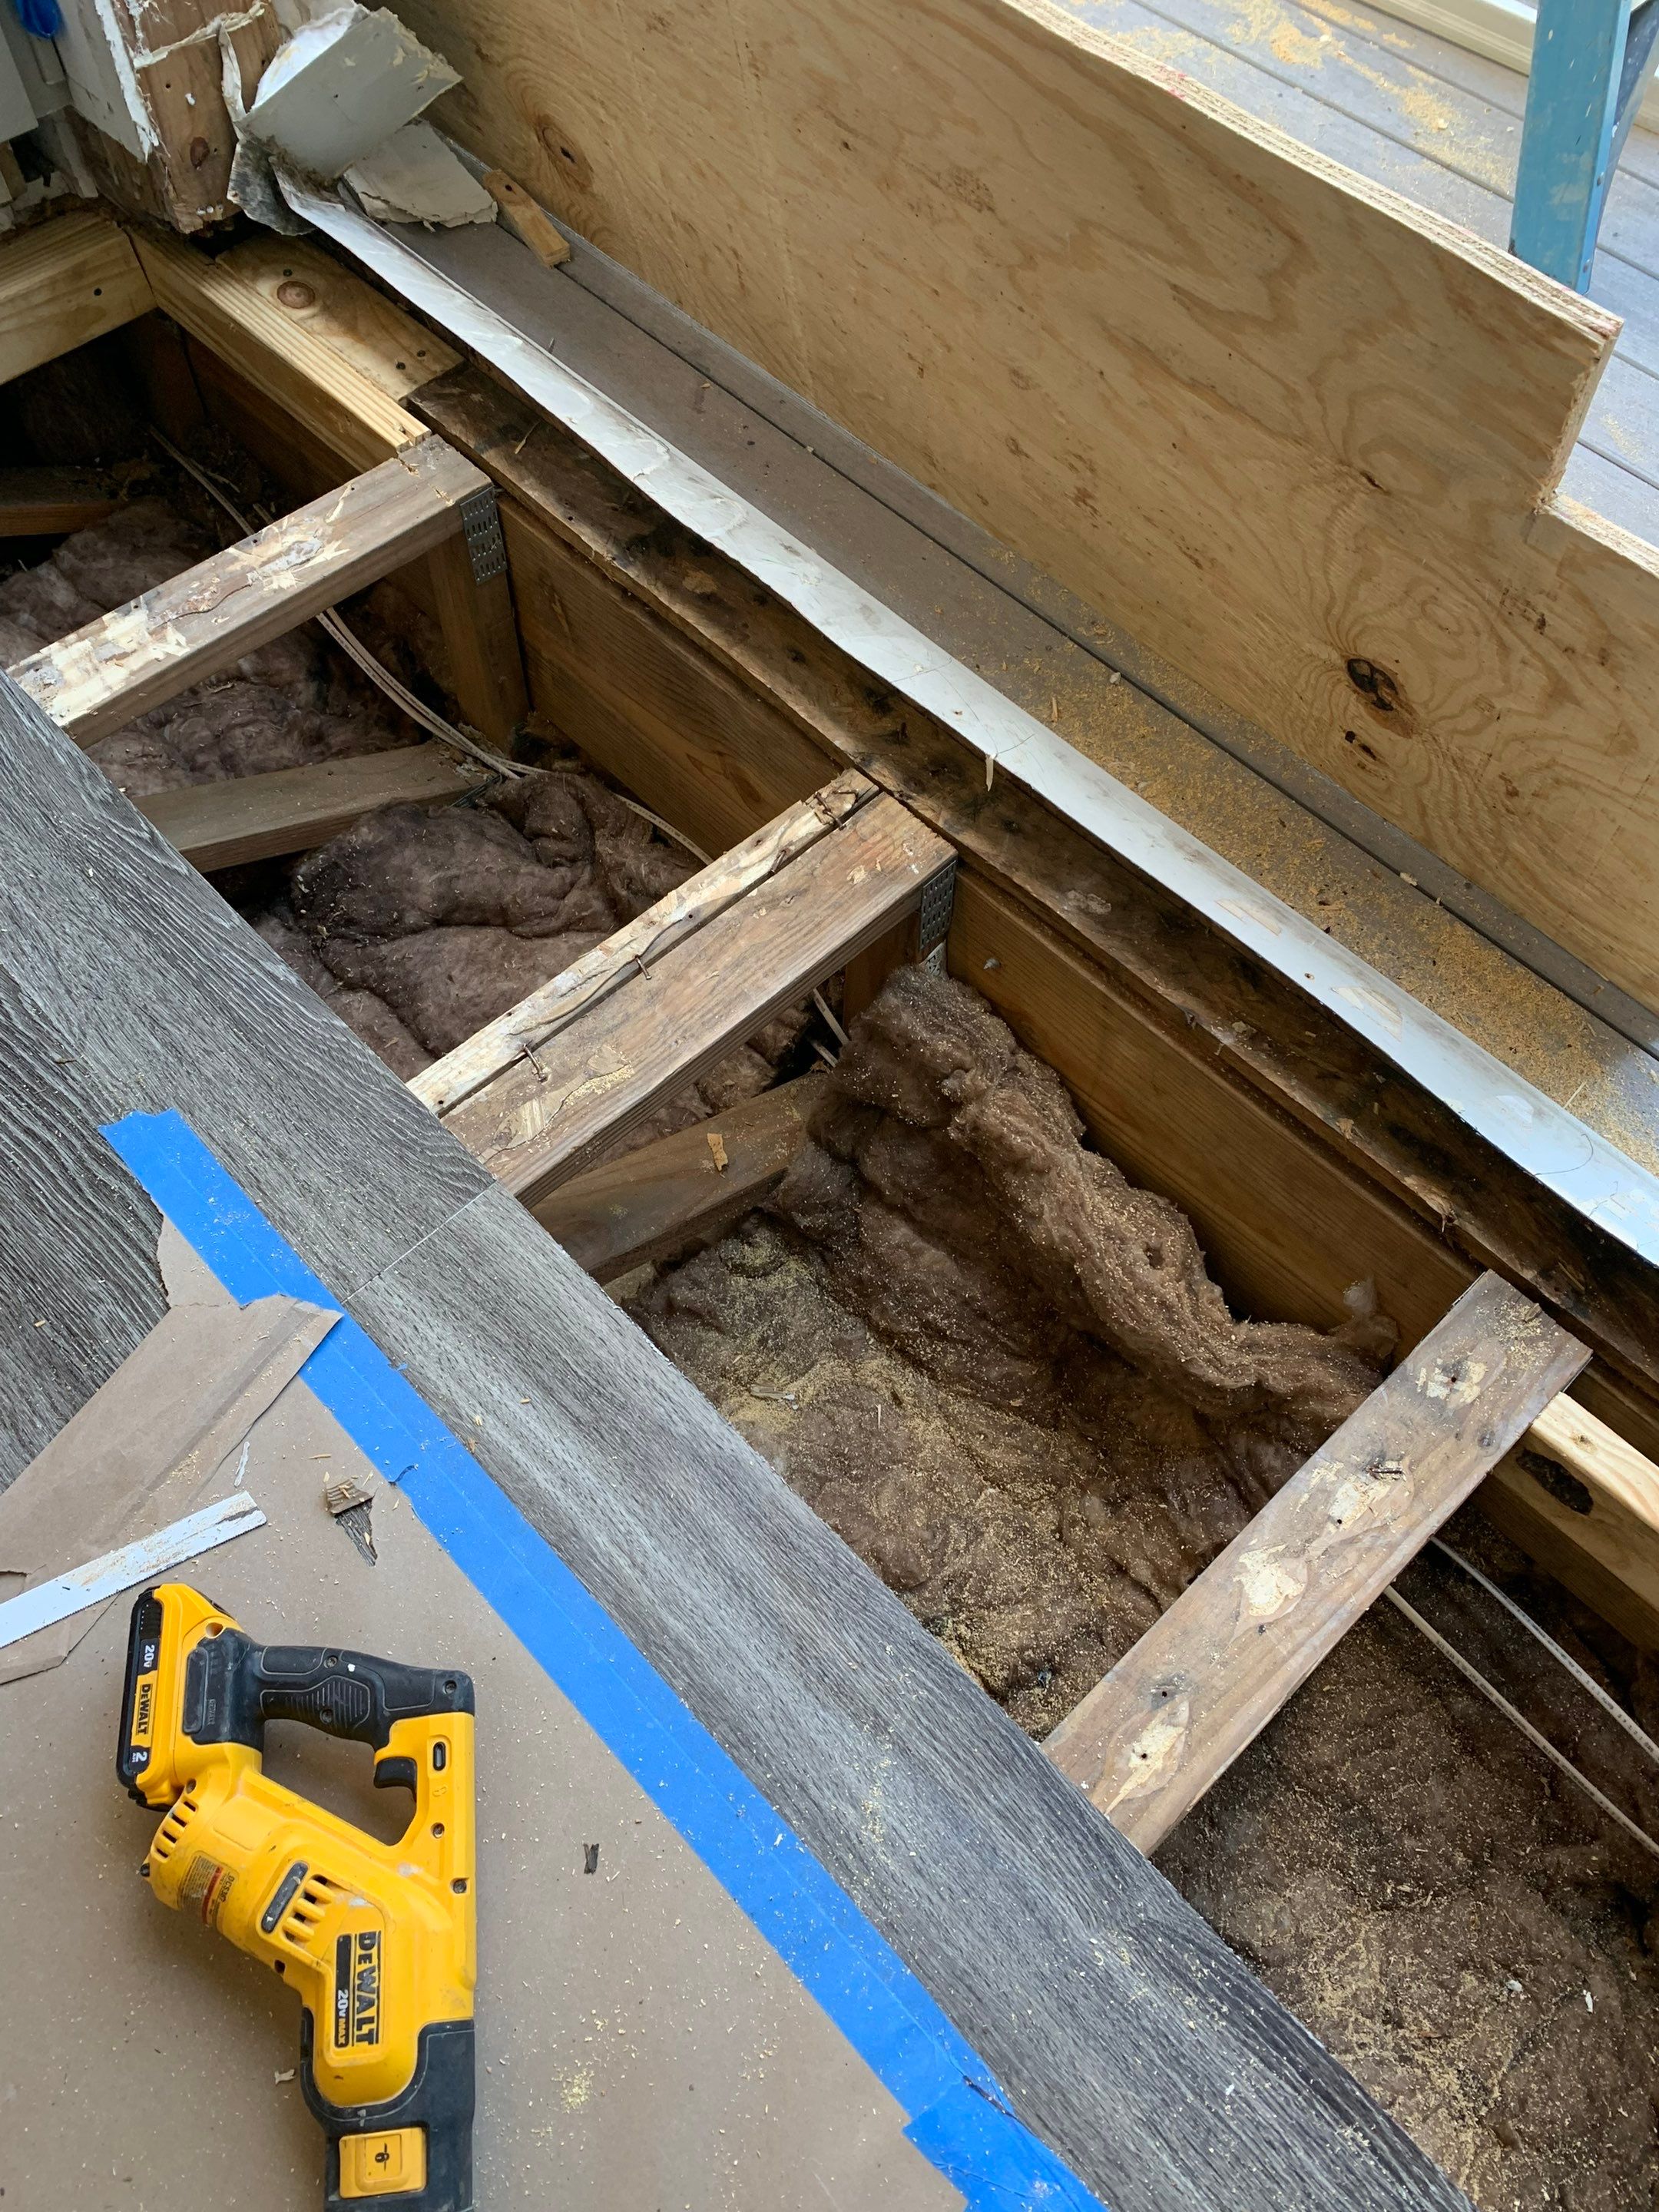 During
Exposed floor joists and insulation beneath the doorway following removal of damaged subfloor materials.
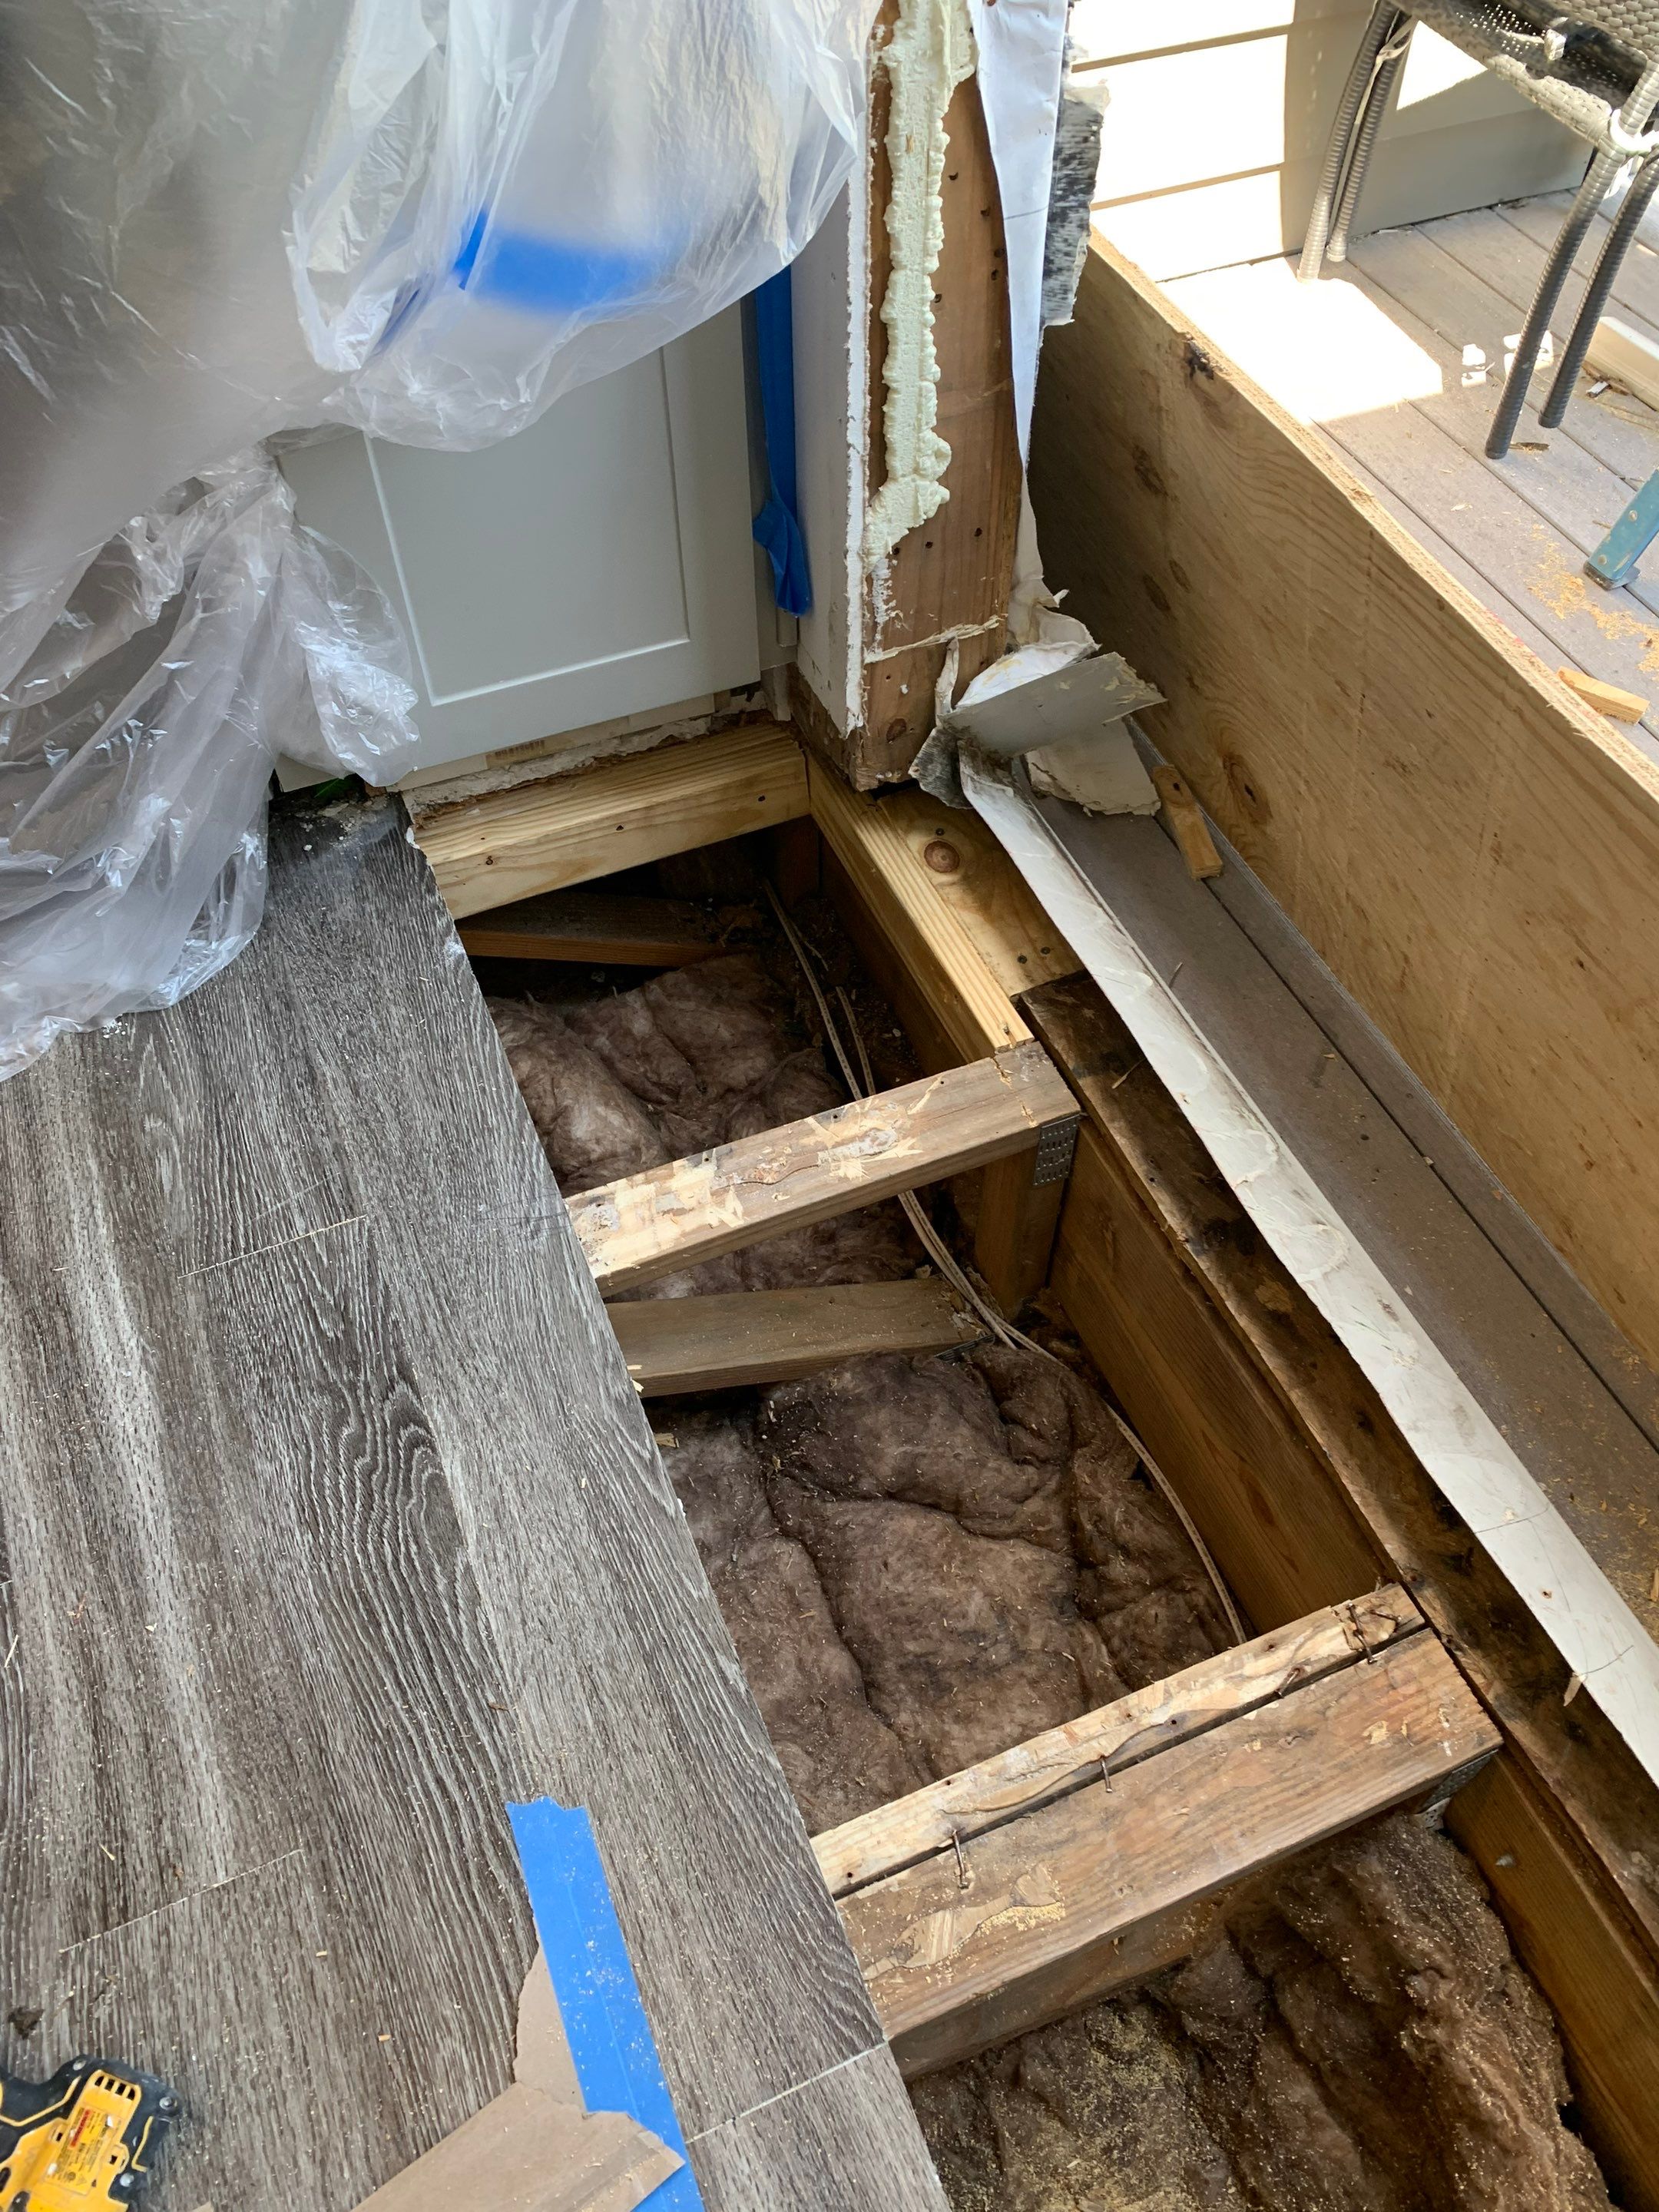 During
Wider view of the opened floor assembly during structural repairs near the balcony entrance.
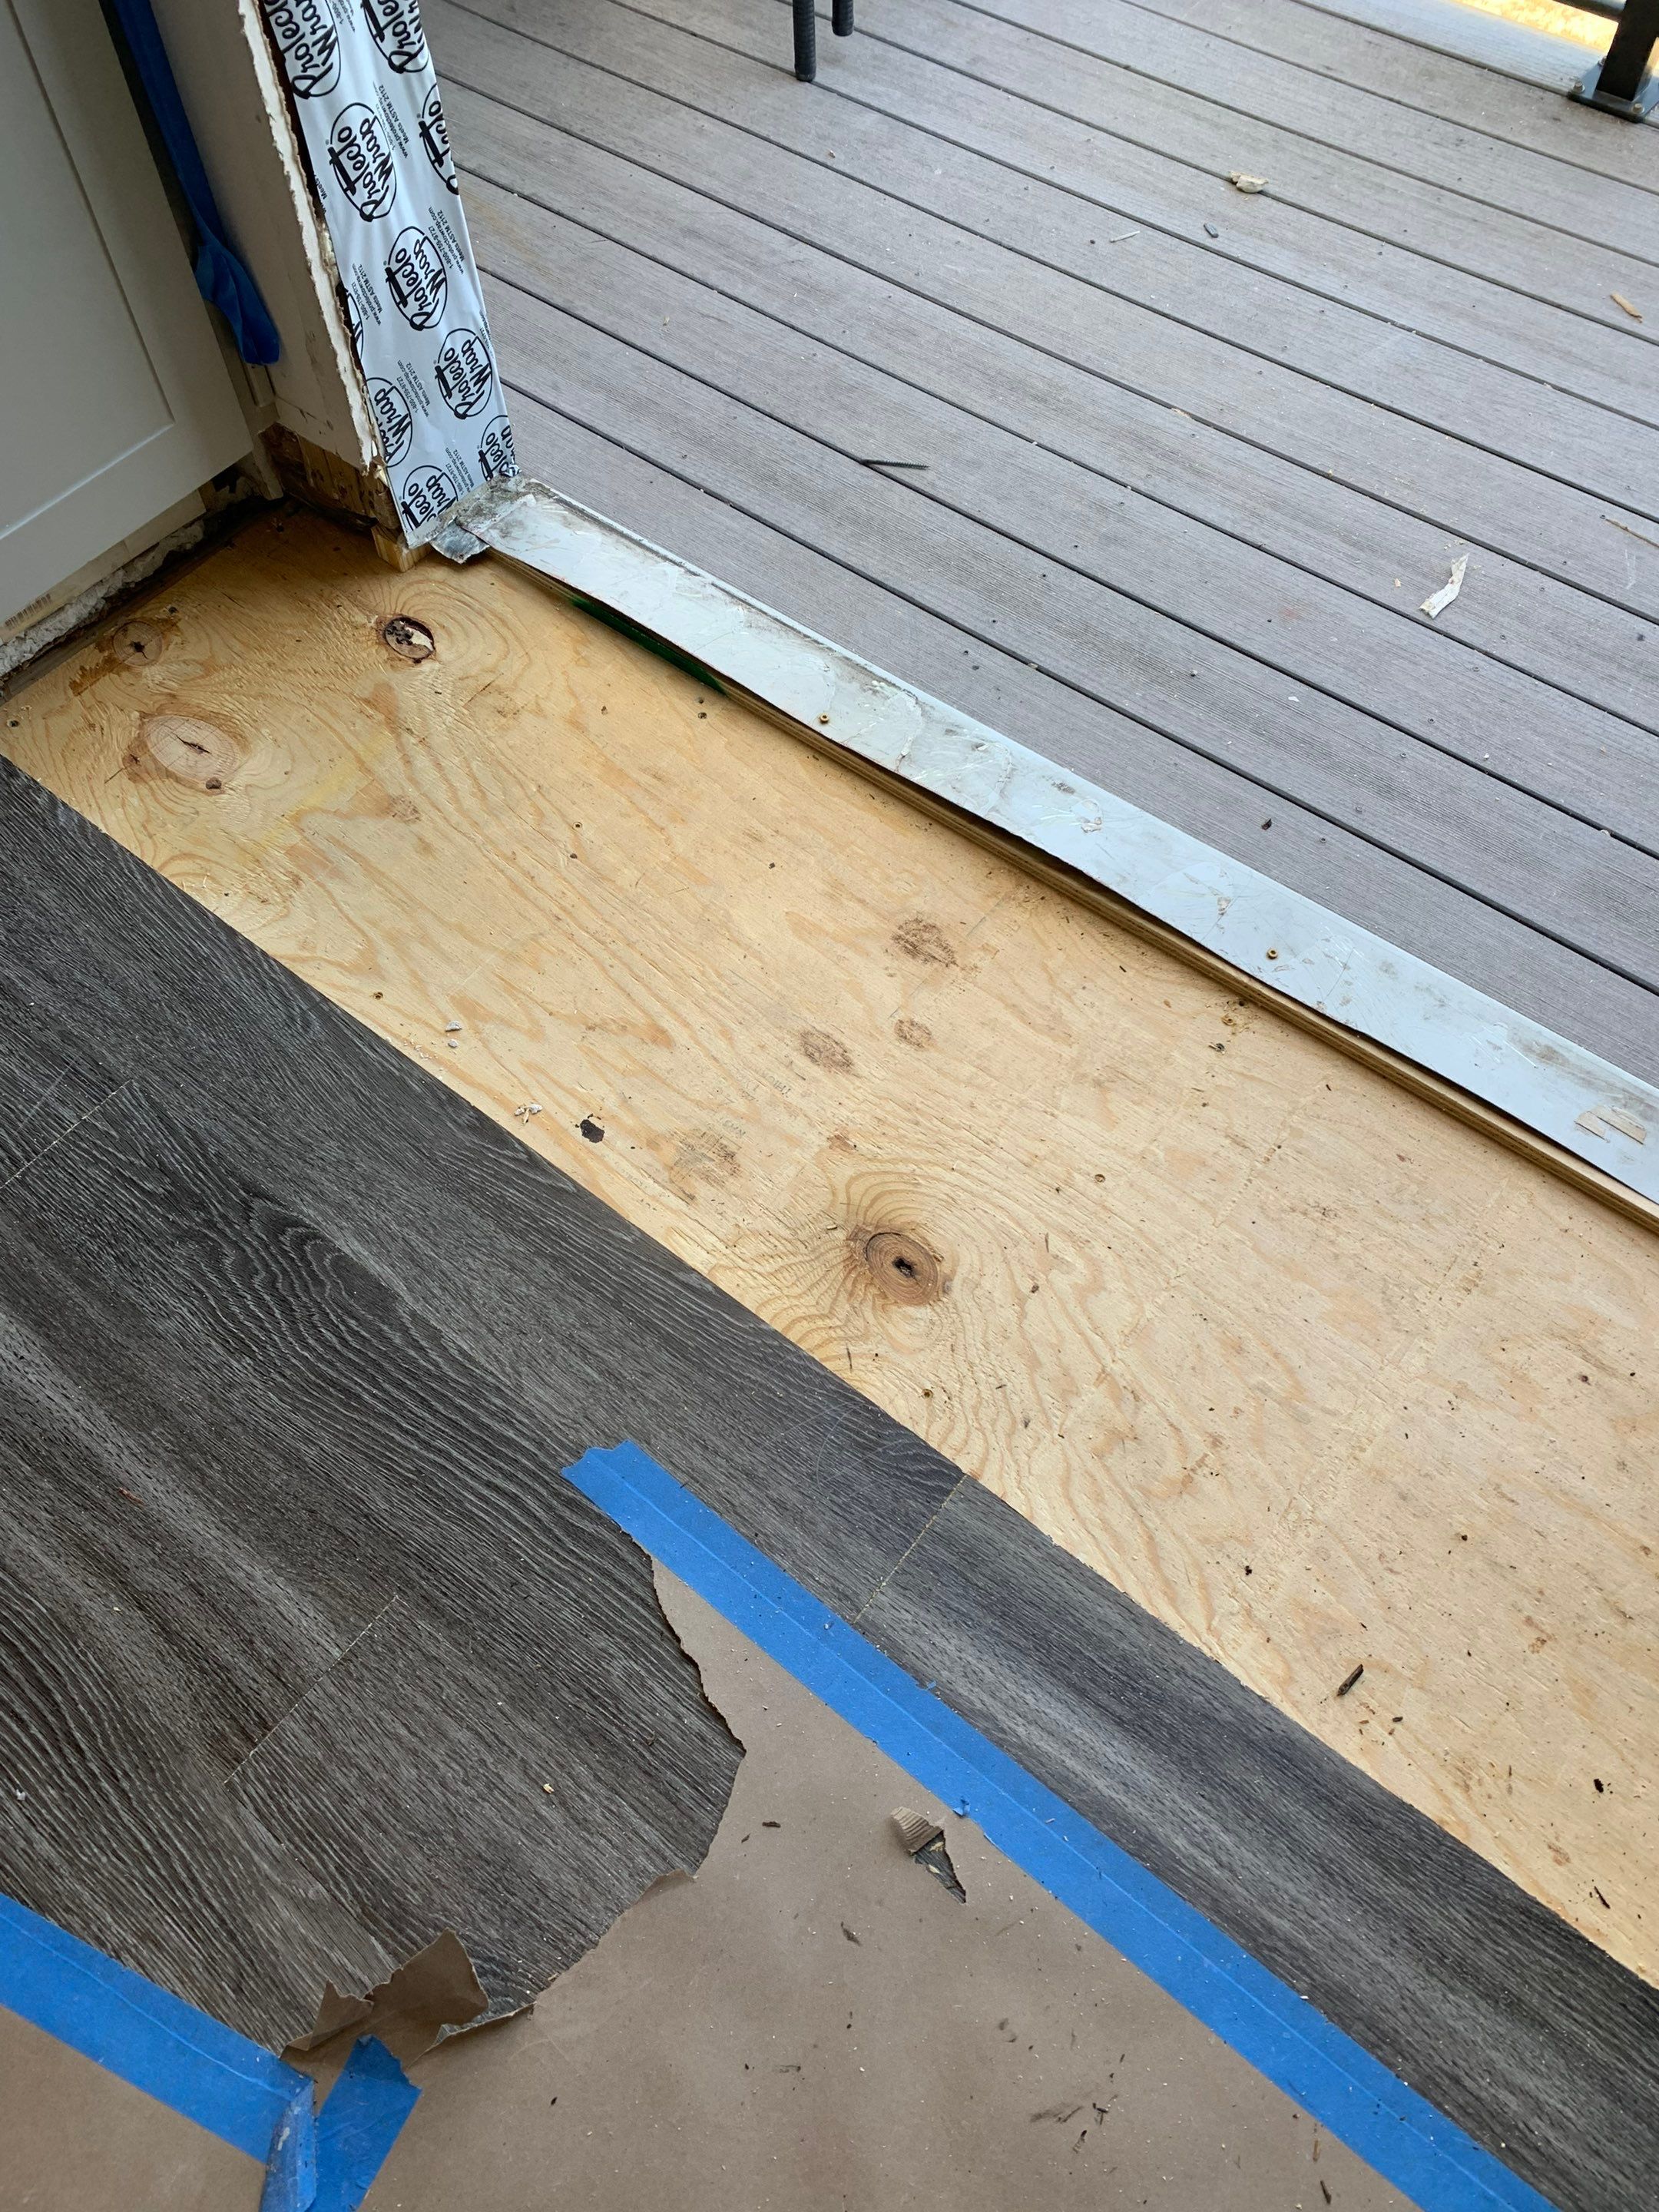 During
New plywood subfloor installed at the balcony doorway, restoring the floor surface after repairs.
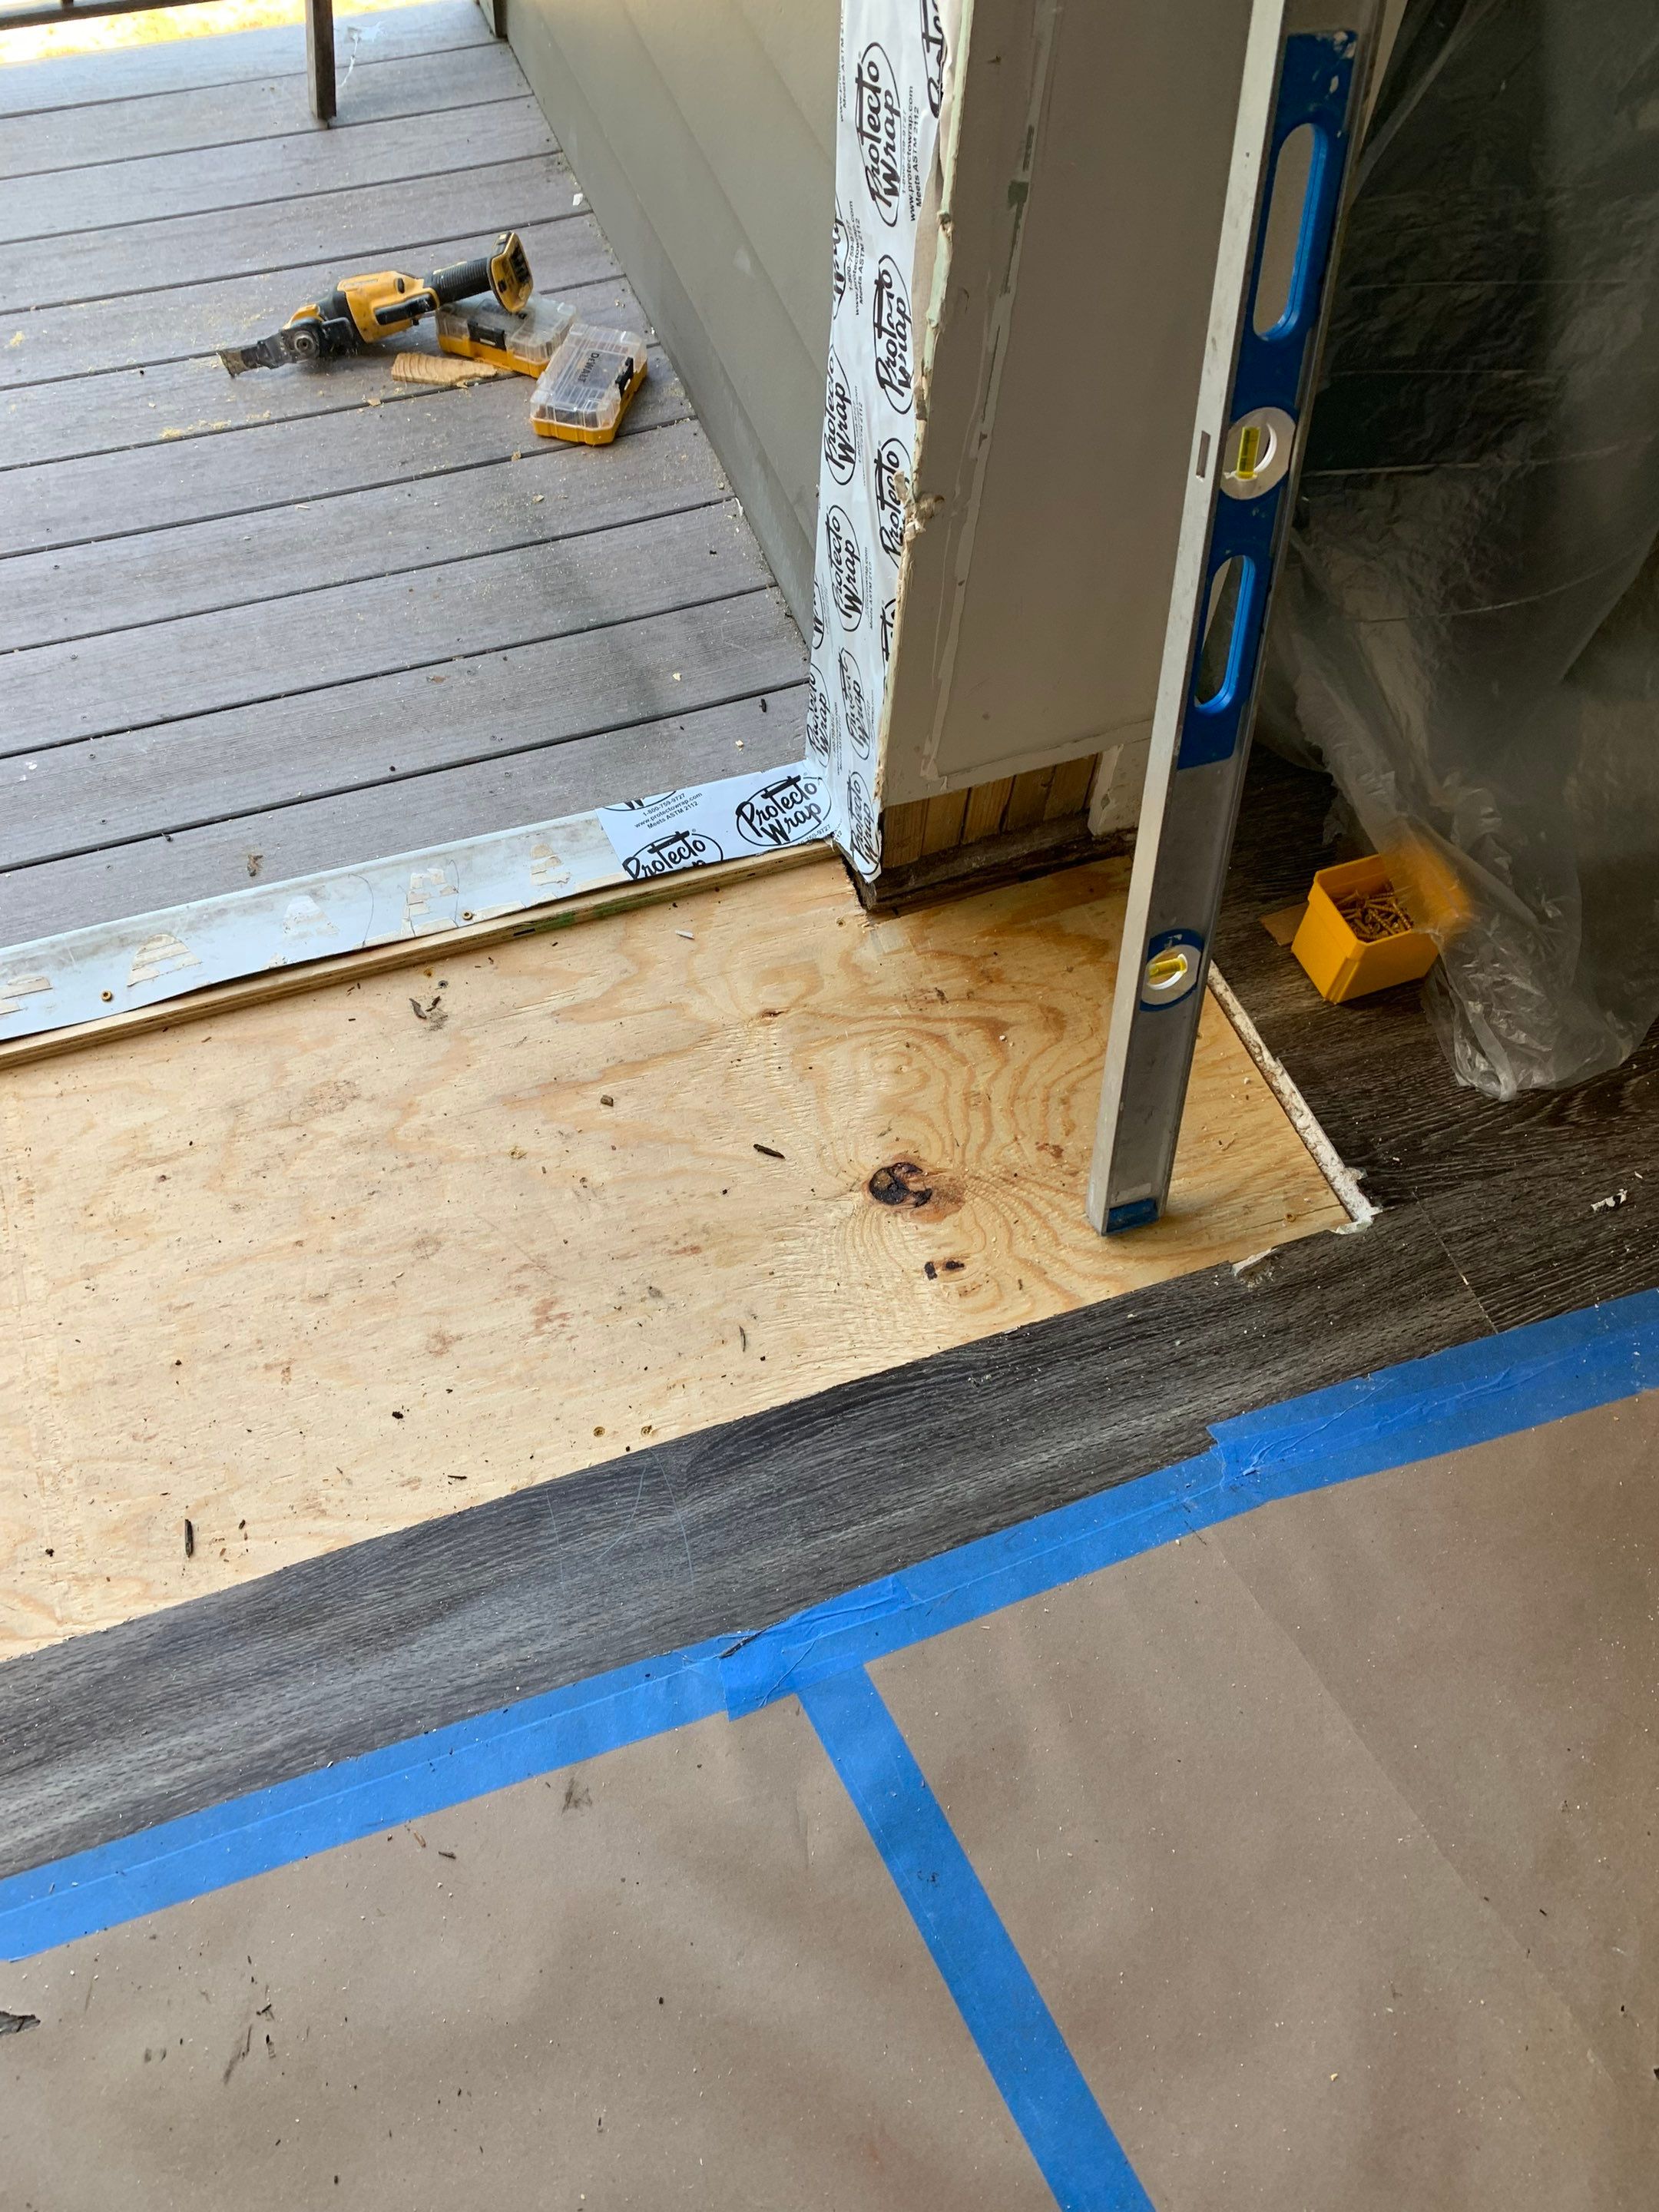 During
Replacement plywood fitted around the doorway, with surrounding flooring protected from construction activity.
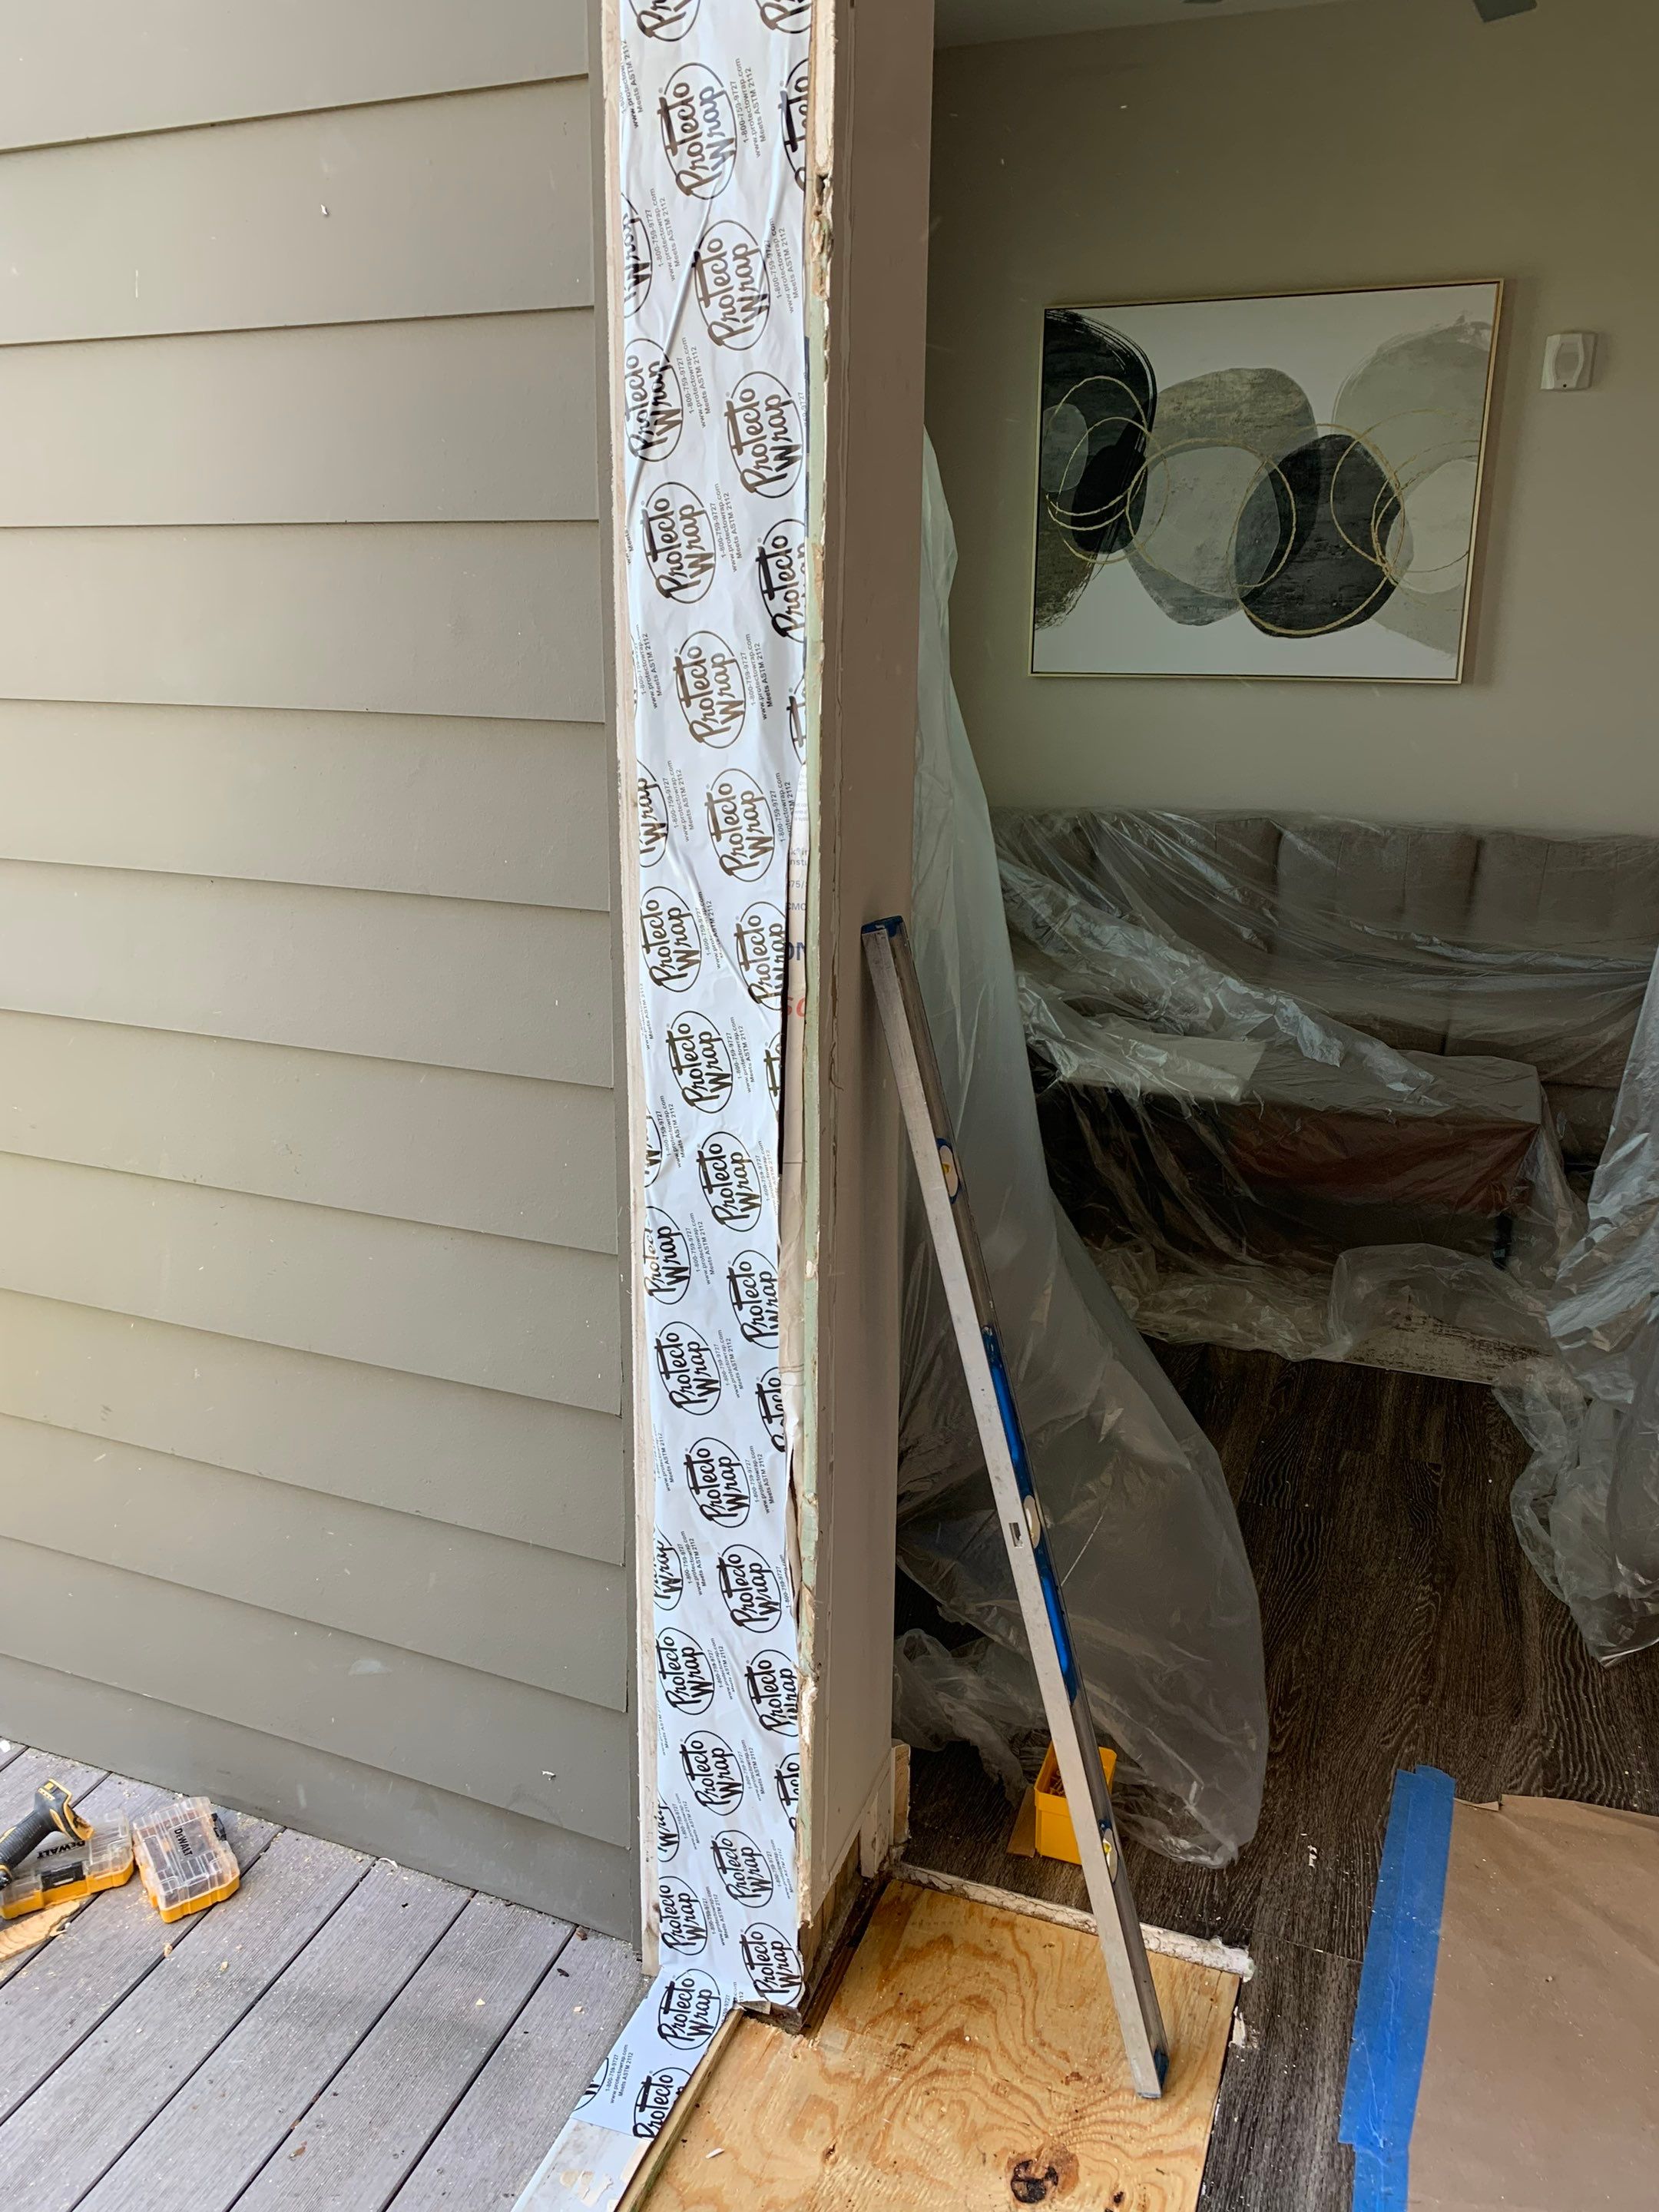 During
Exterior side of the doorway prepared with weather barrier and replacement subfloor.
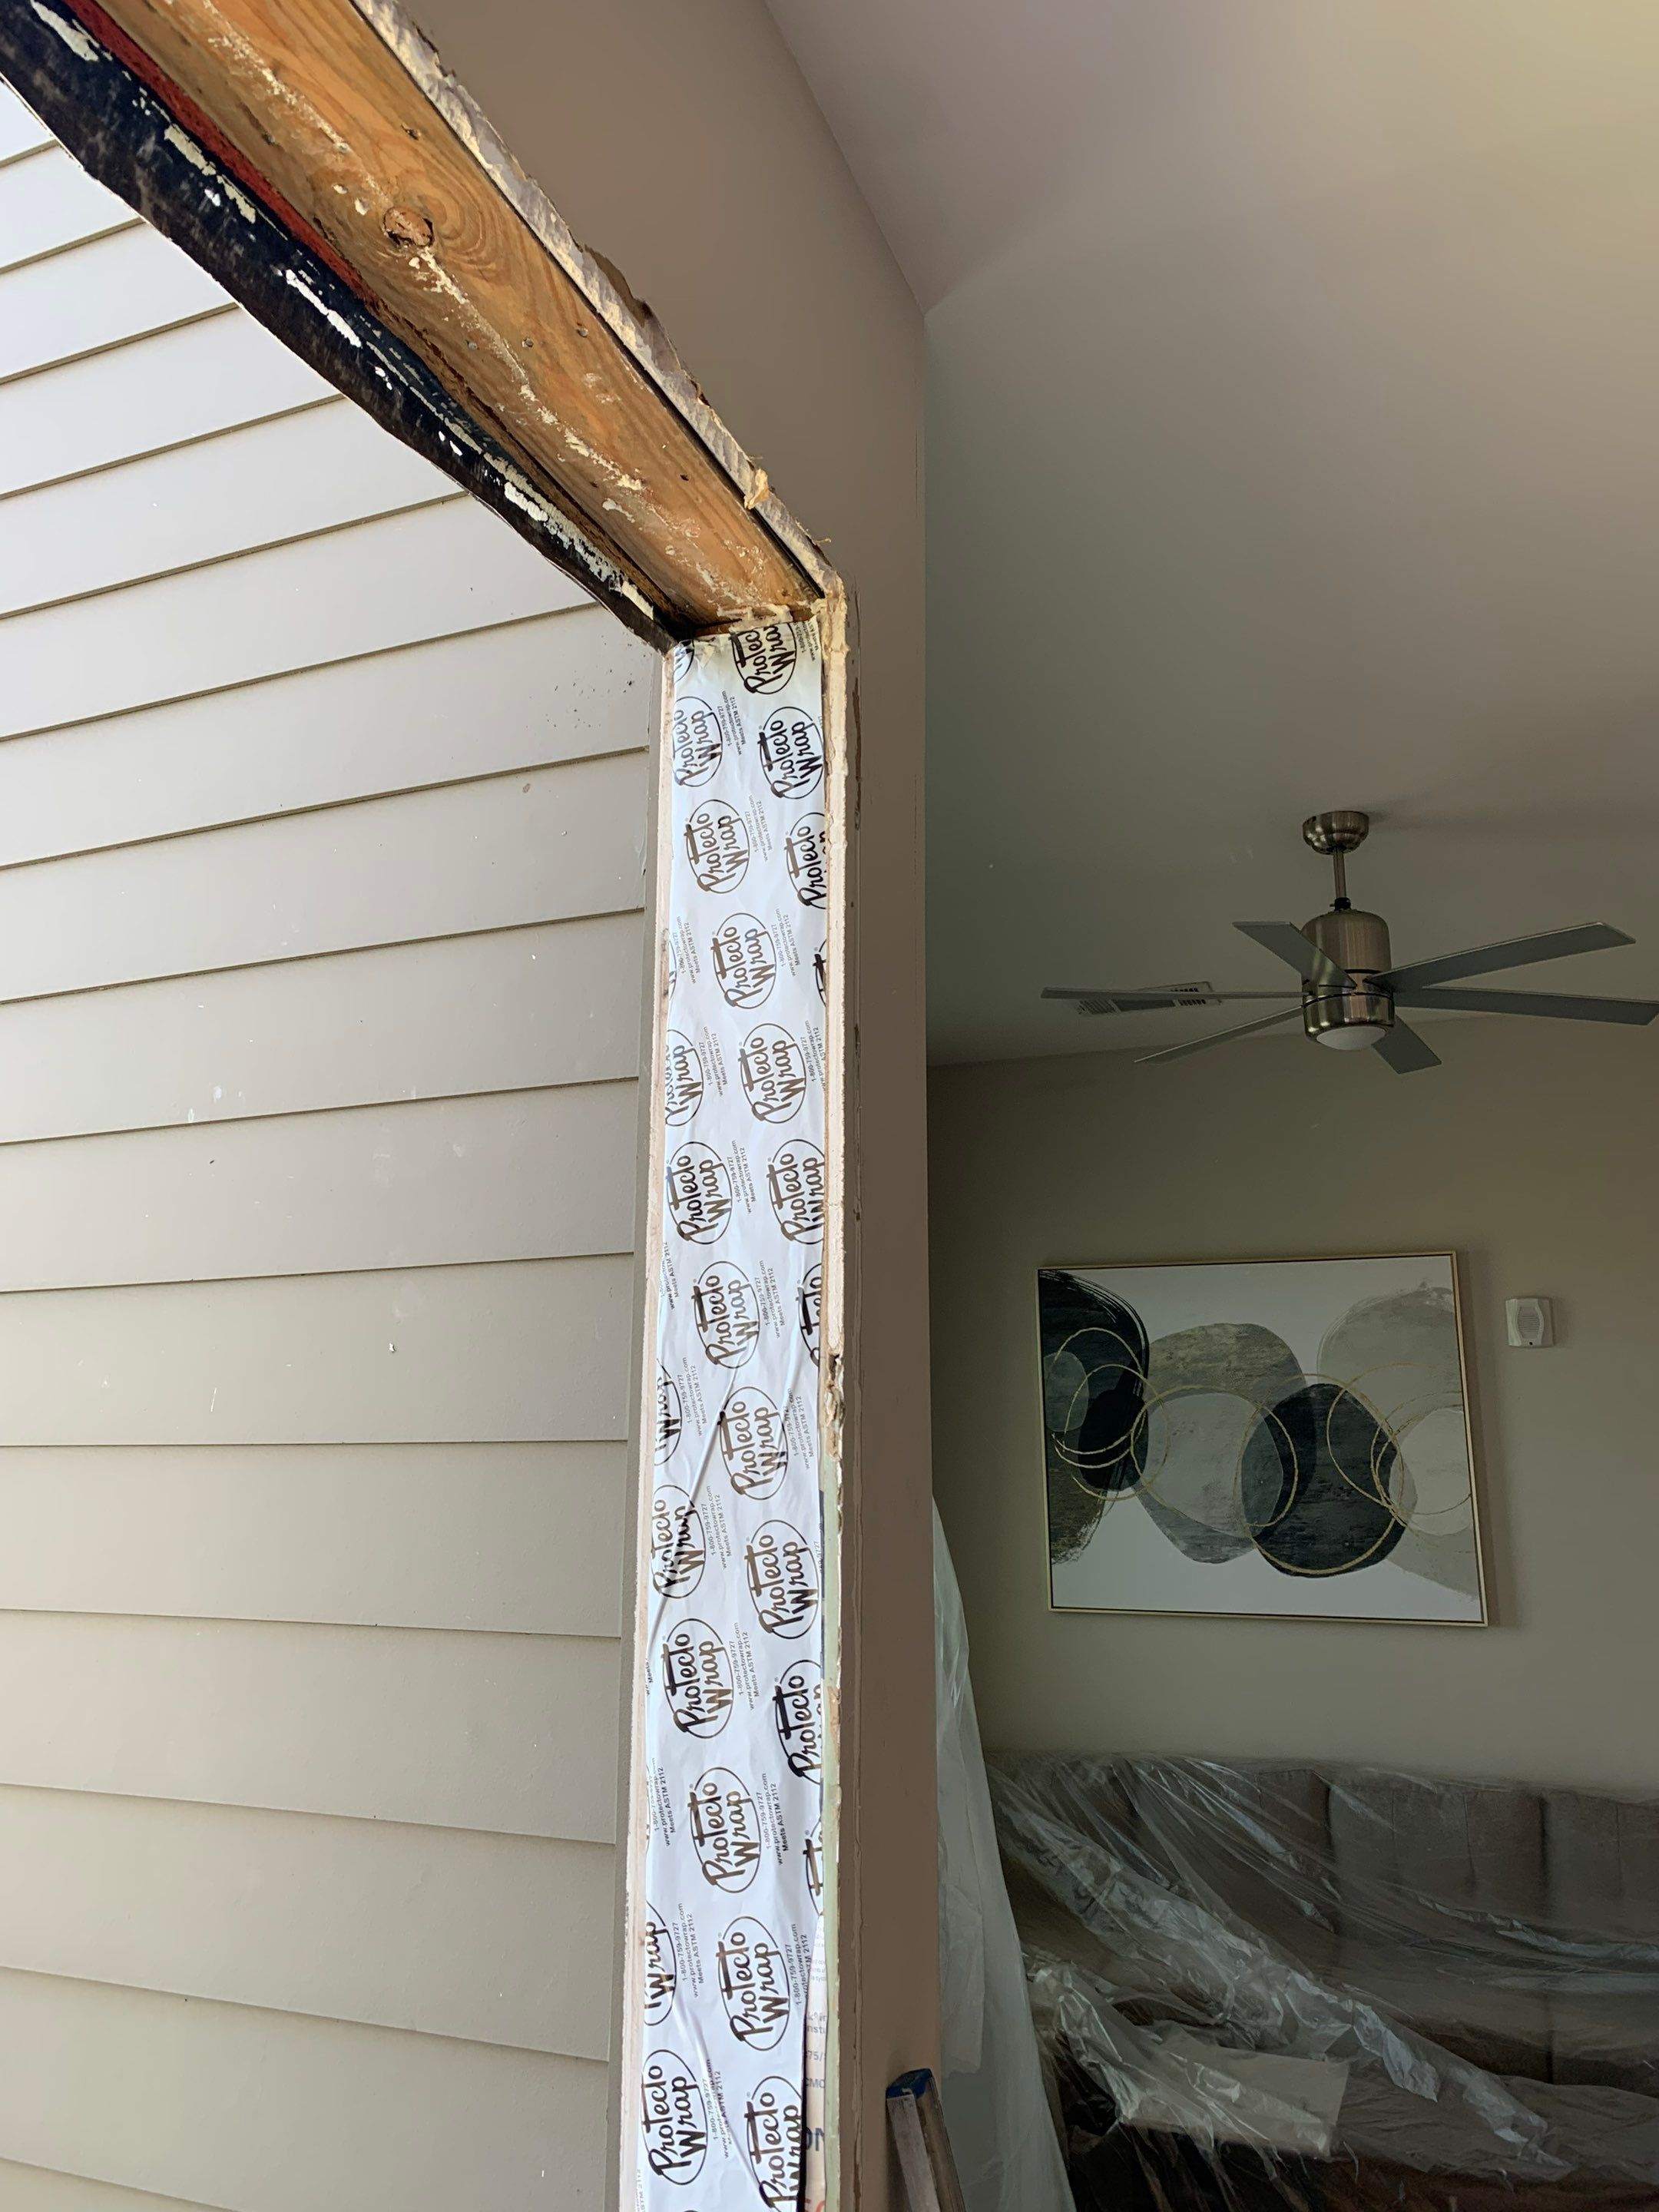 During
Interior view of the original door assembly and surrounding wall before finishing work.
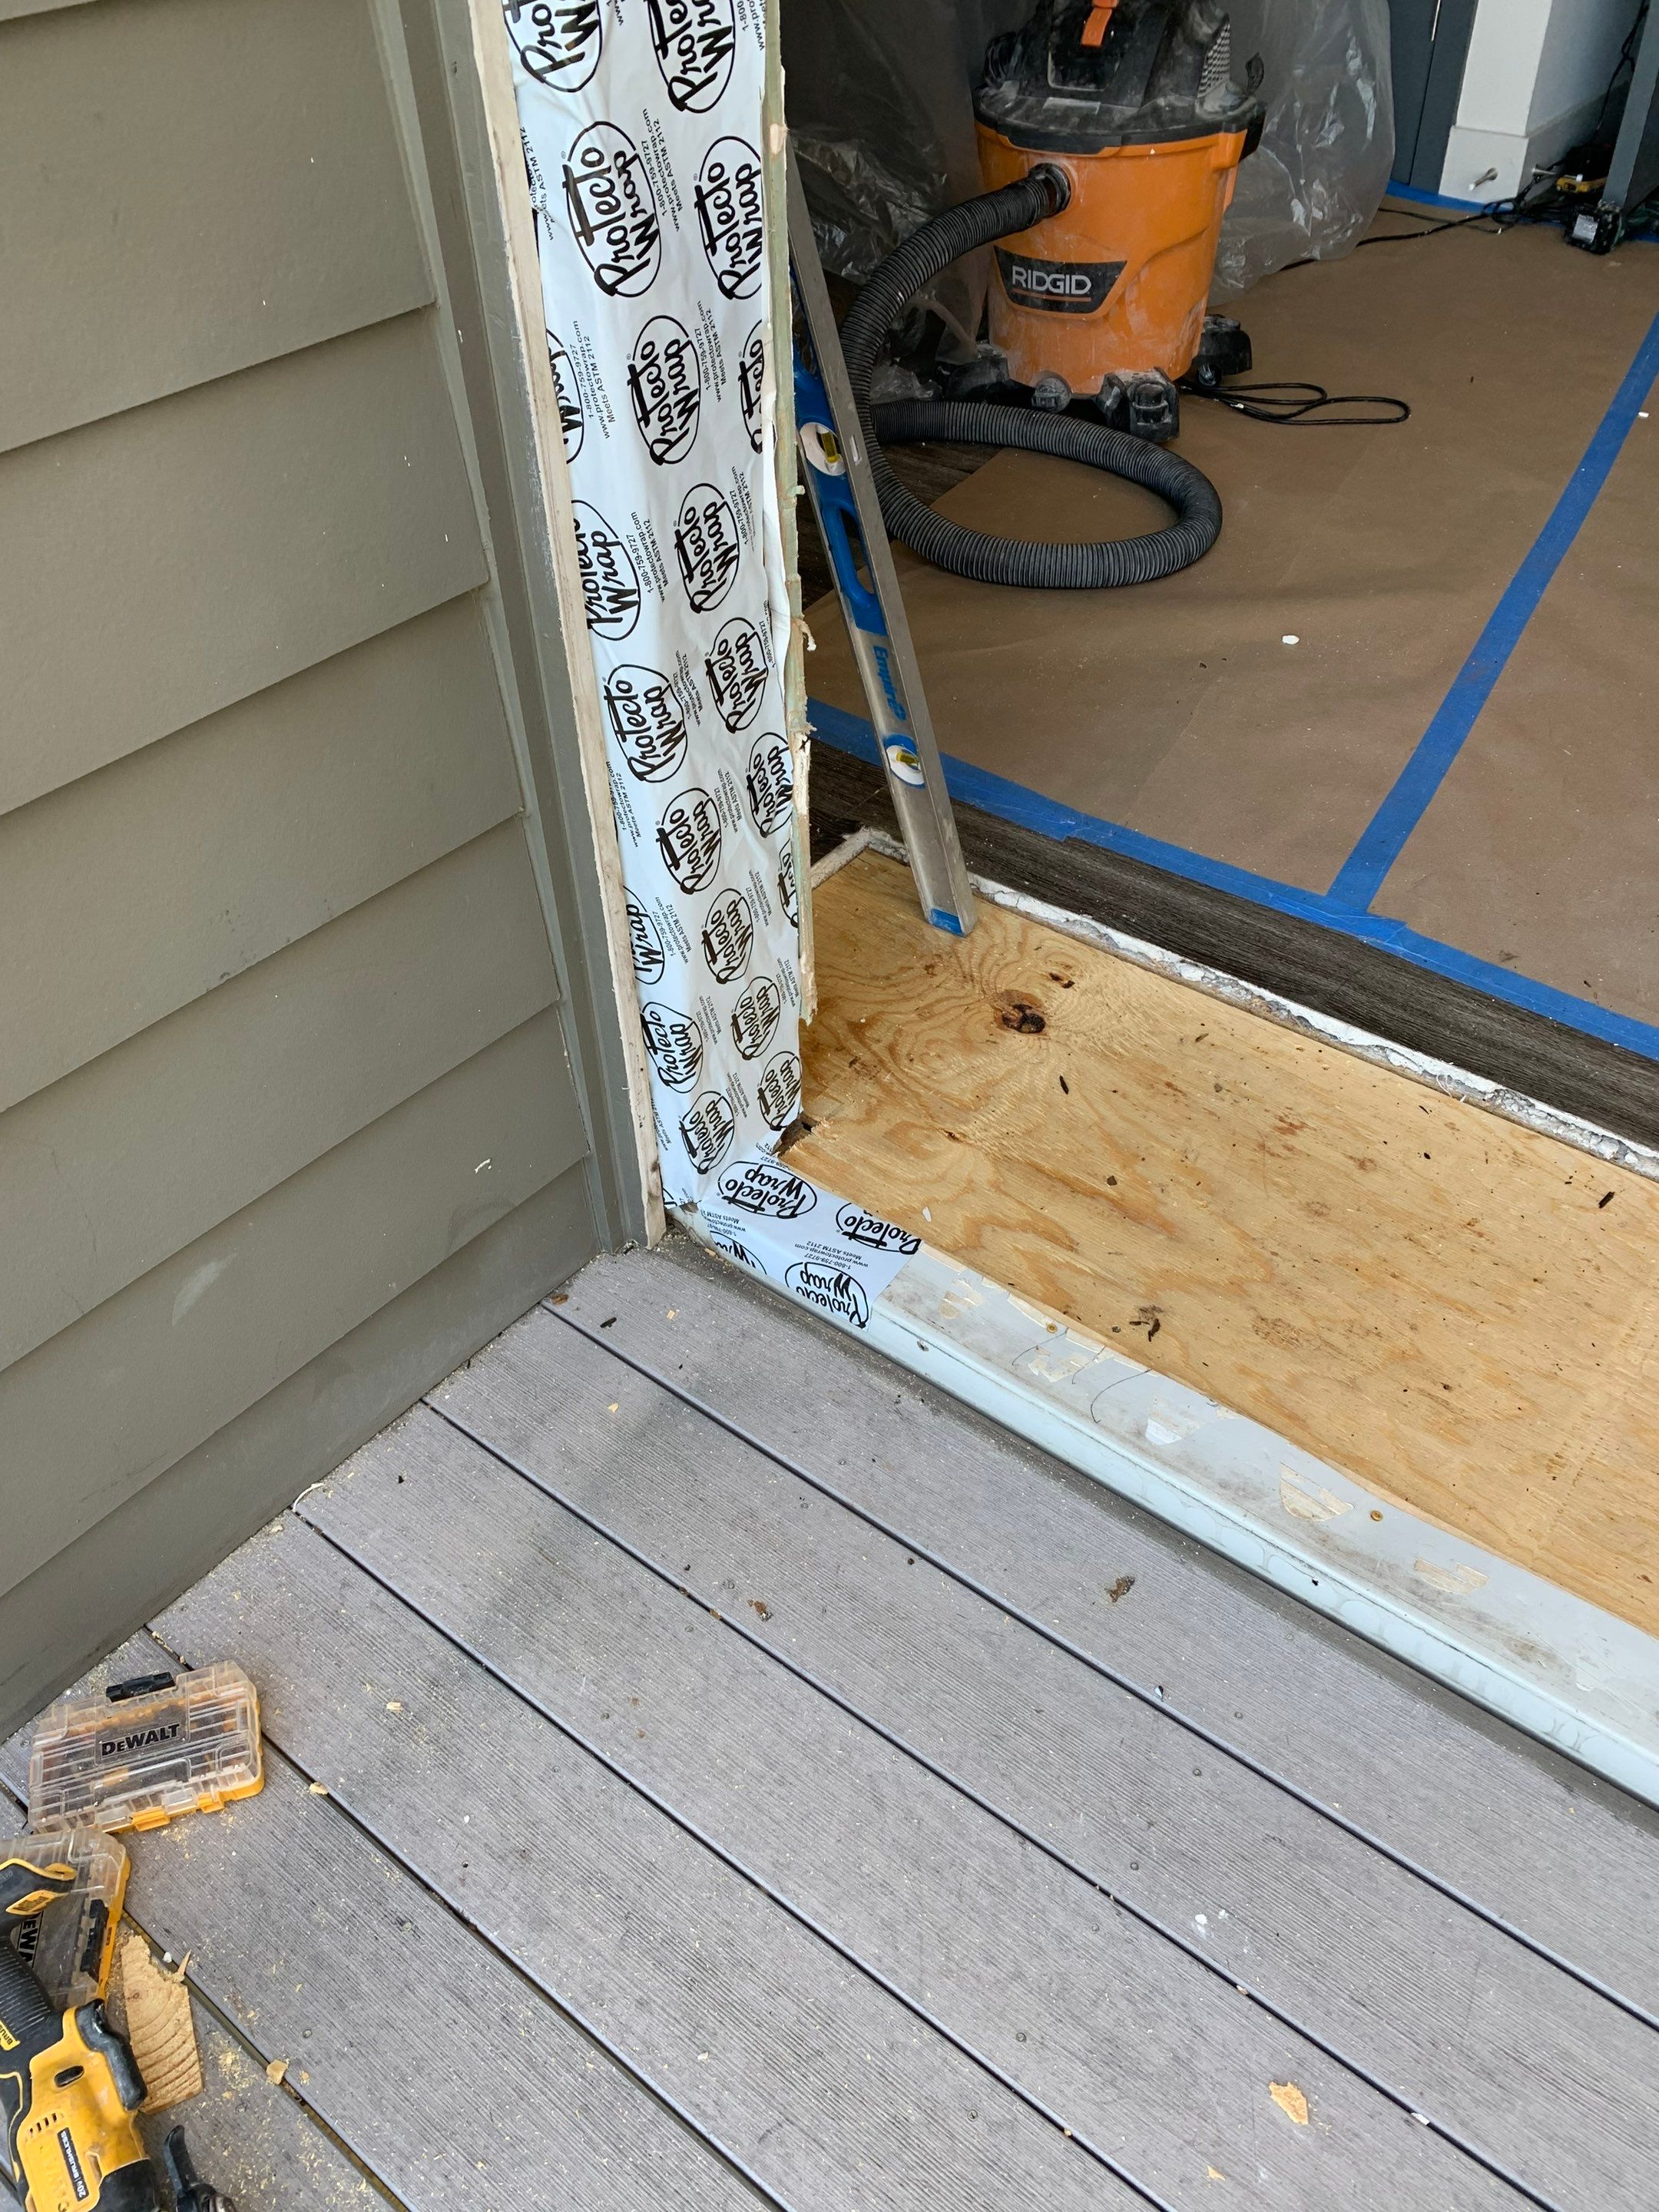 During
Exterior view of the repaired threshold area showing new plywood and exposed door jamb preparation.
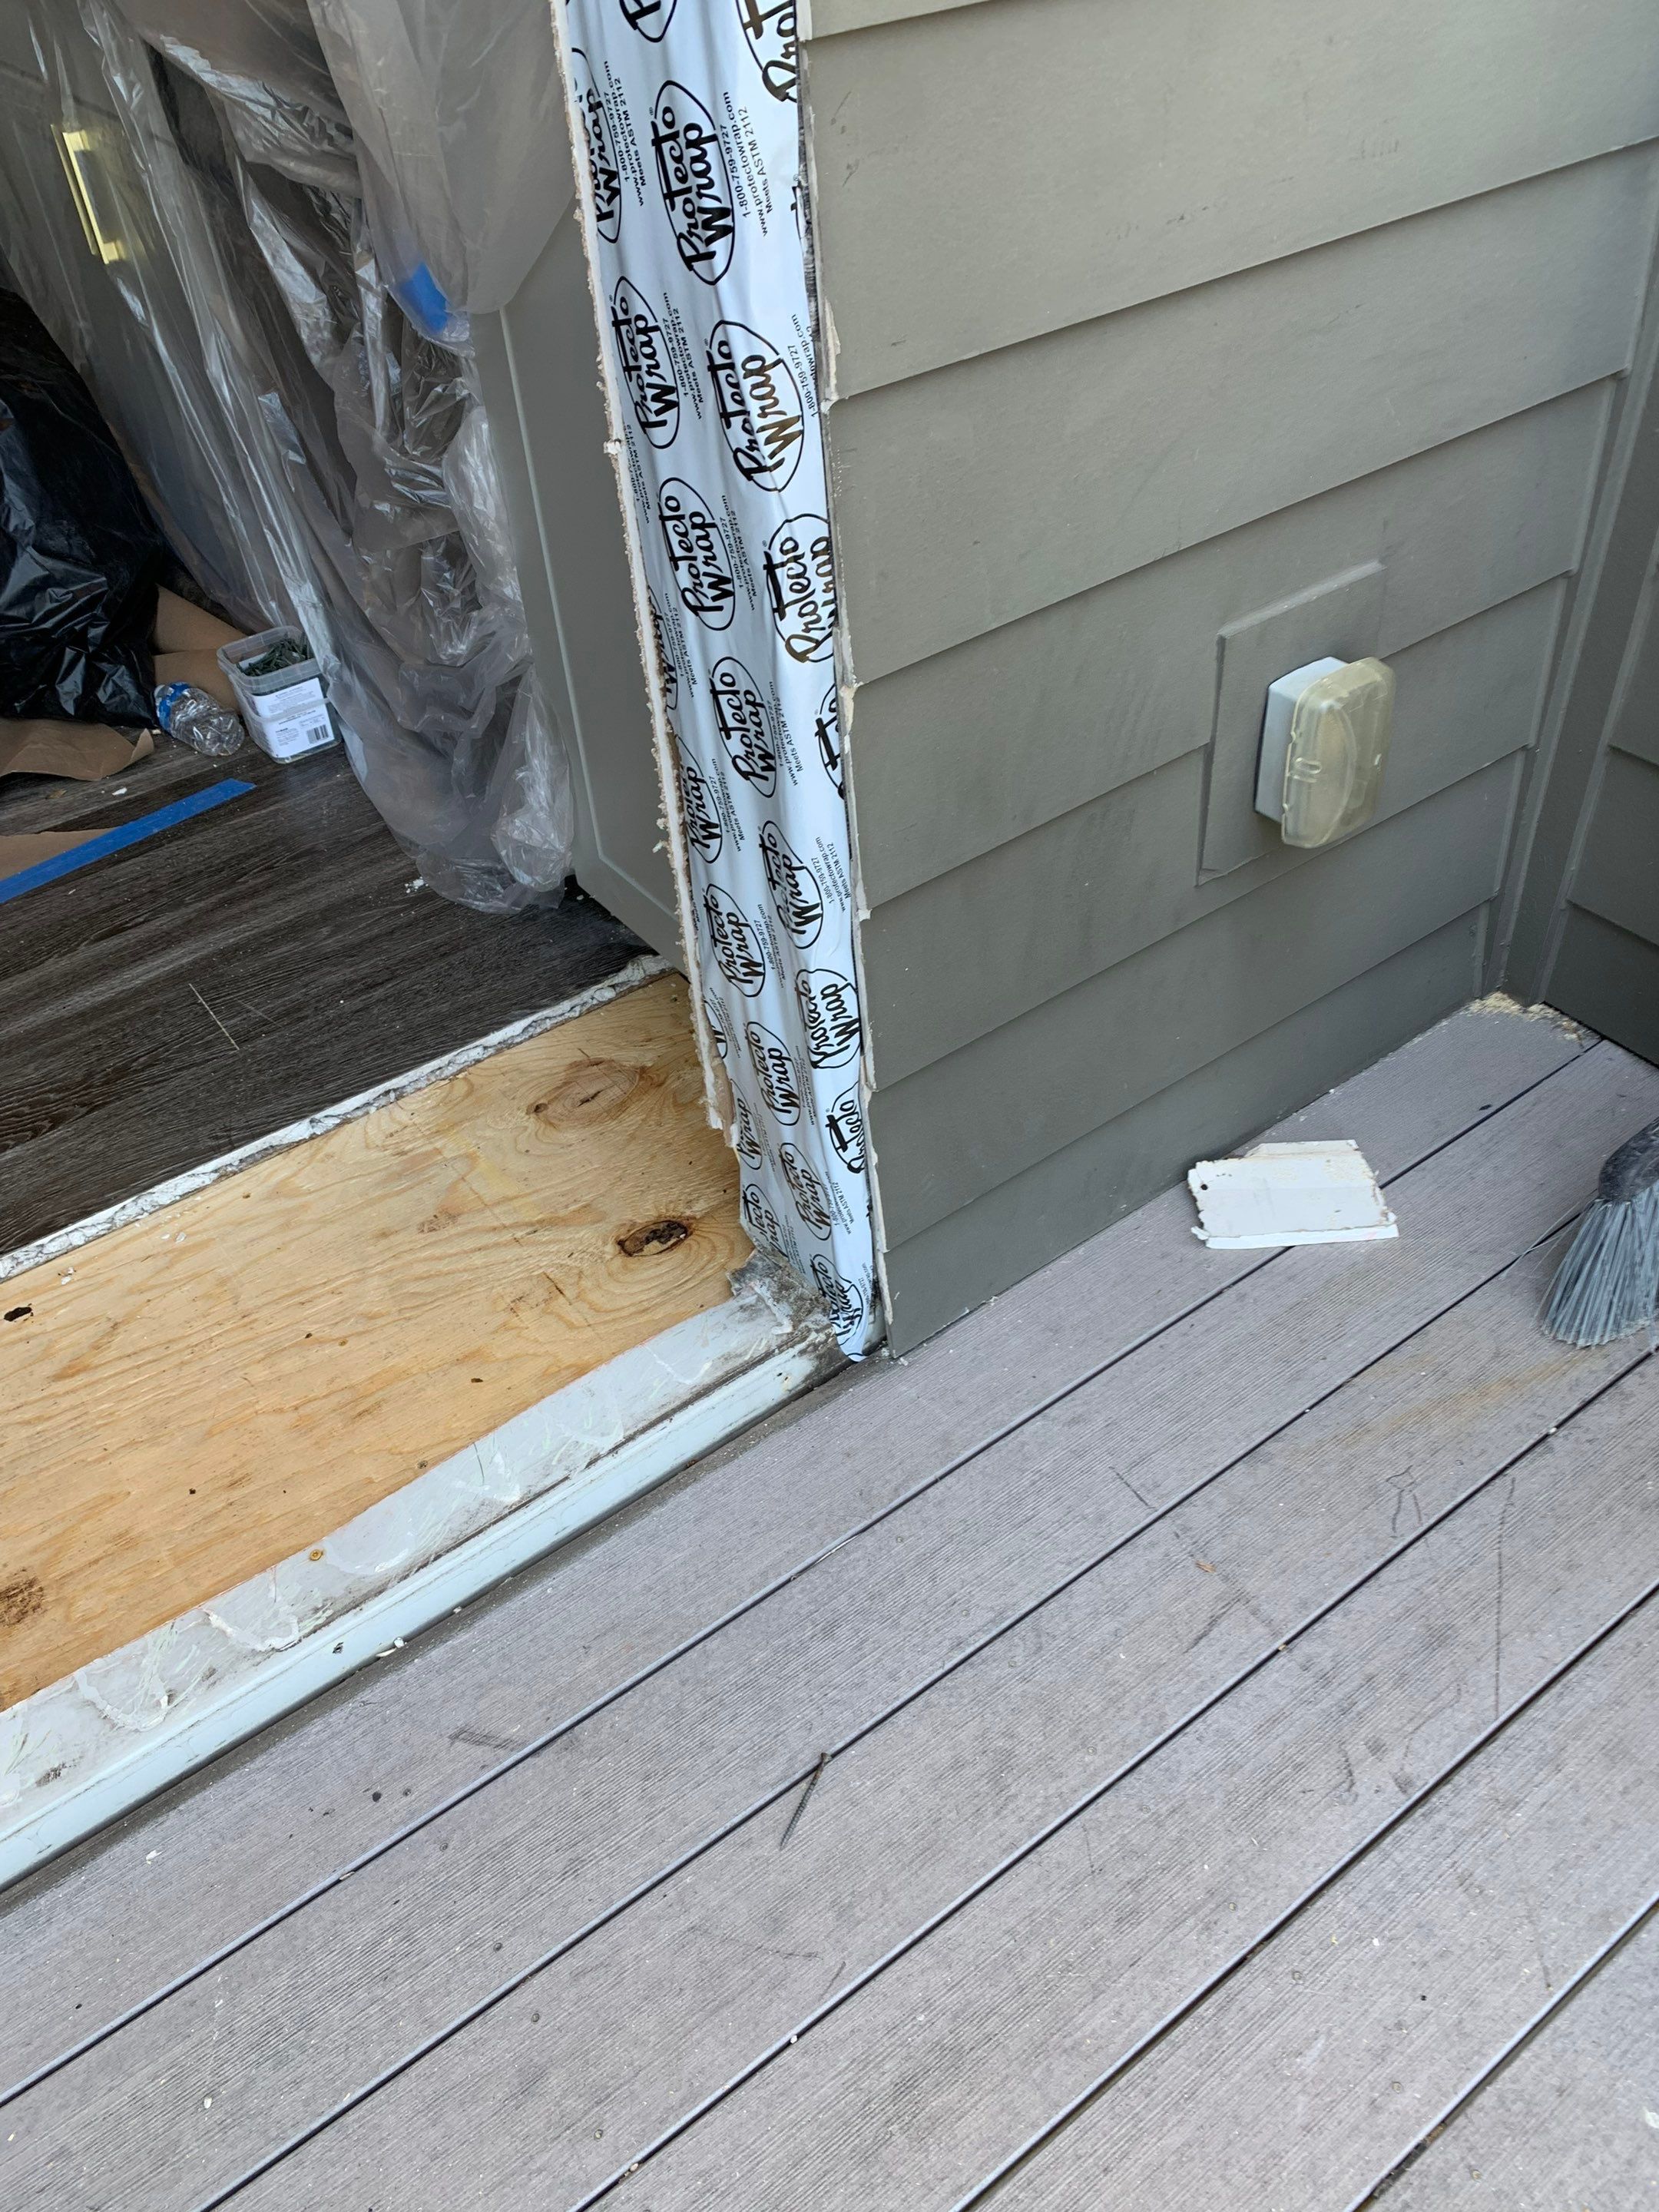 During
Balcony-side view of the replacement subfloor and weather-resistant barrier along the jamb.
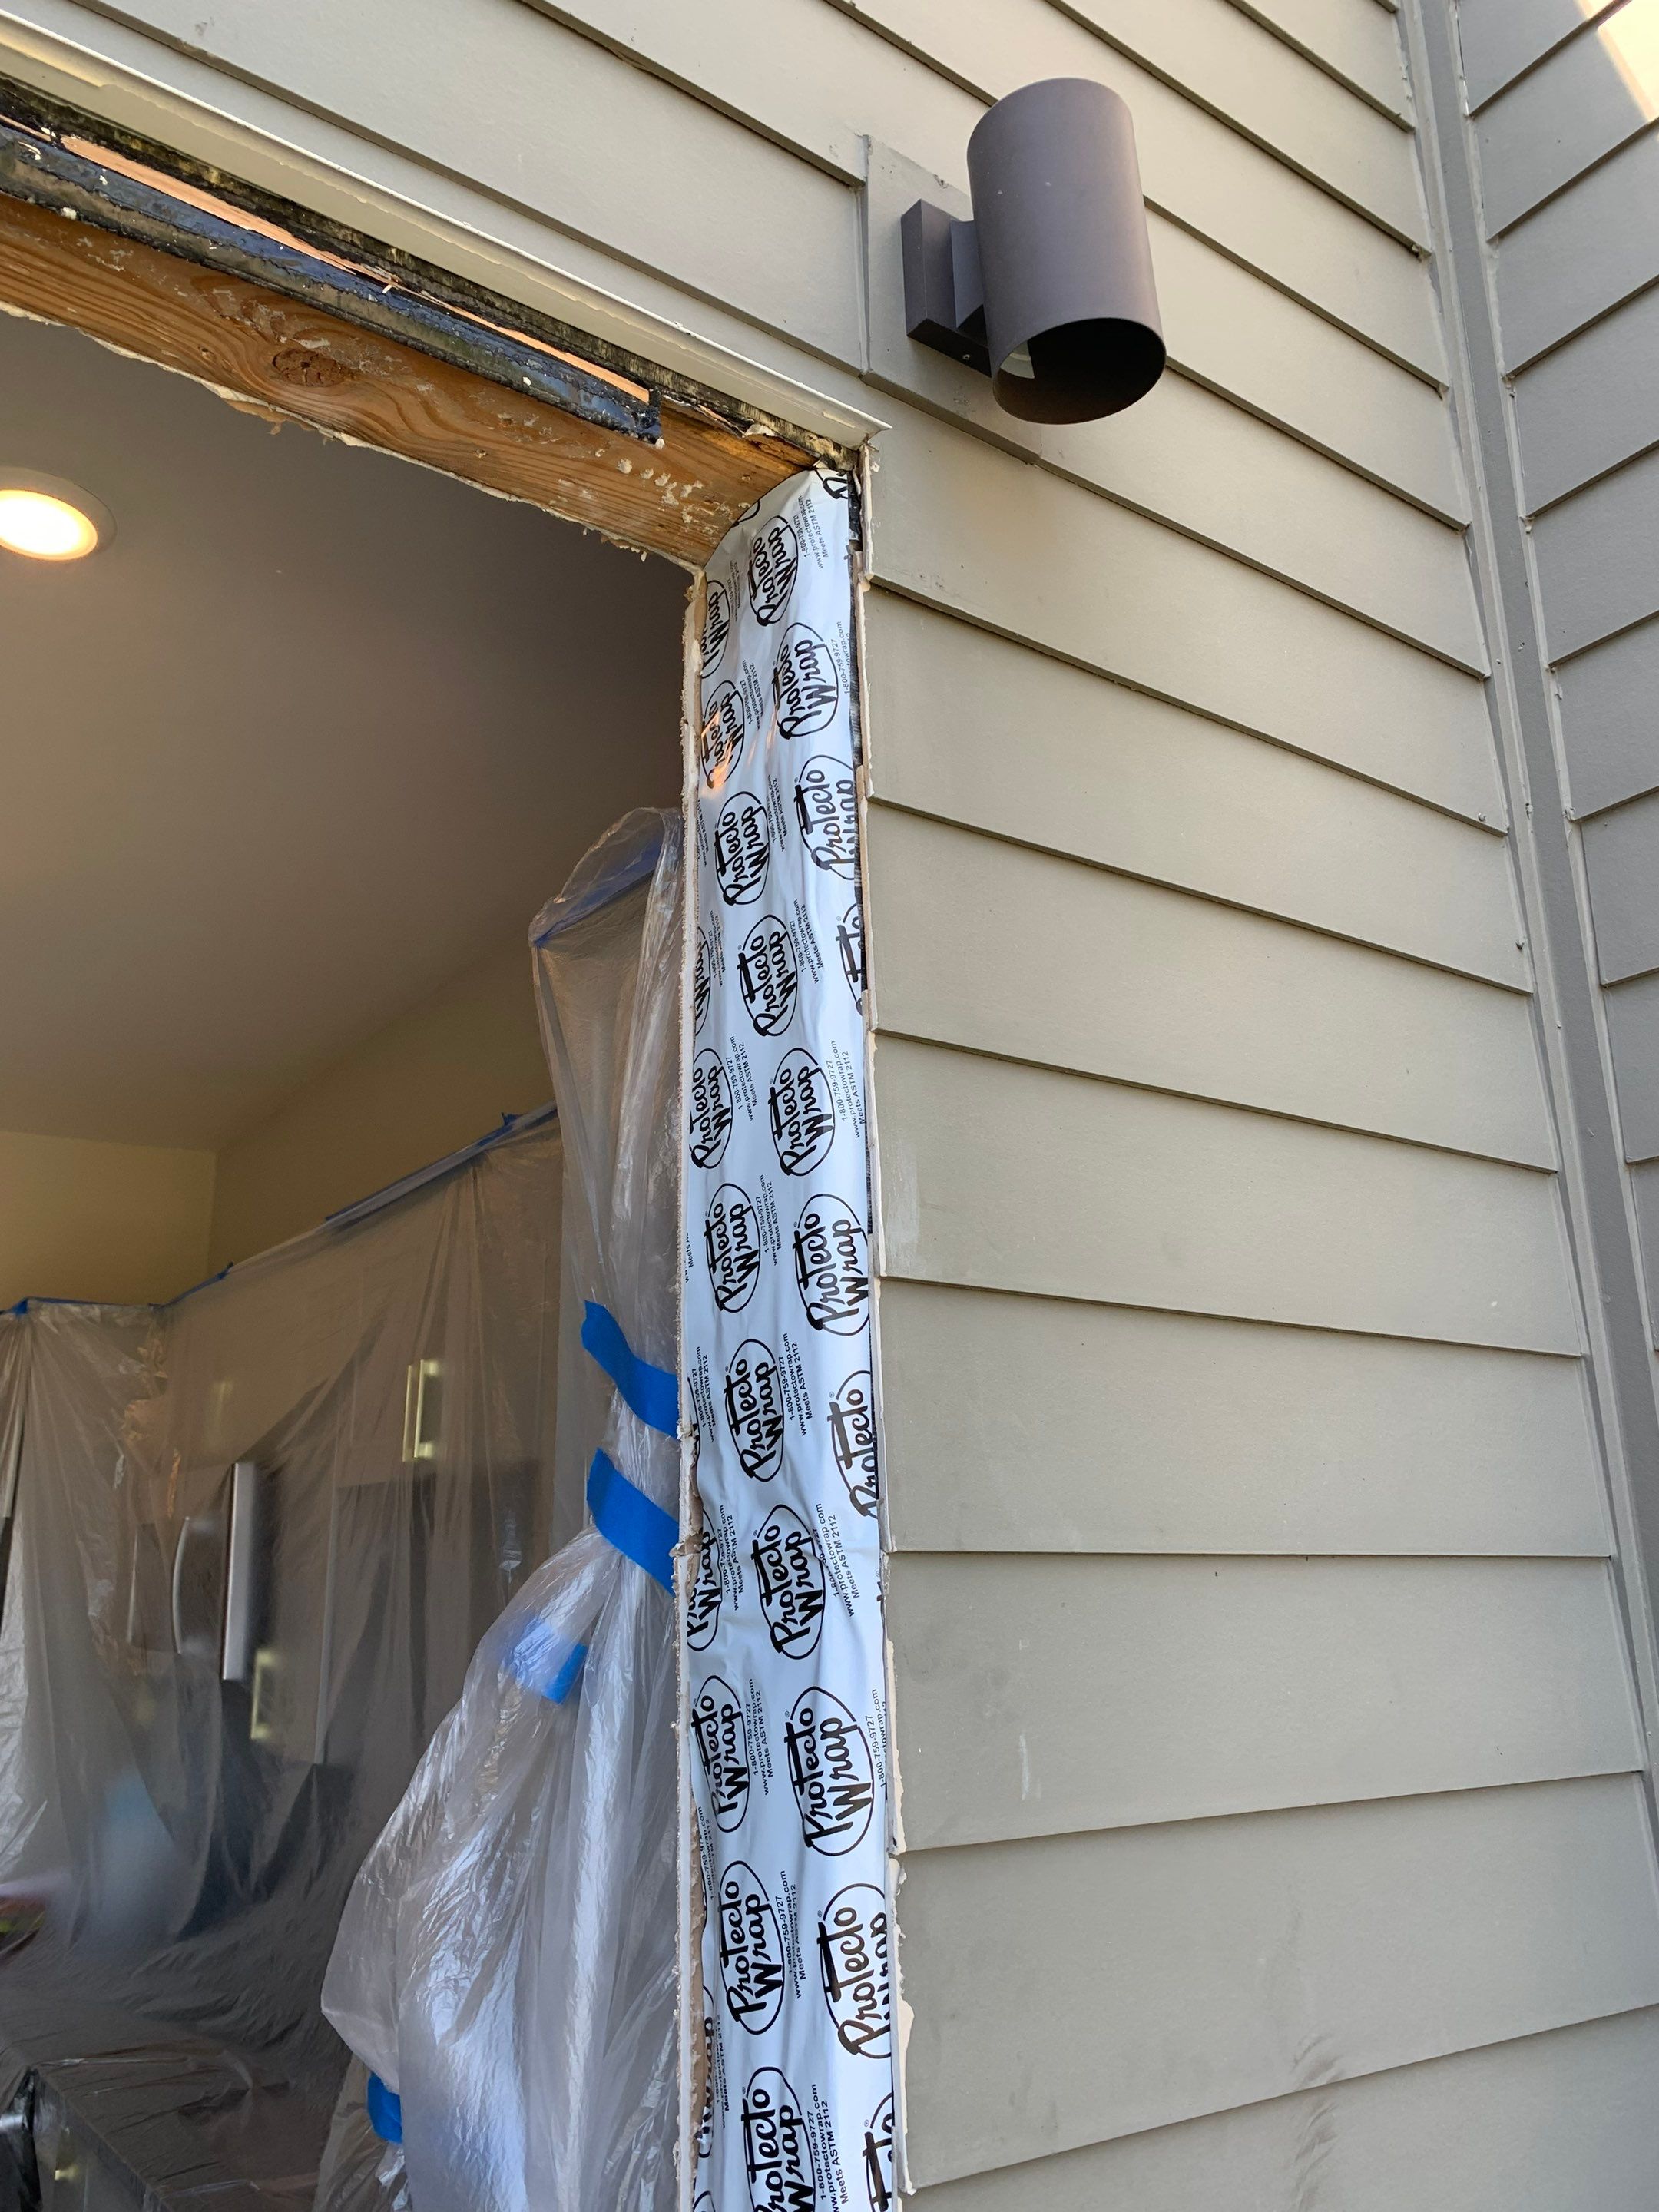 During
Exterior doorway framing with weather barrier installed along the jamb beneath the existing light fixture.
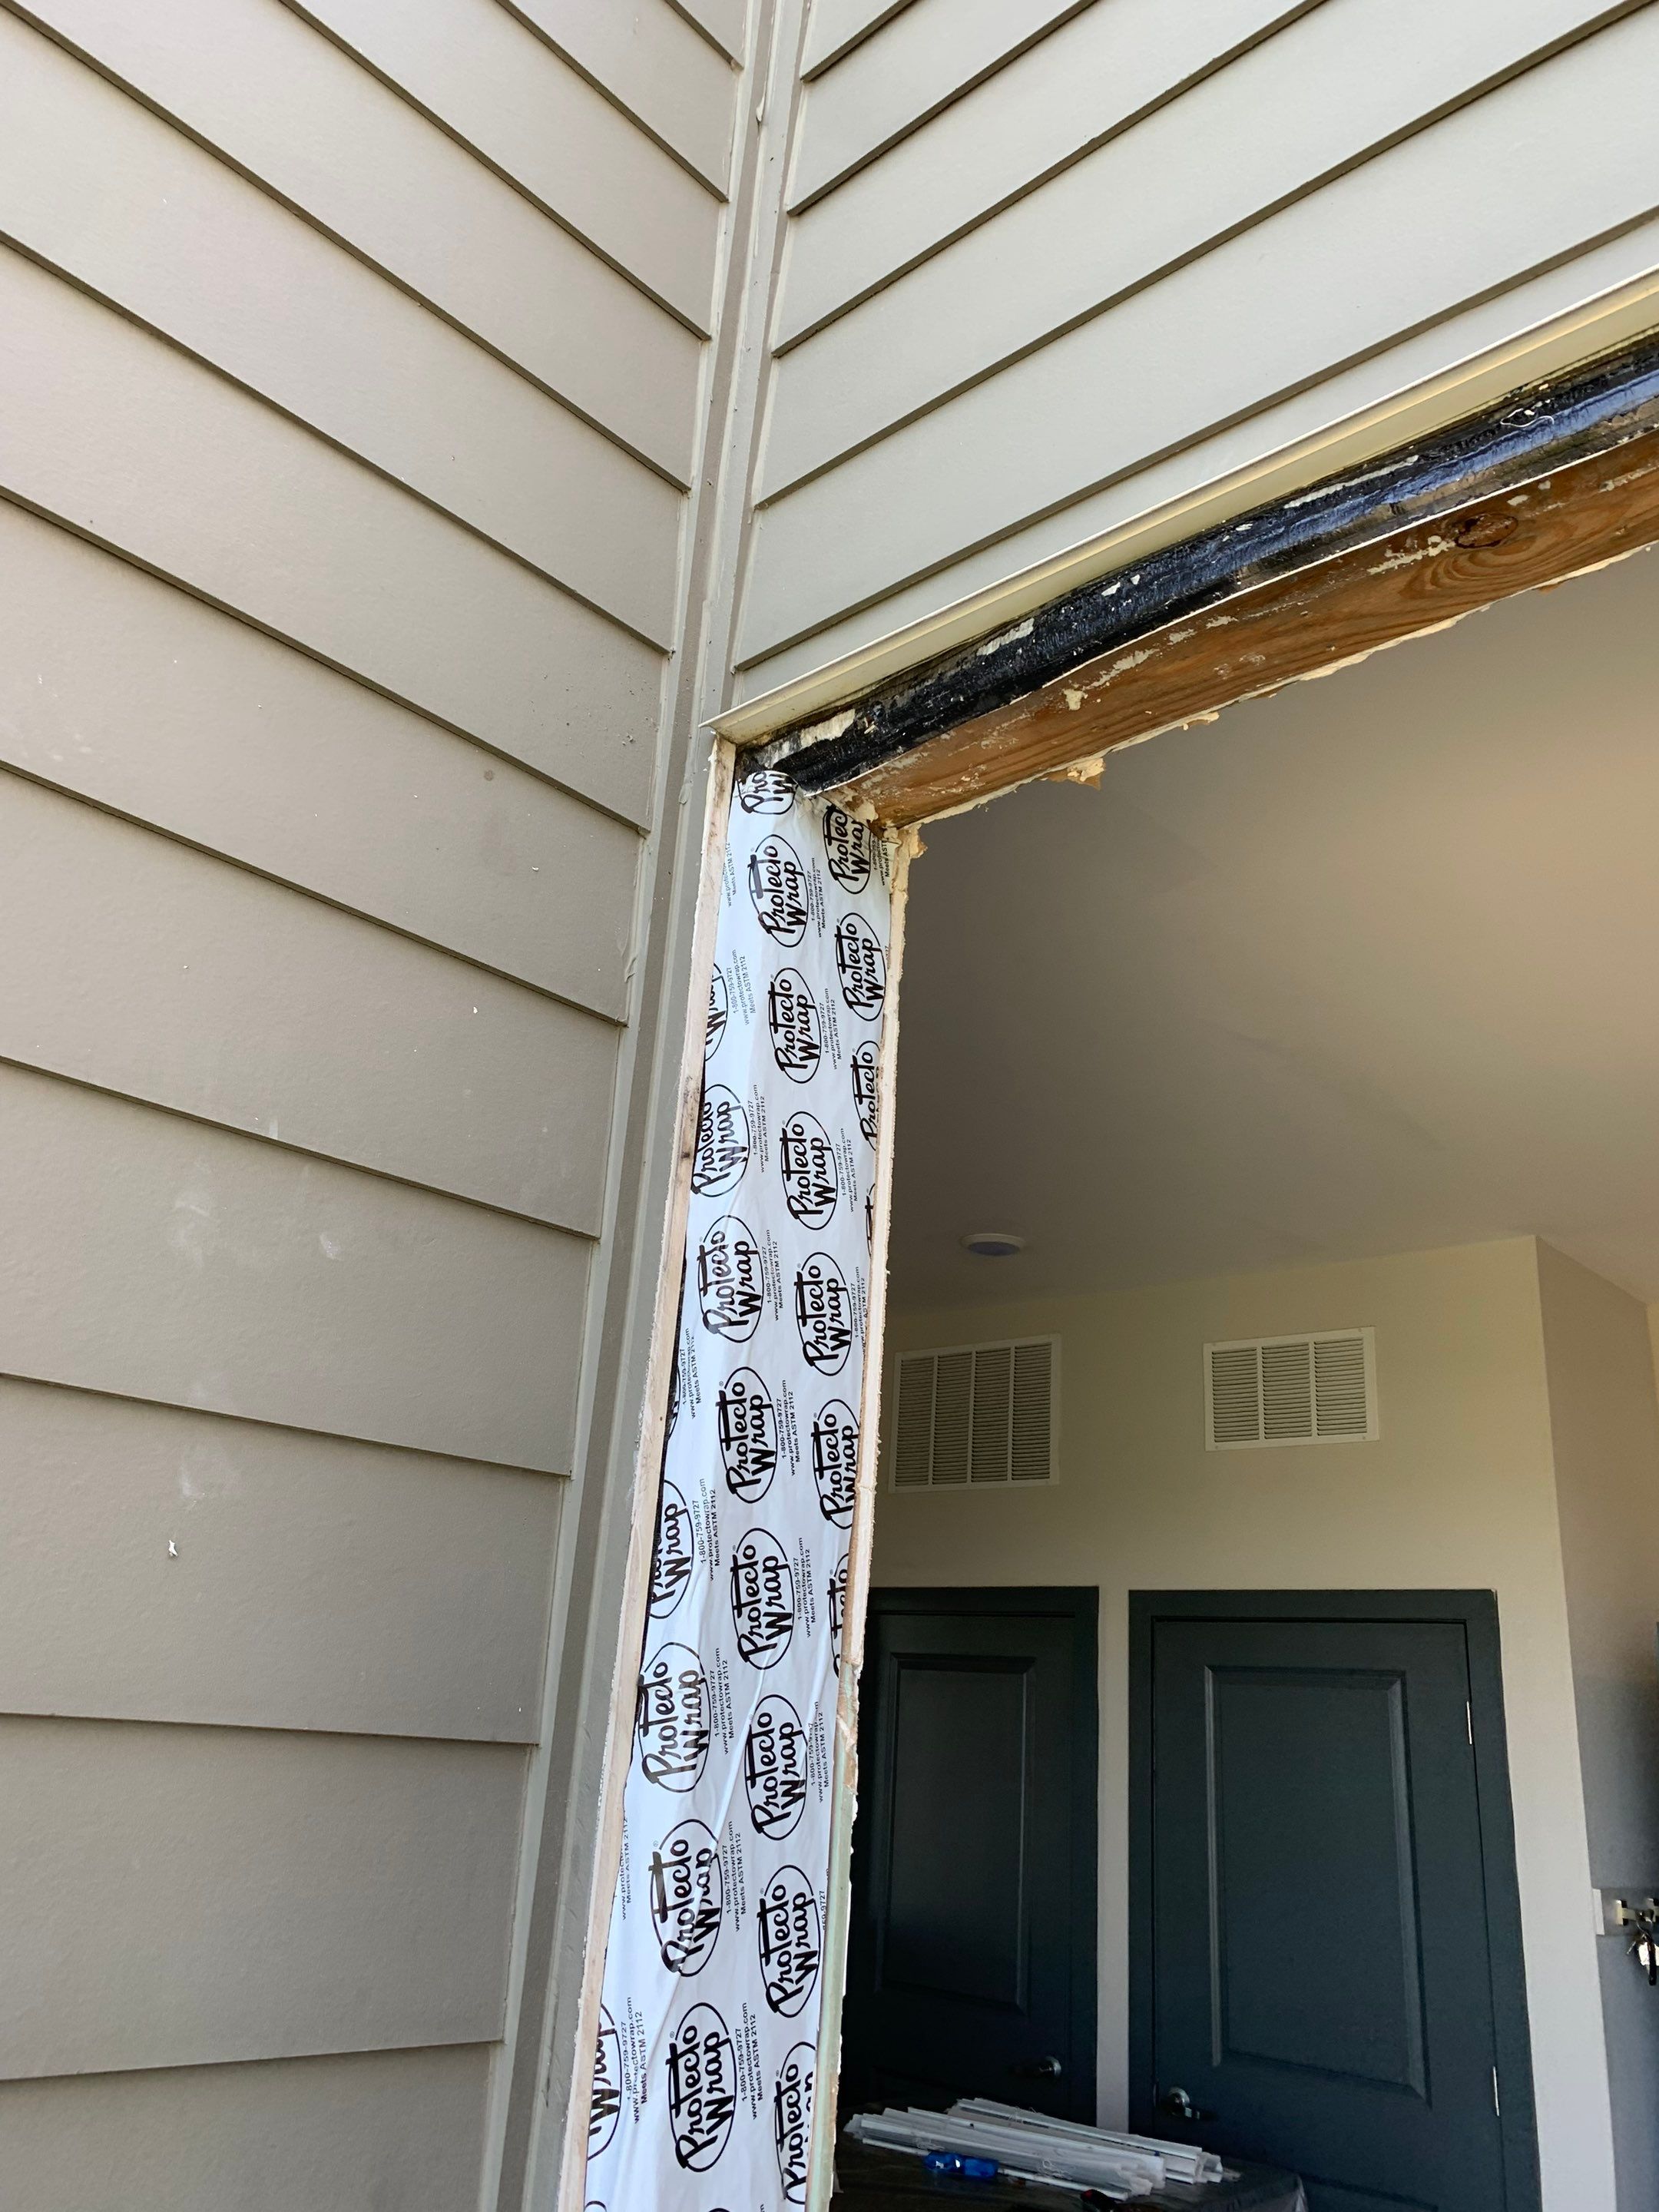 During
Upper exterior corner showing weather barrier preparation and exposed framing before door installation.
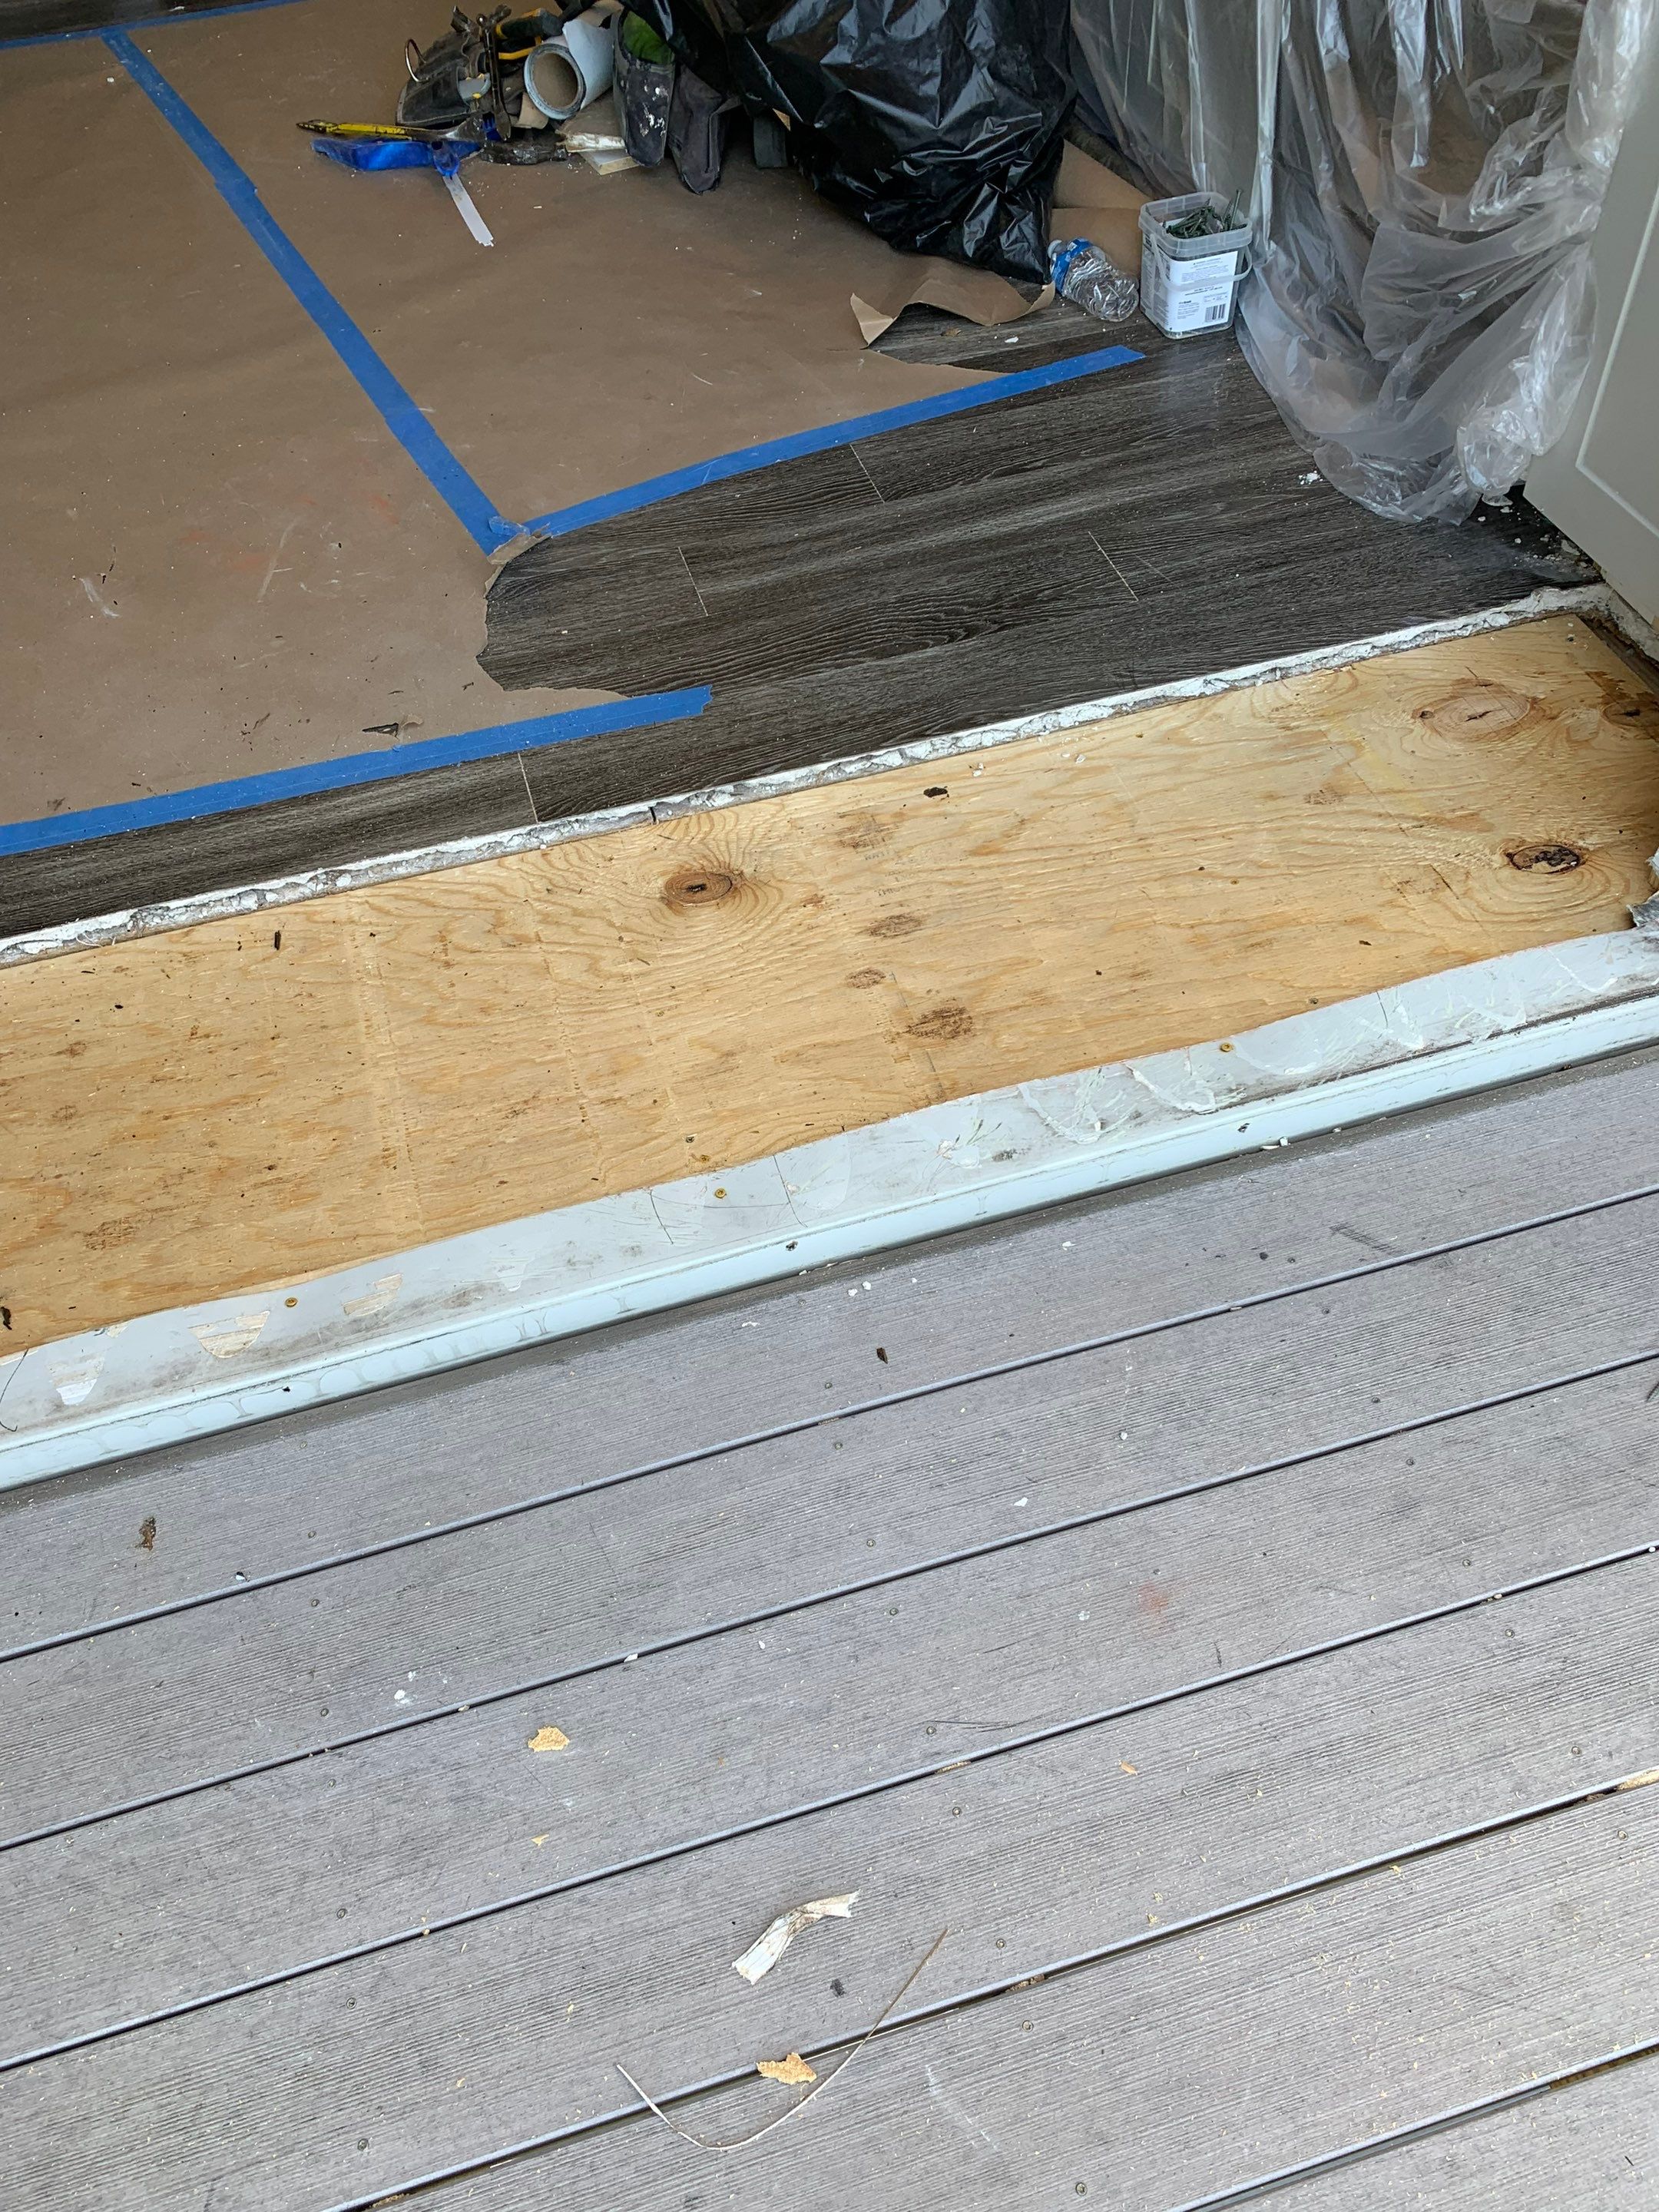 During
Repaired threshold area showing new plywood subfloor and the adjoining original flooring.
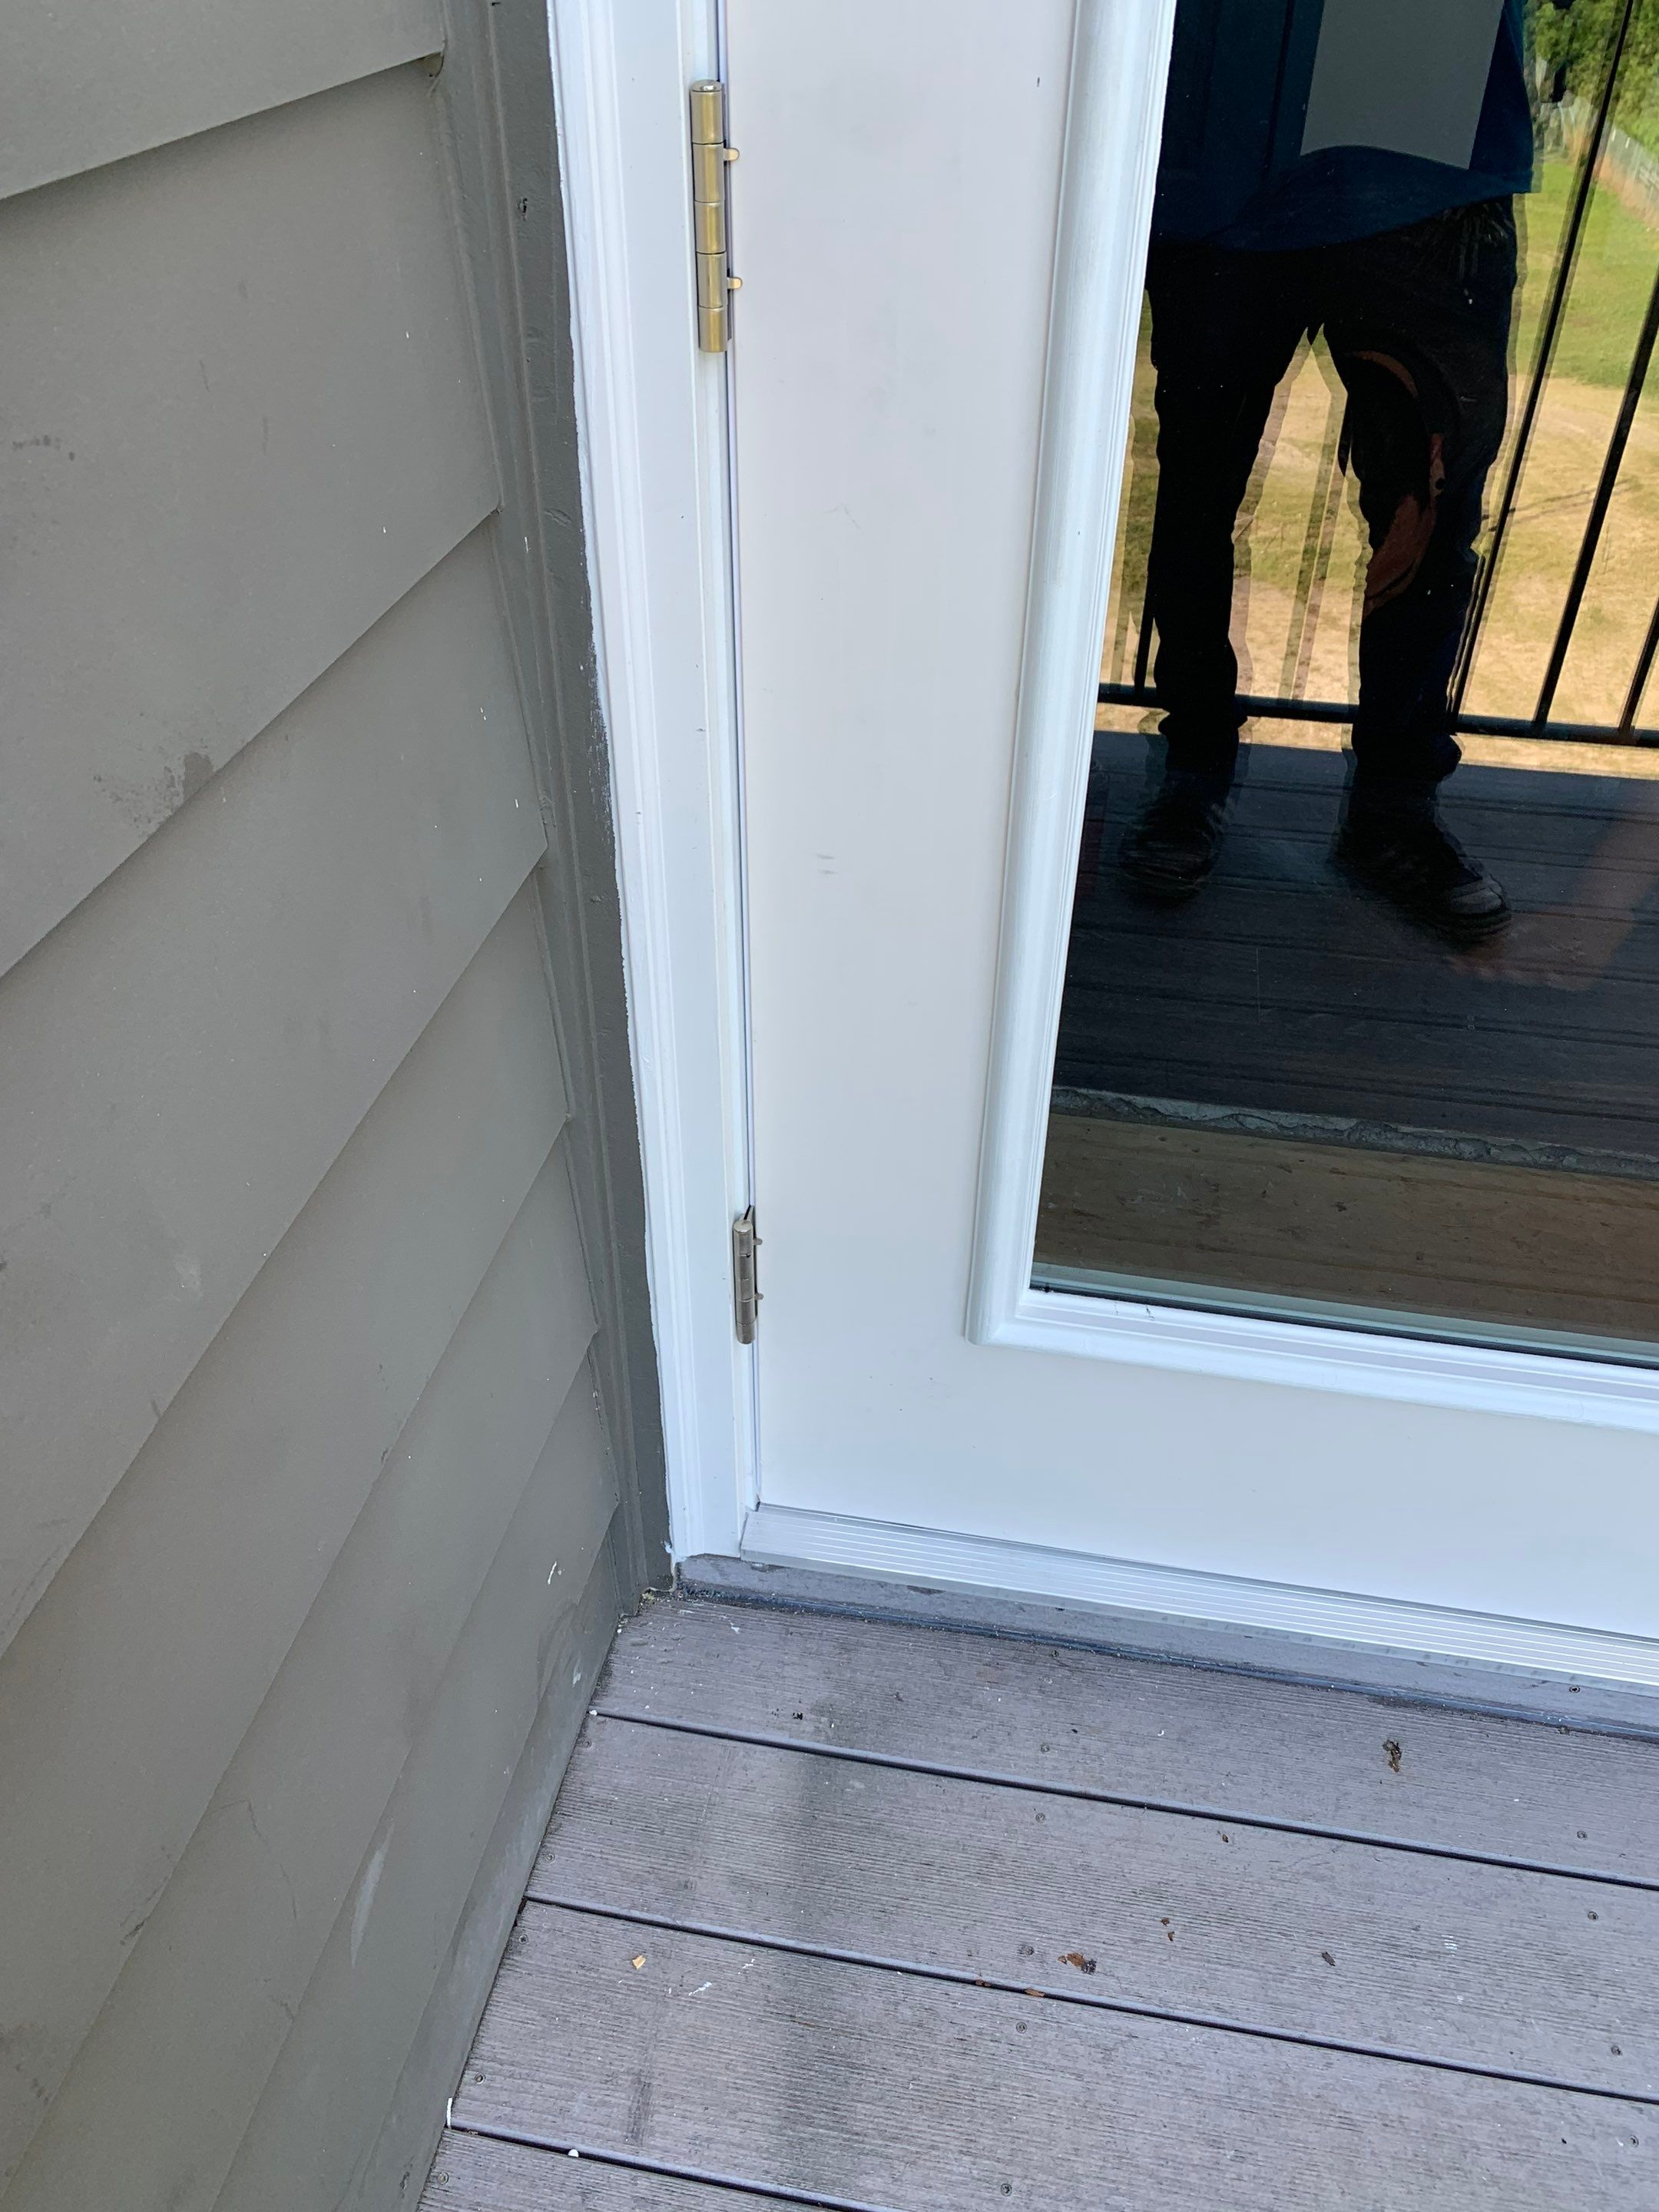 During
Lower exterior corner of the newly installed balcony door with surrounding trim and siding restored.
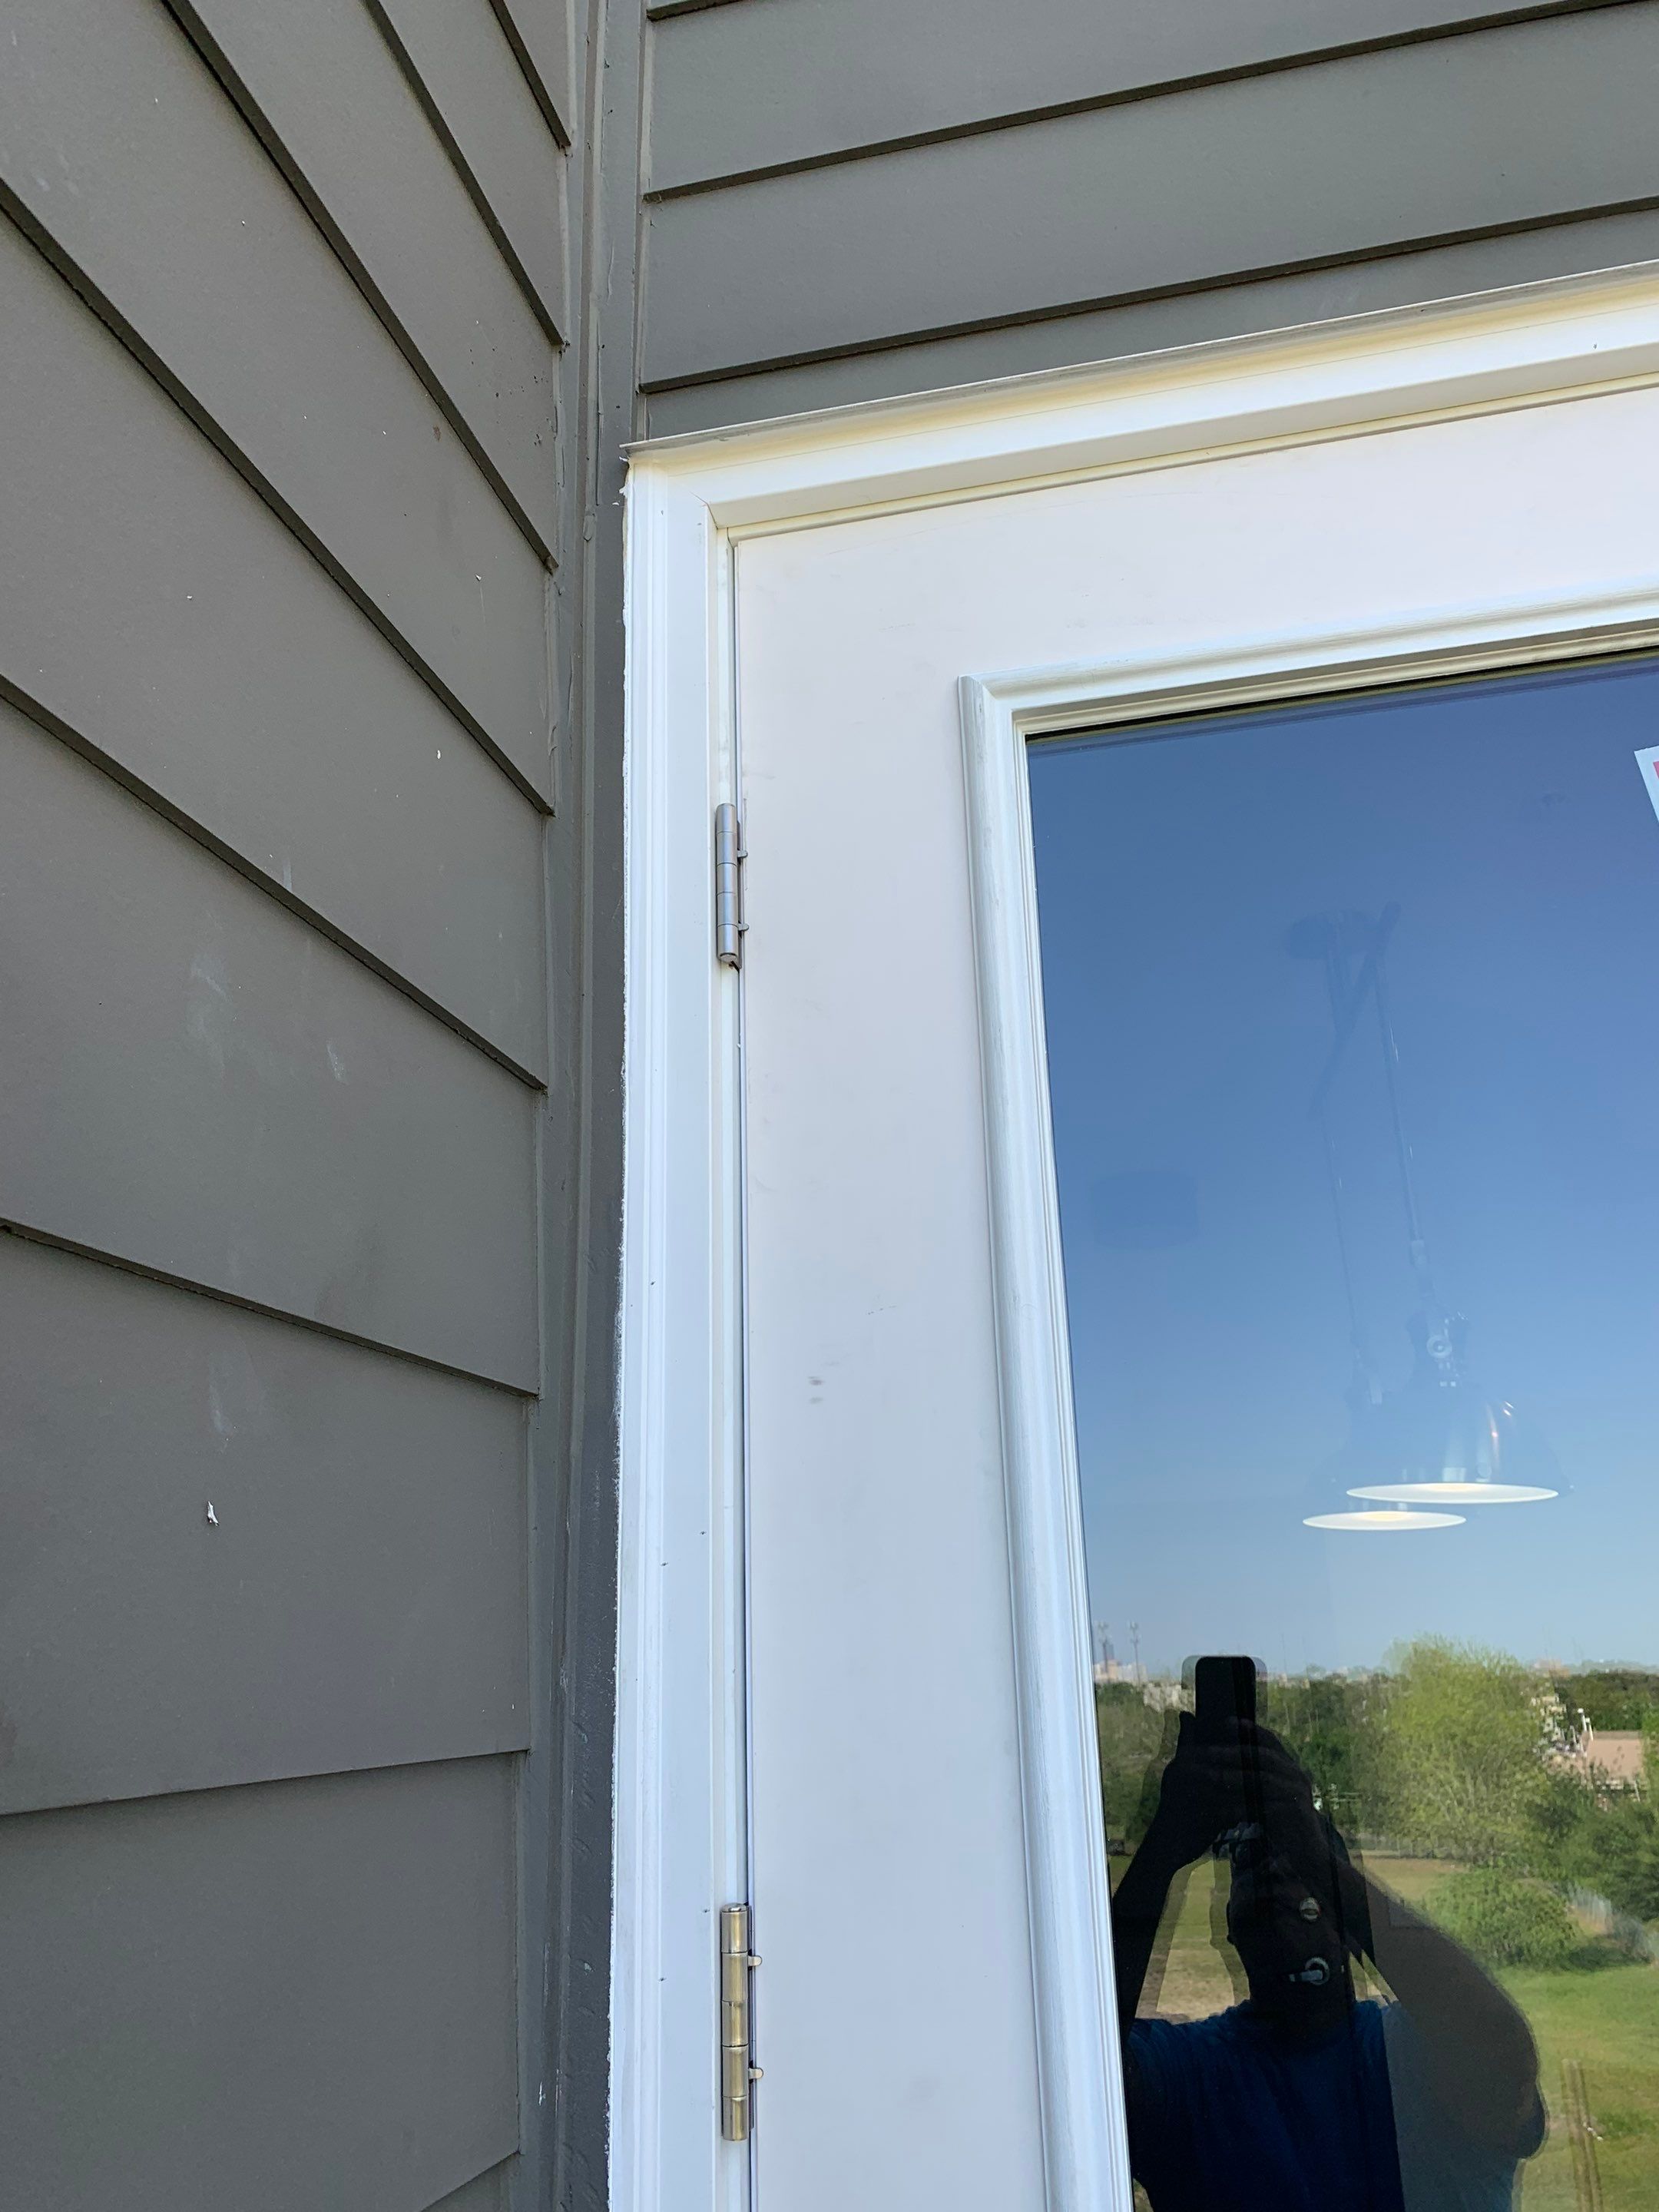 During
Upper exterior corner of the replacement balcony door showing its finished frame and trim.
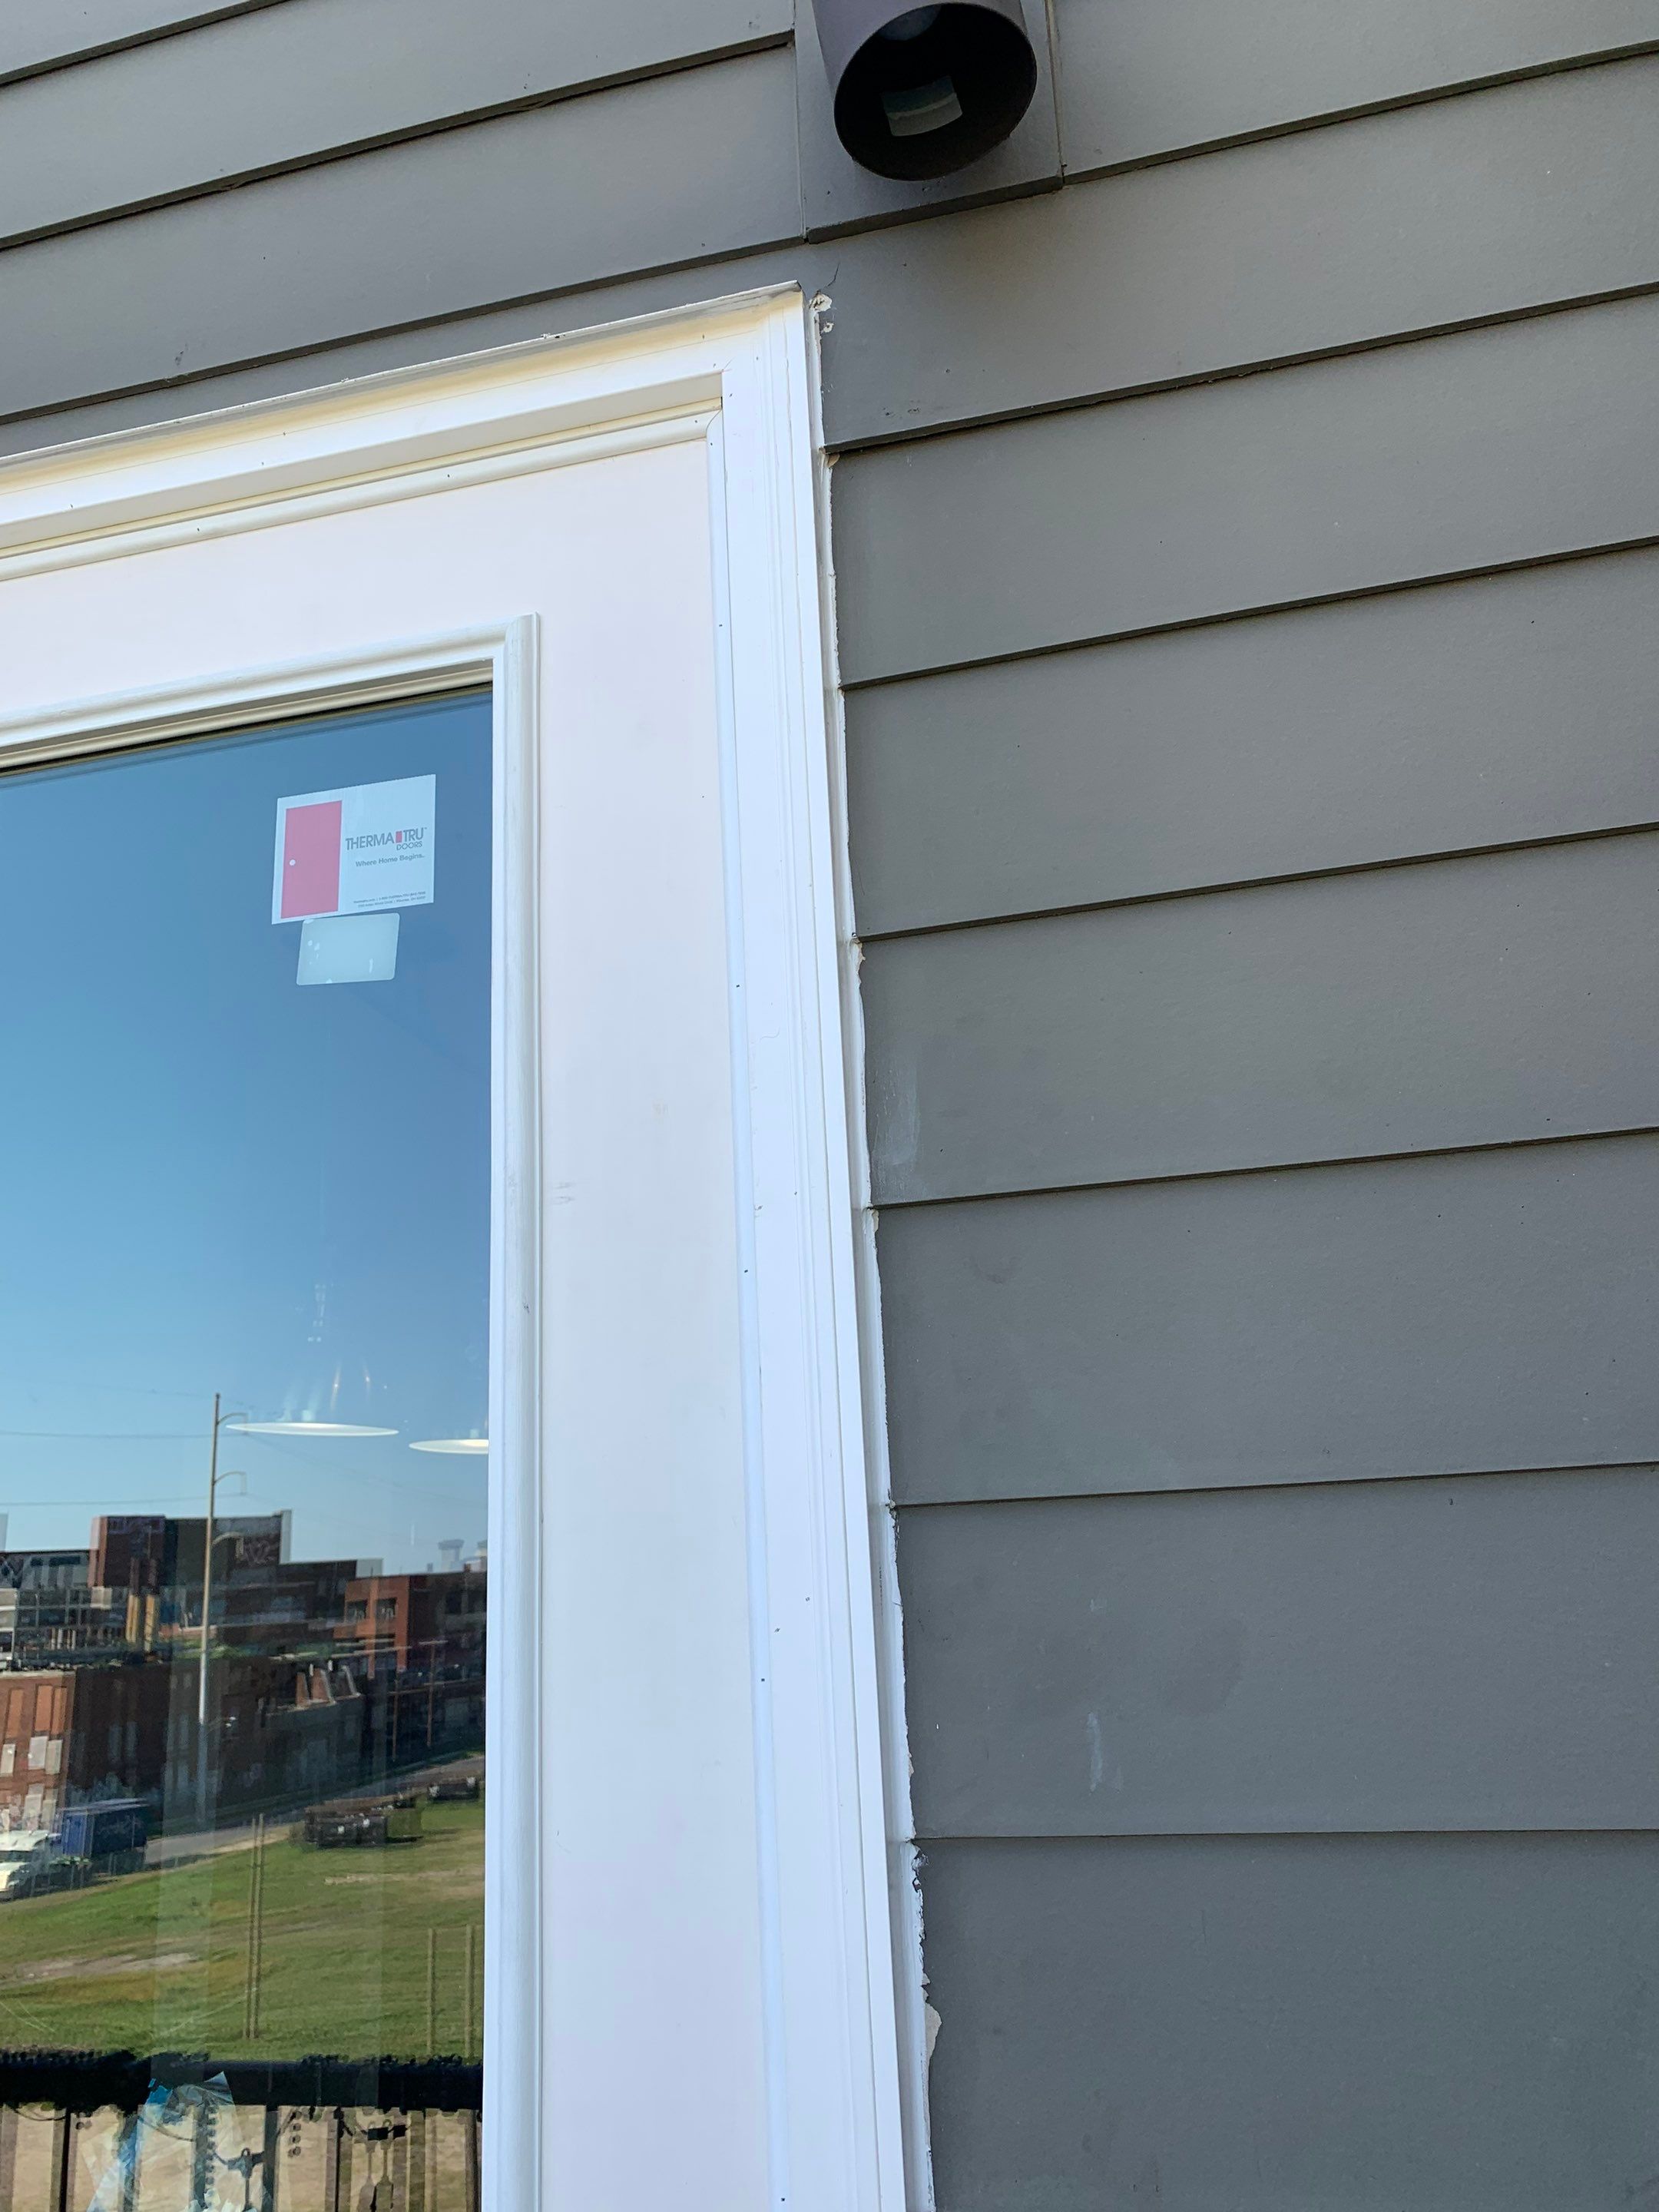 During
Exterior view of the replacement door frame and its connection to the surrounding siding.
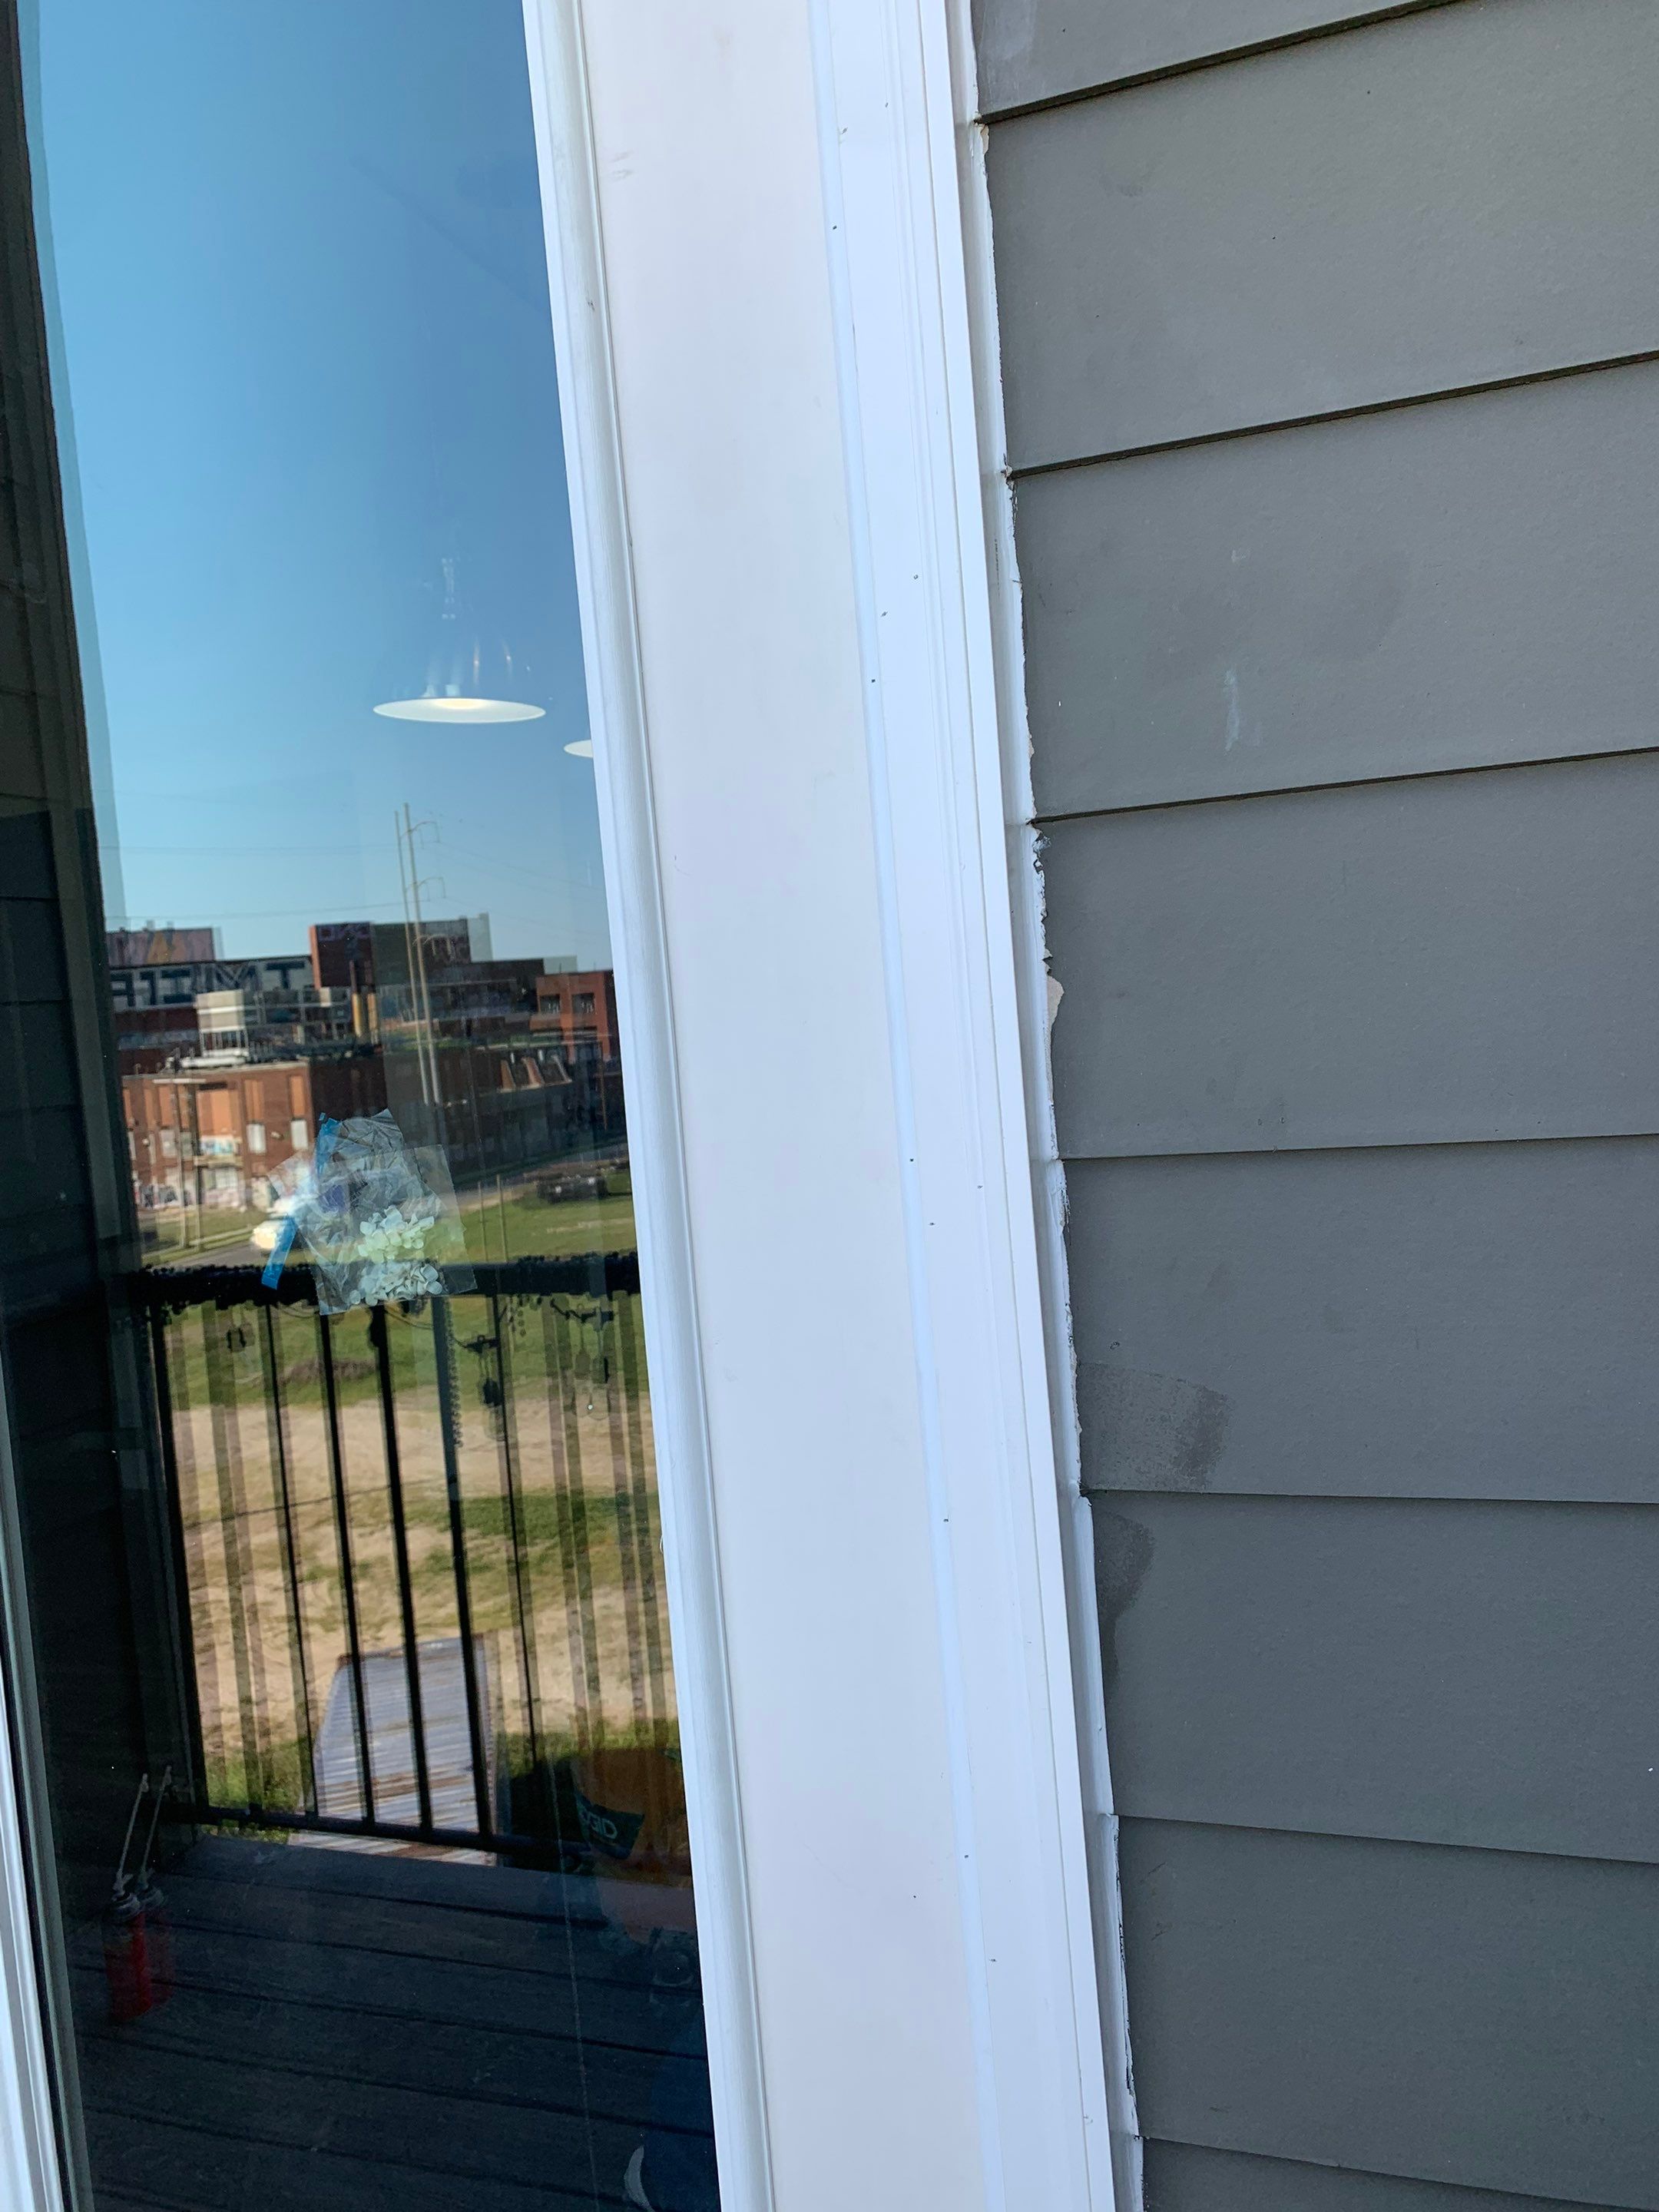 During
Close-up of the finished exterior door trim and adjacent siding
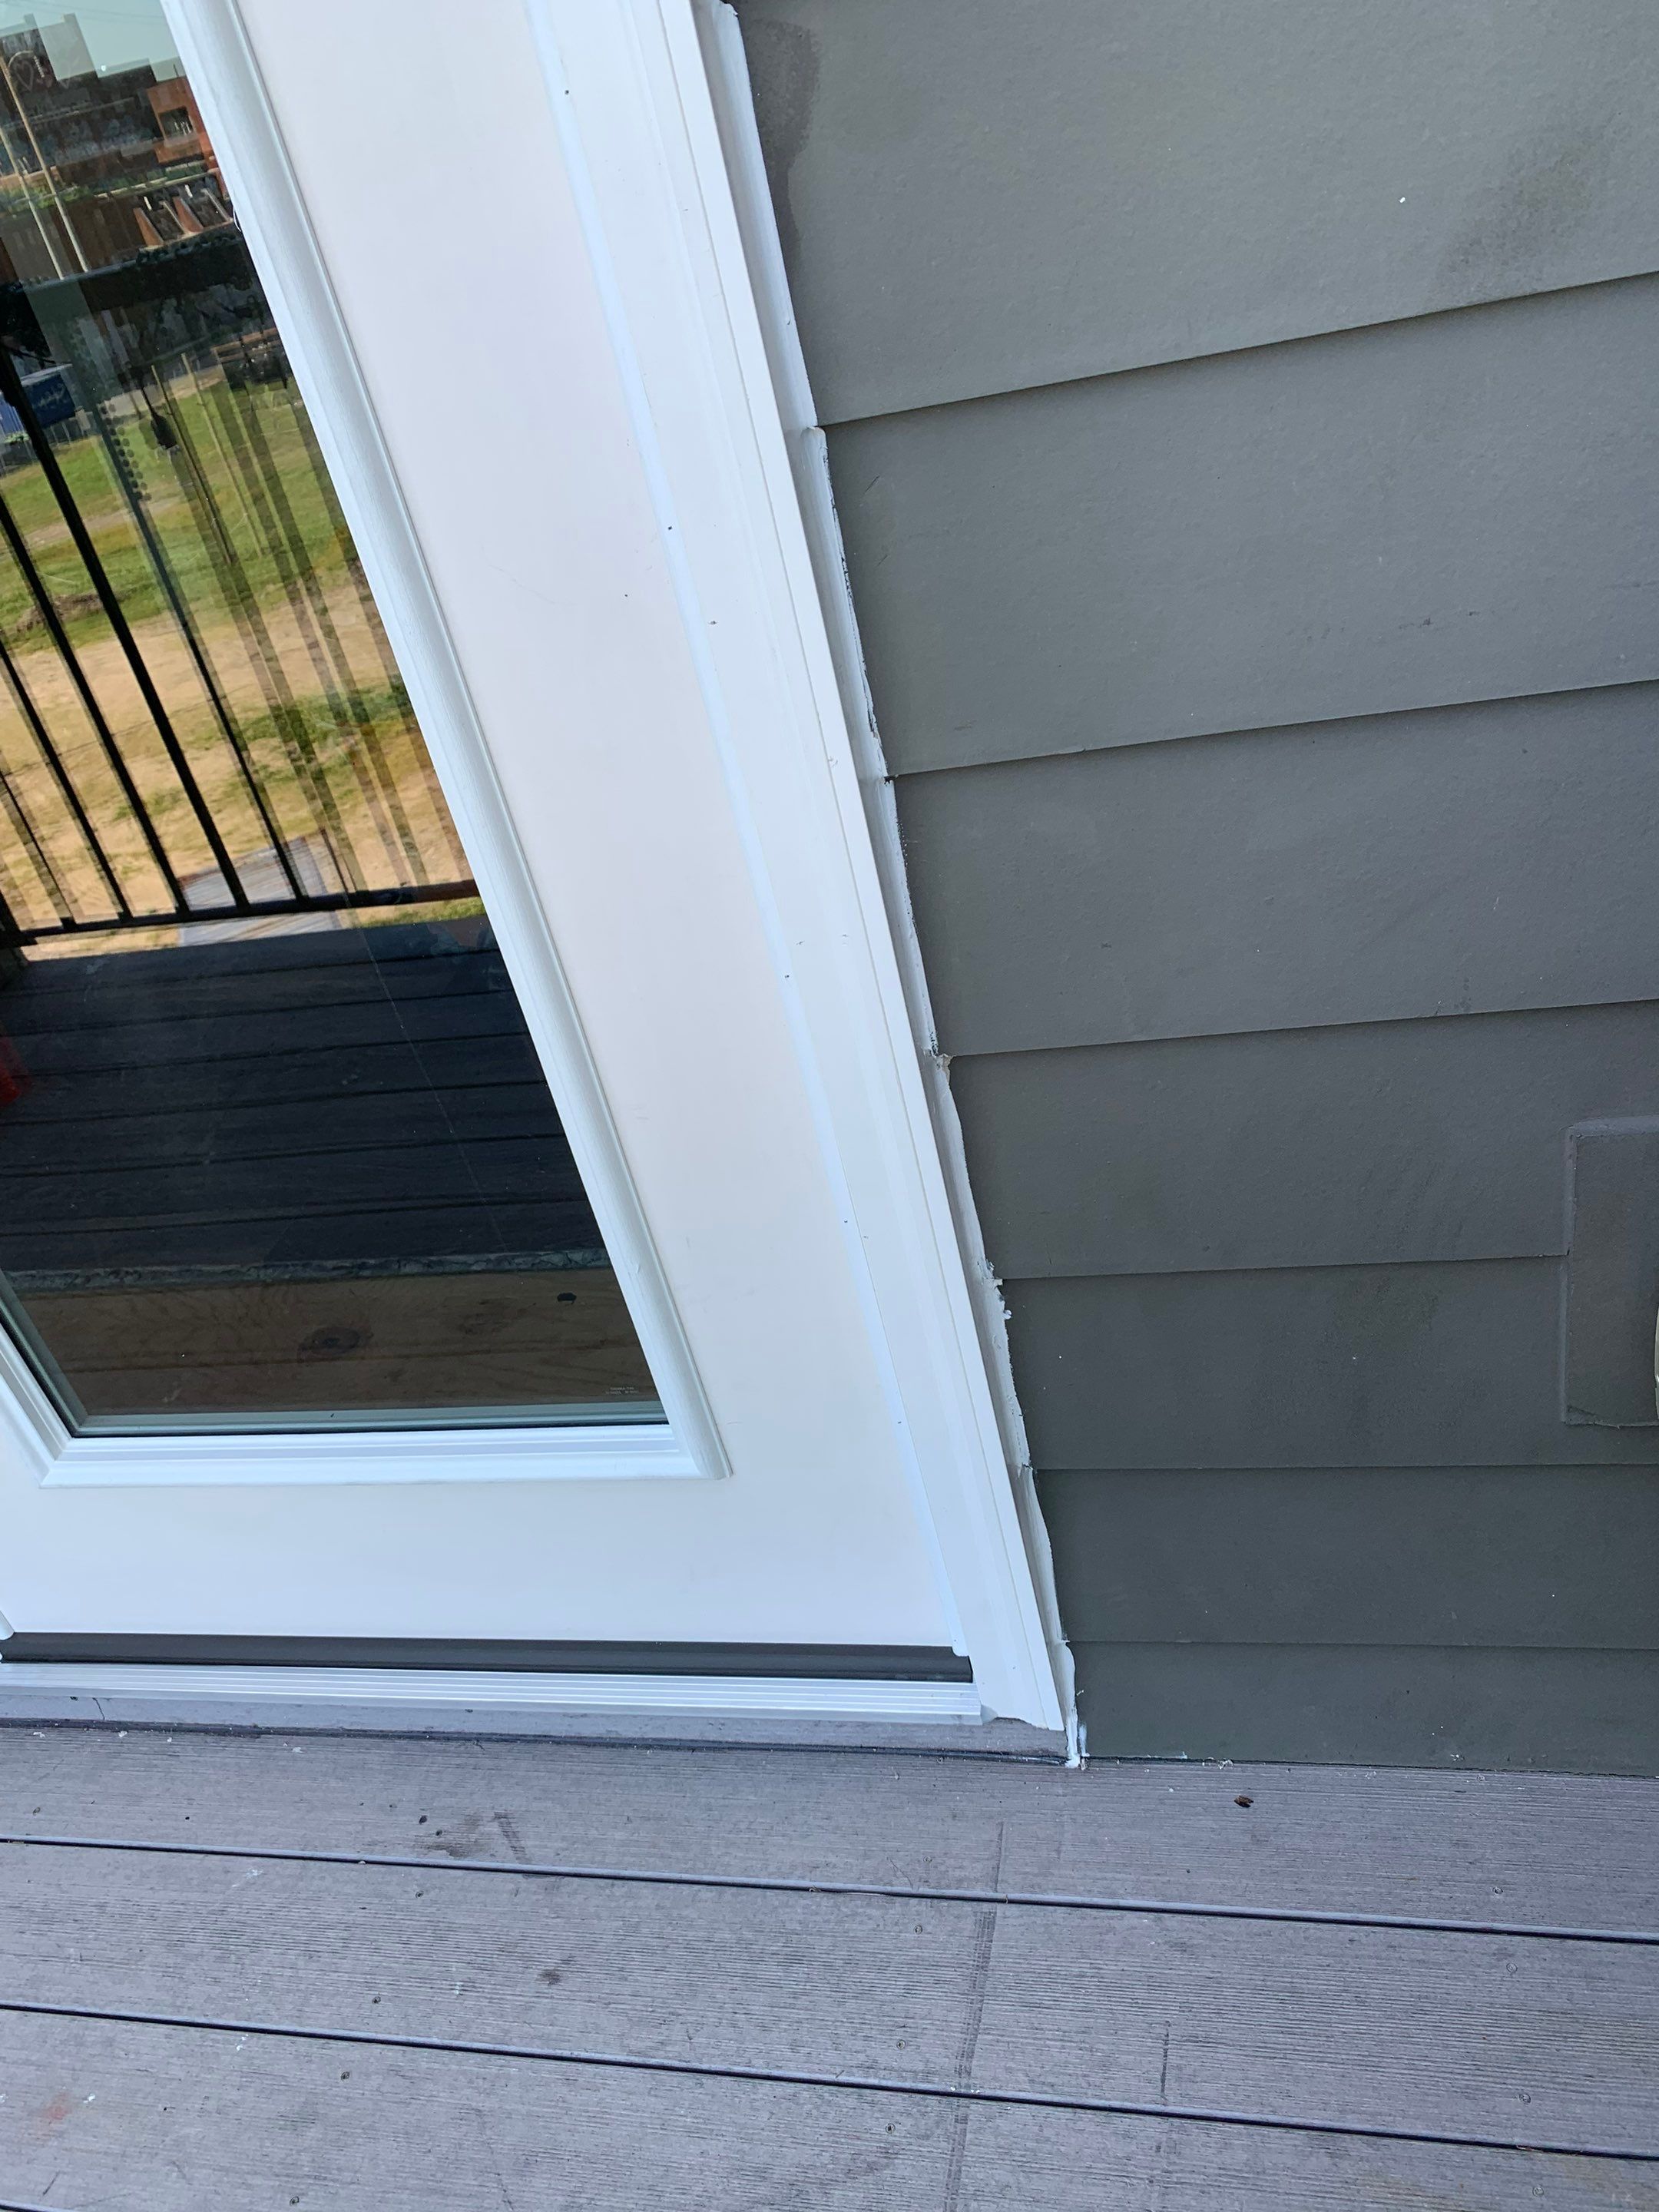 During
Lower corner of the replacement balcony door showing the finished exterior frame and threshold
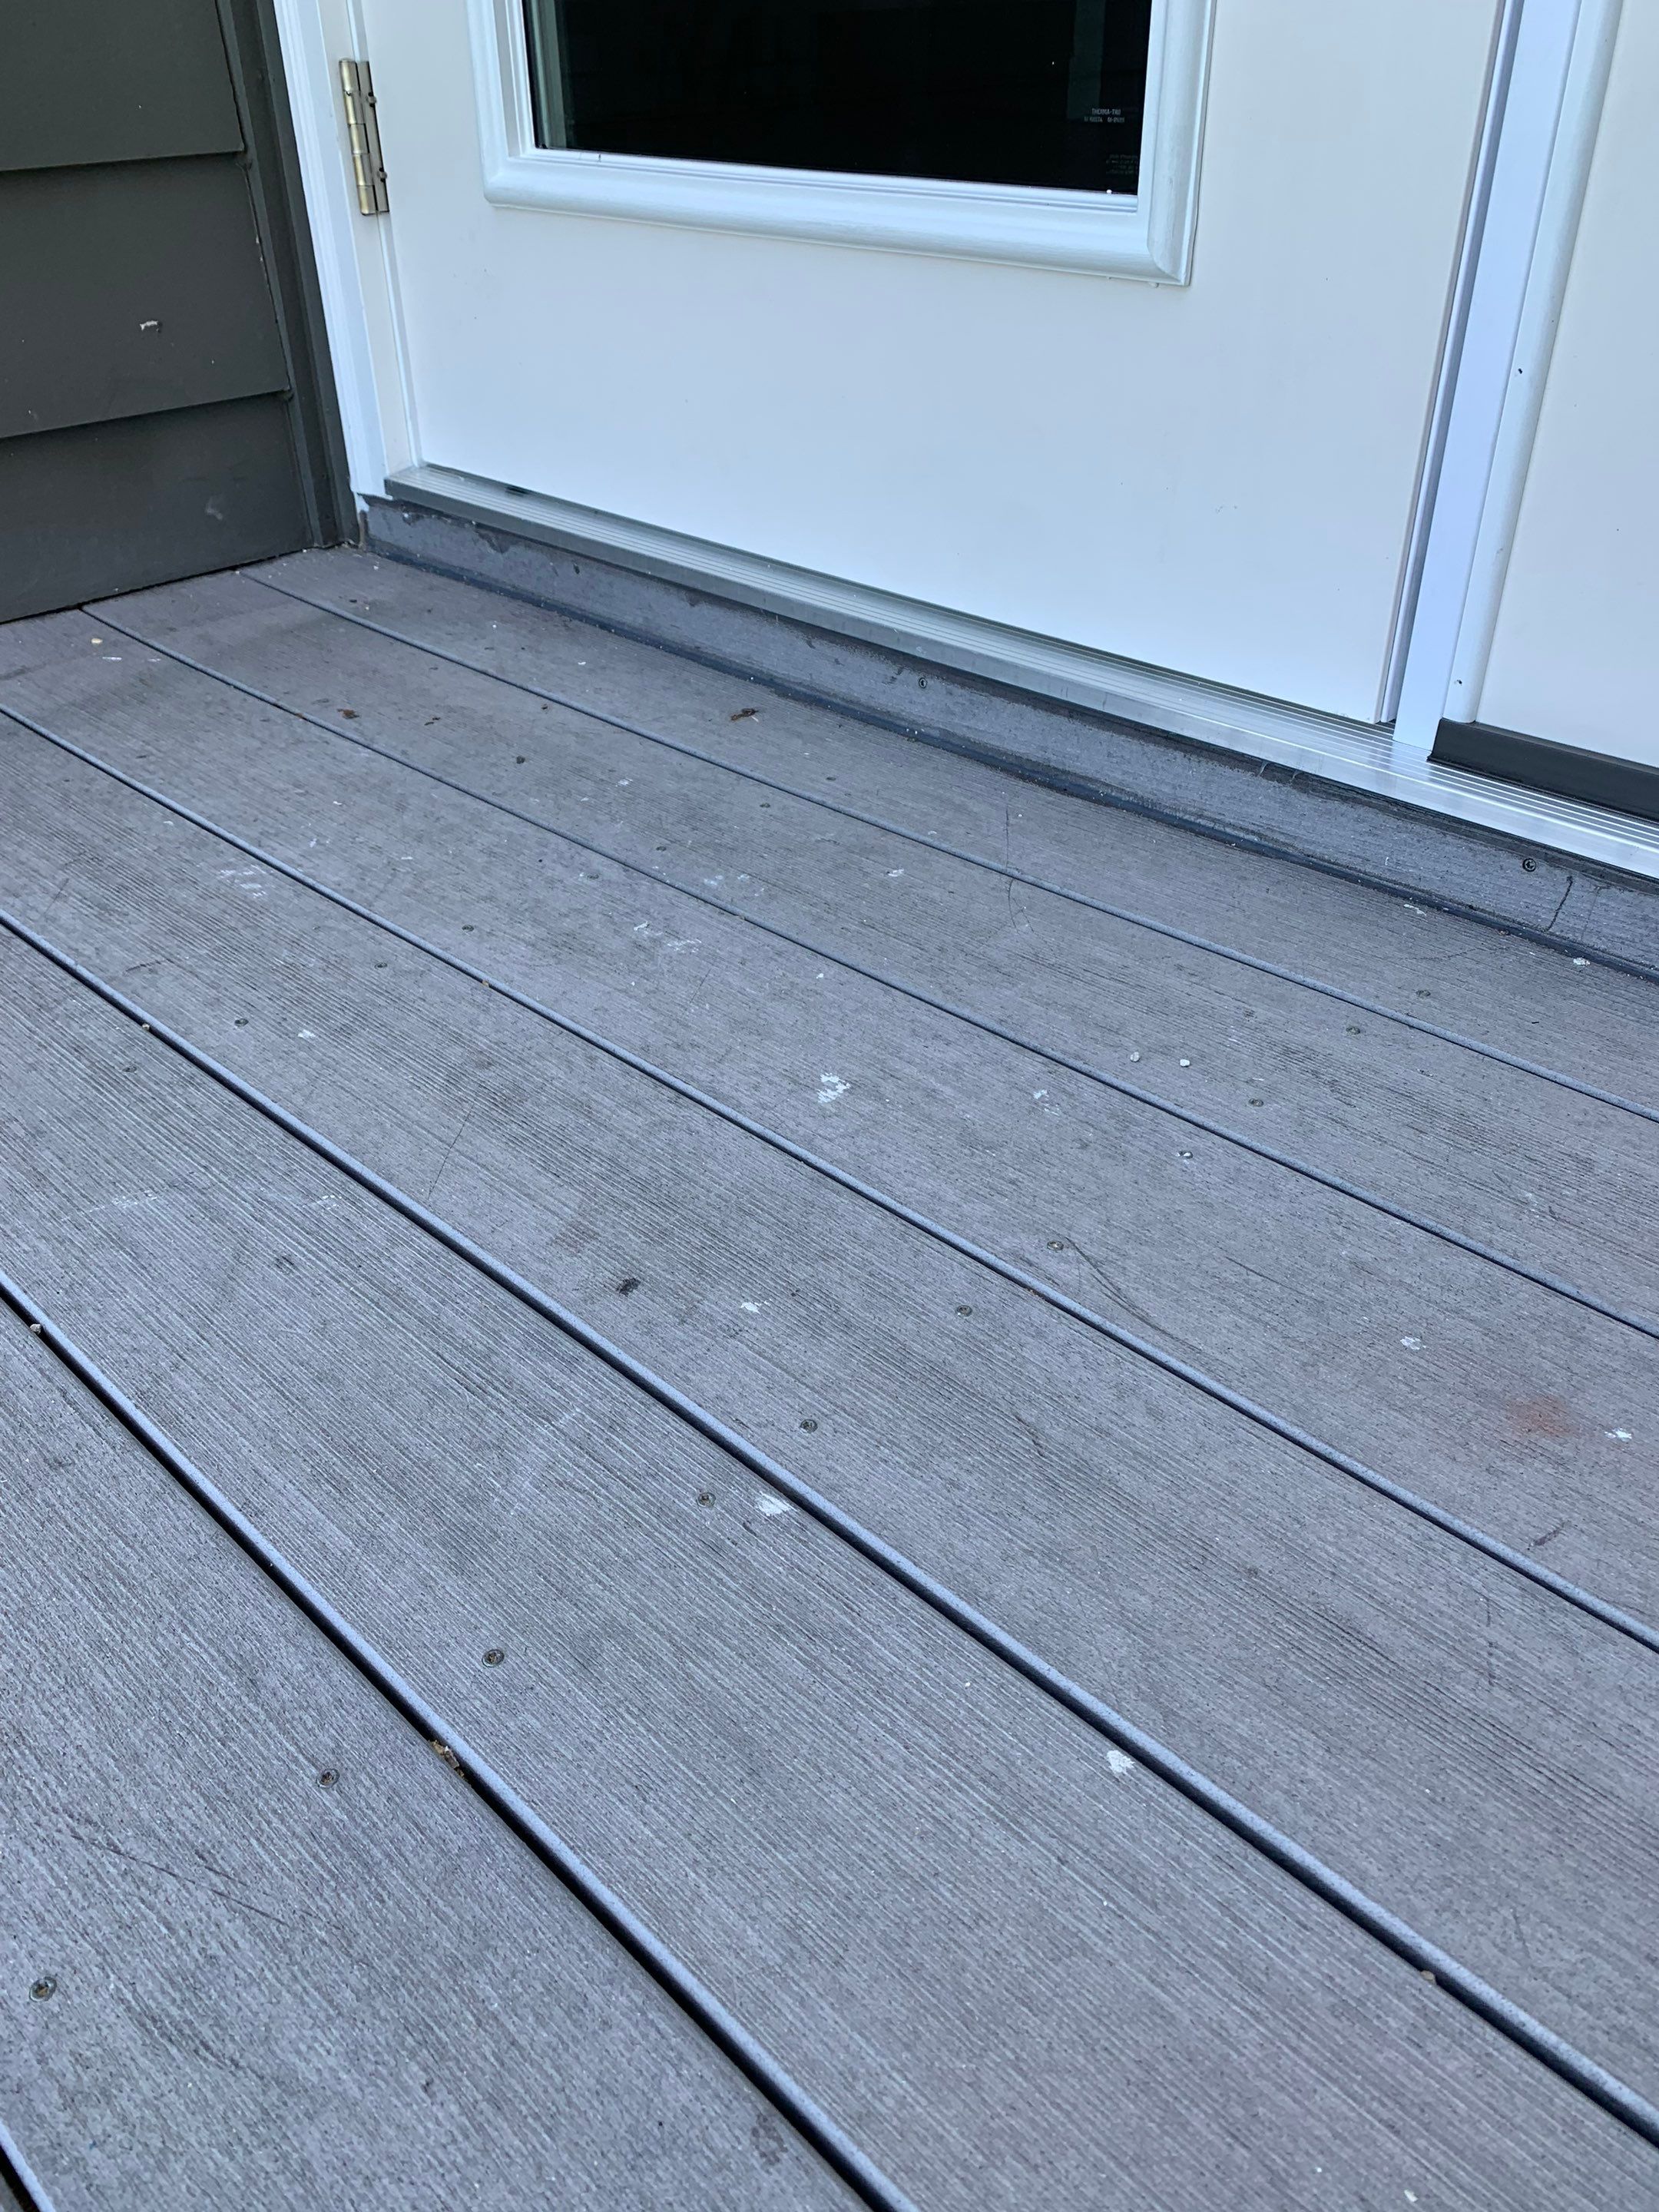 During
Completed exterior threshold where the replacement door meets the balcony decking
 During
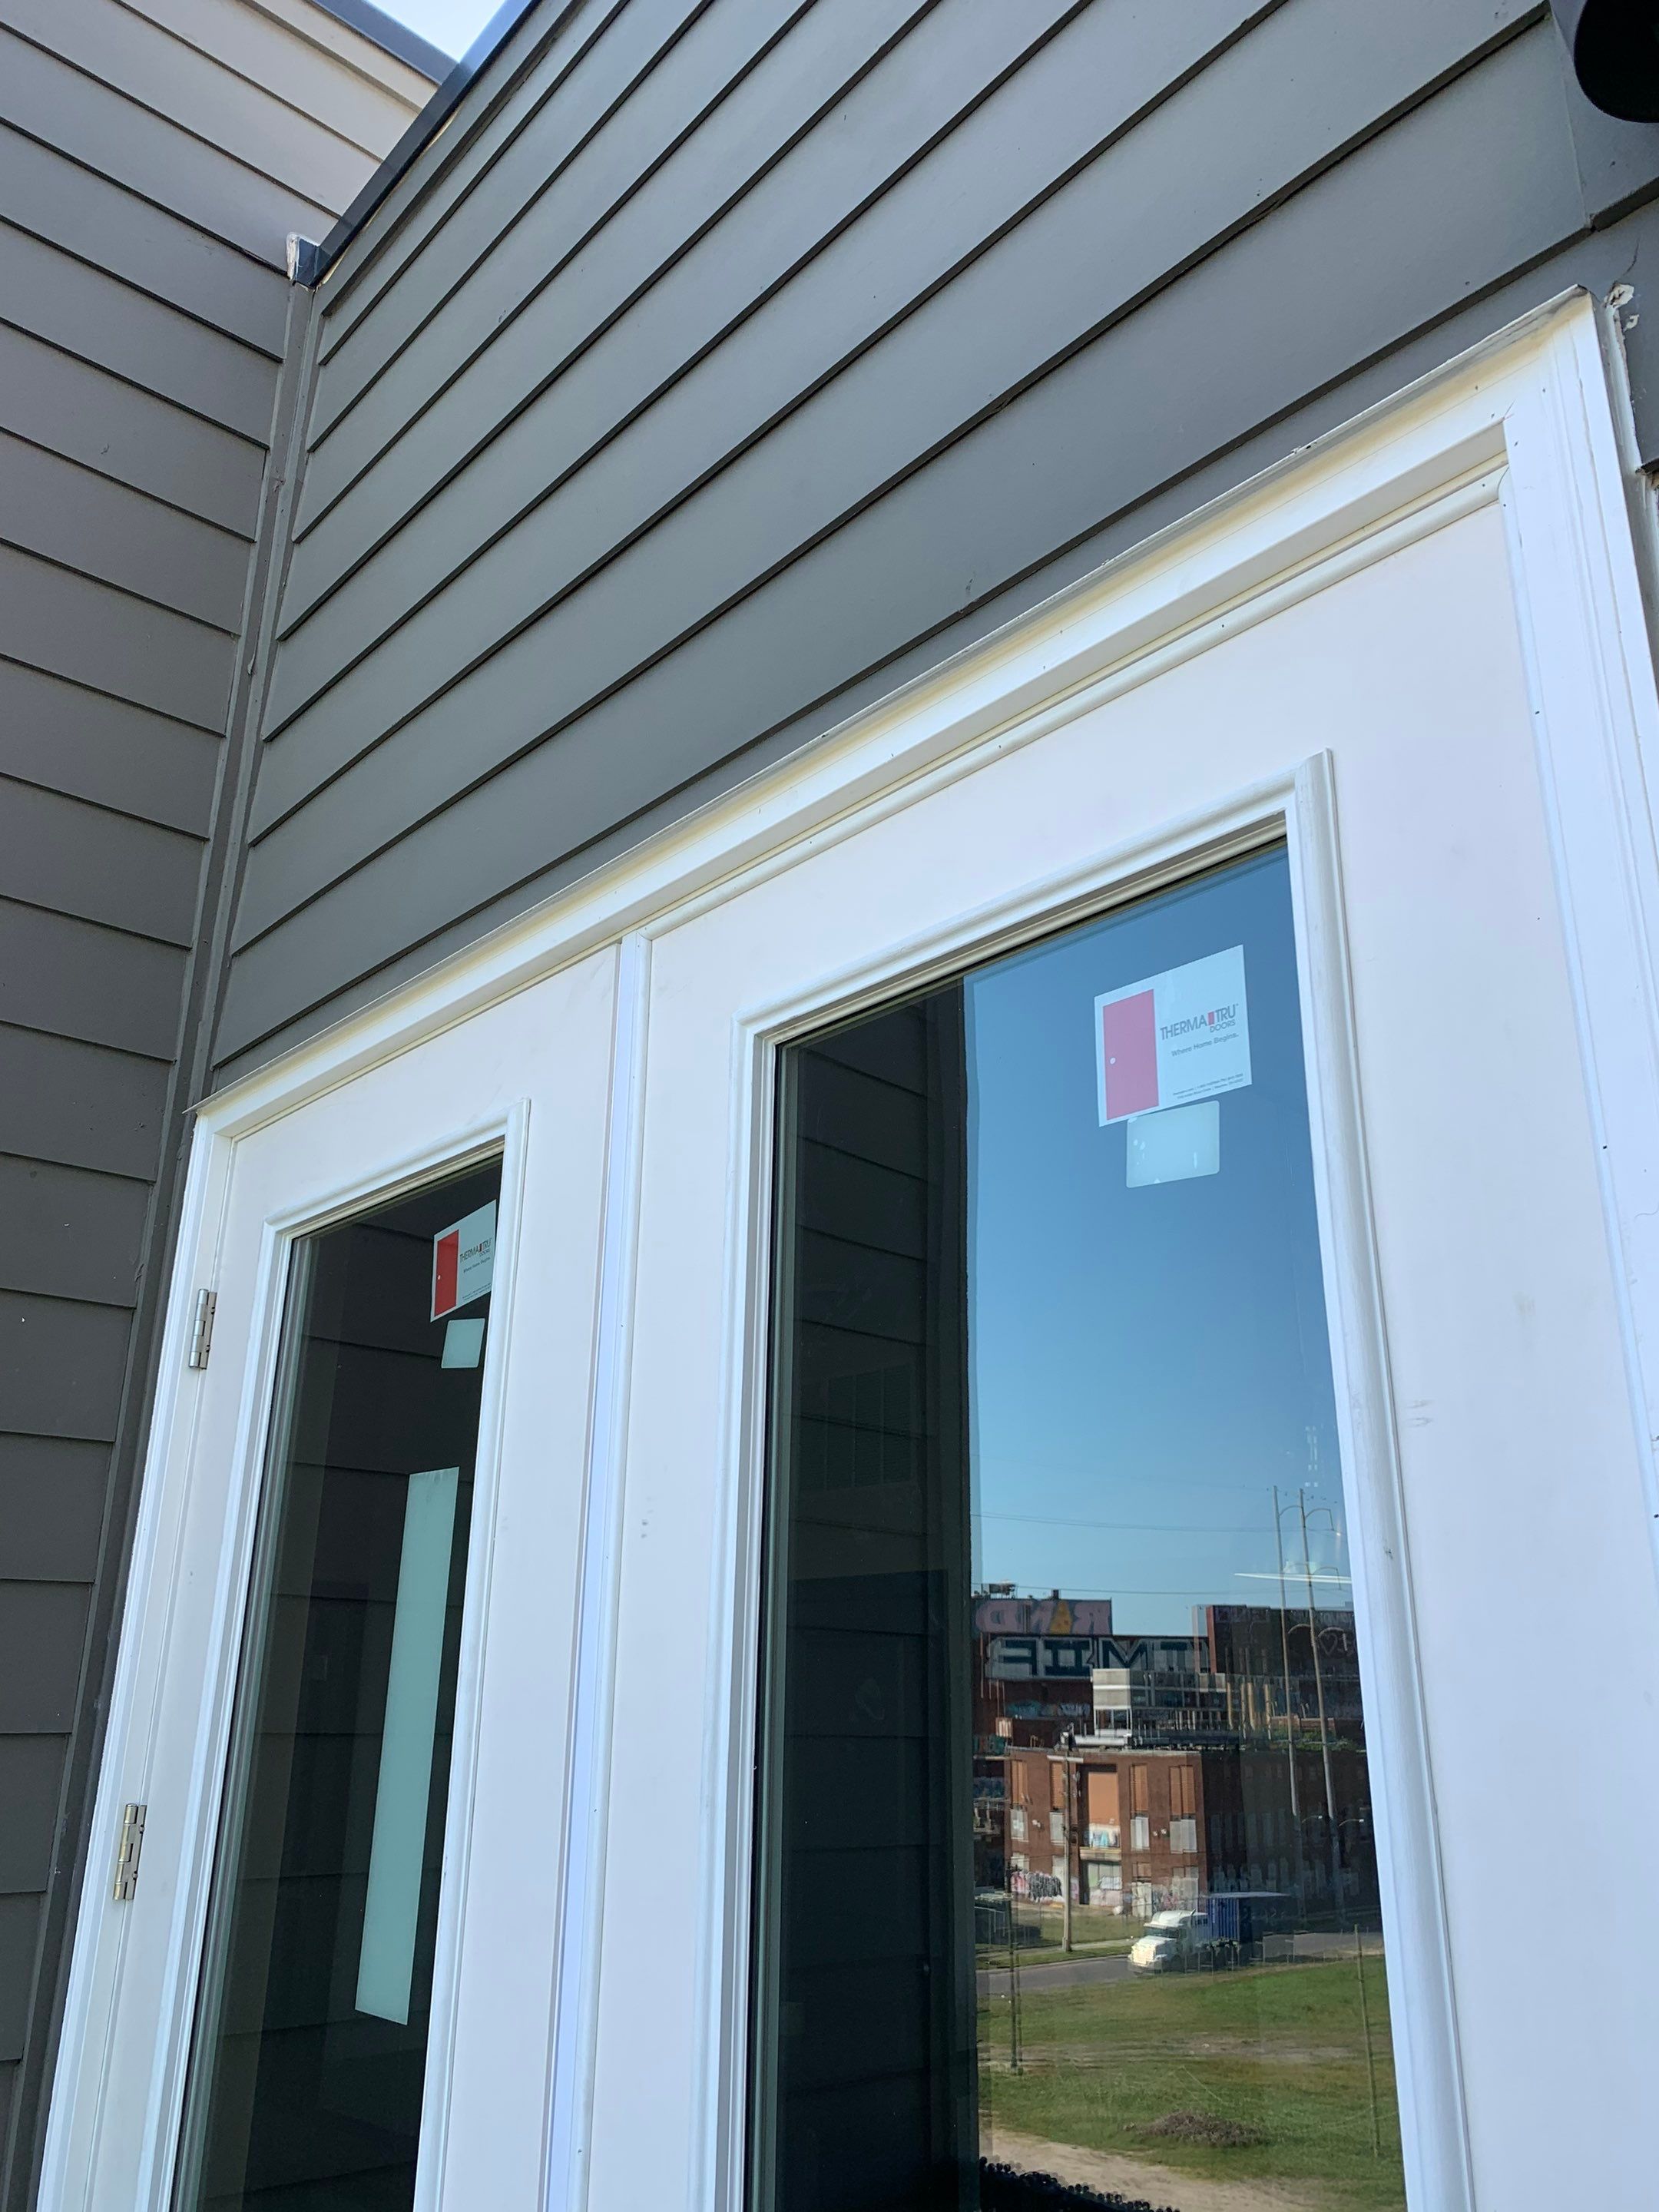
Upper portion of the newly installed French doors with finished exterior trim.
 During
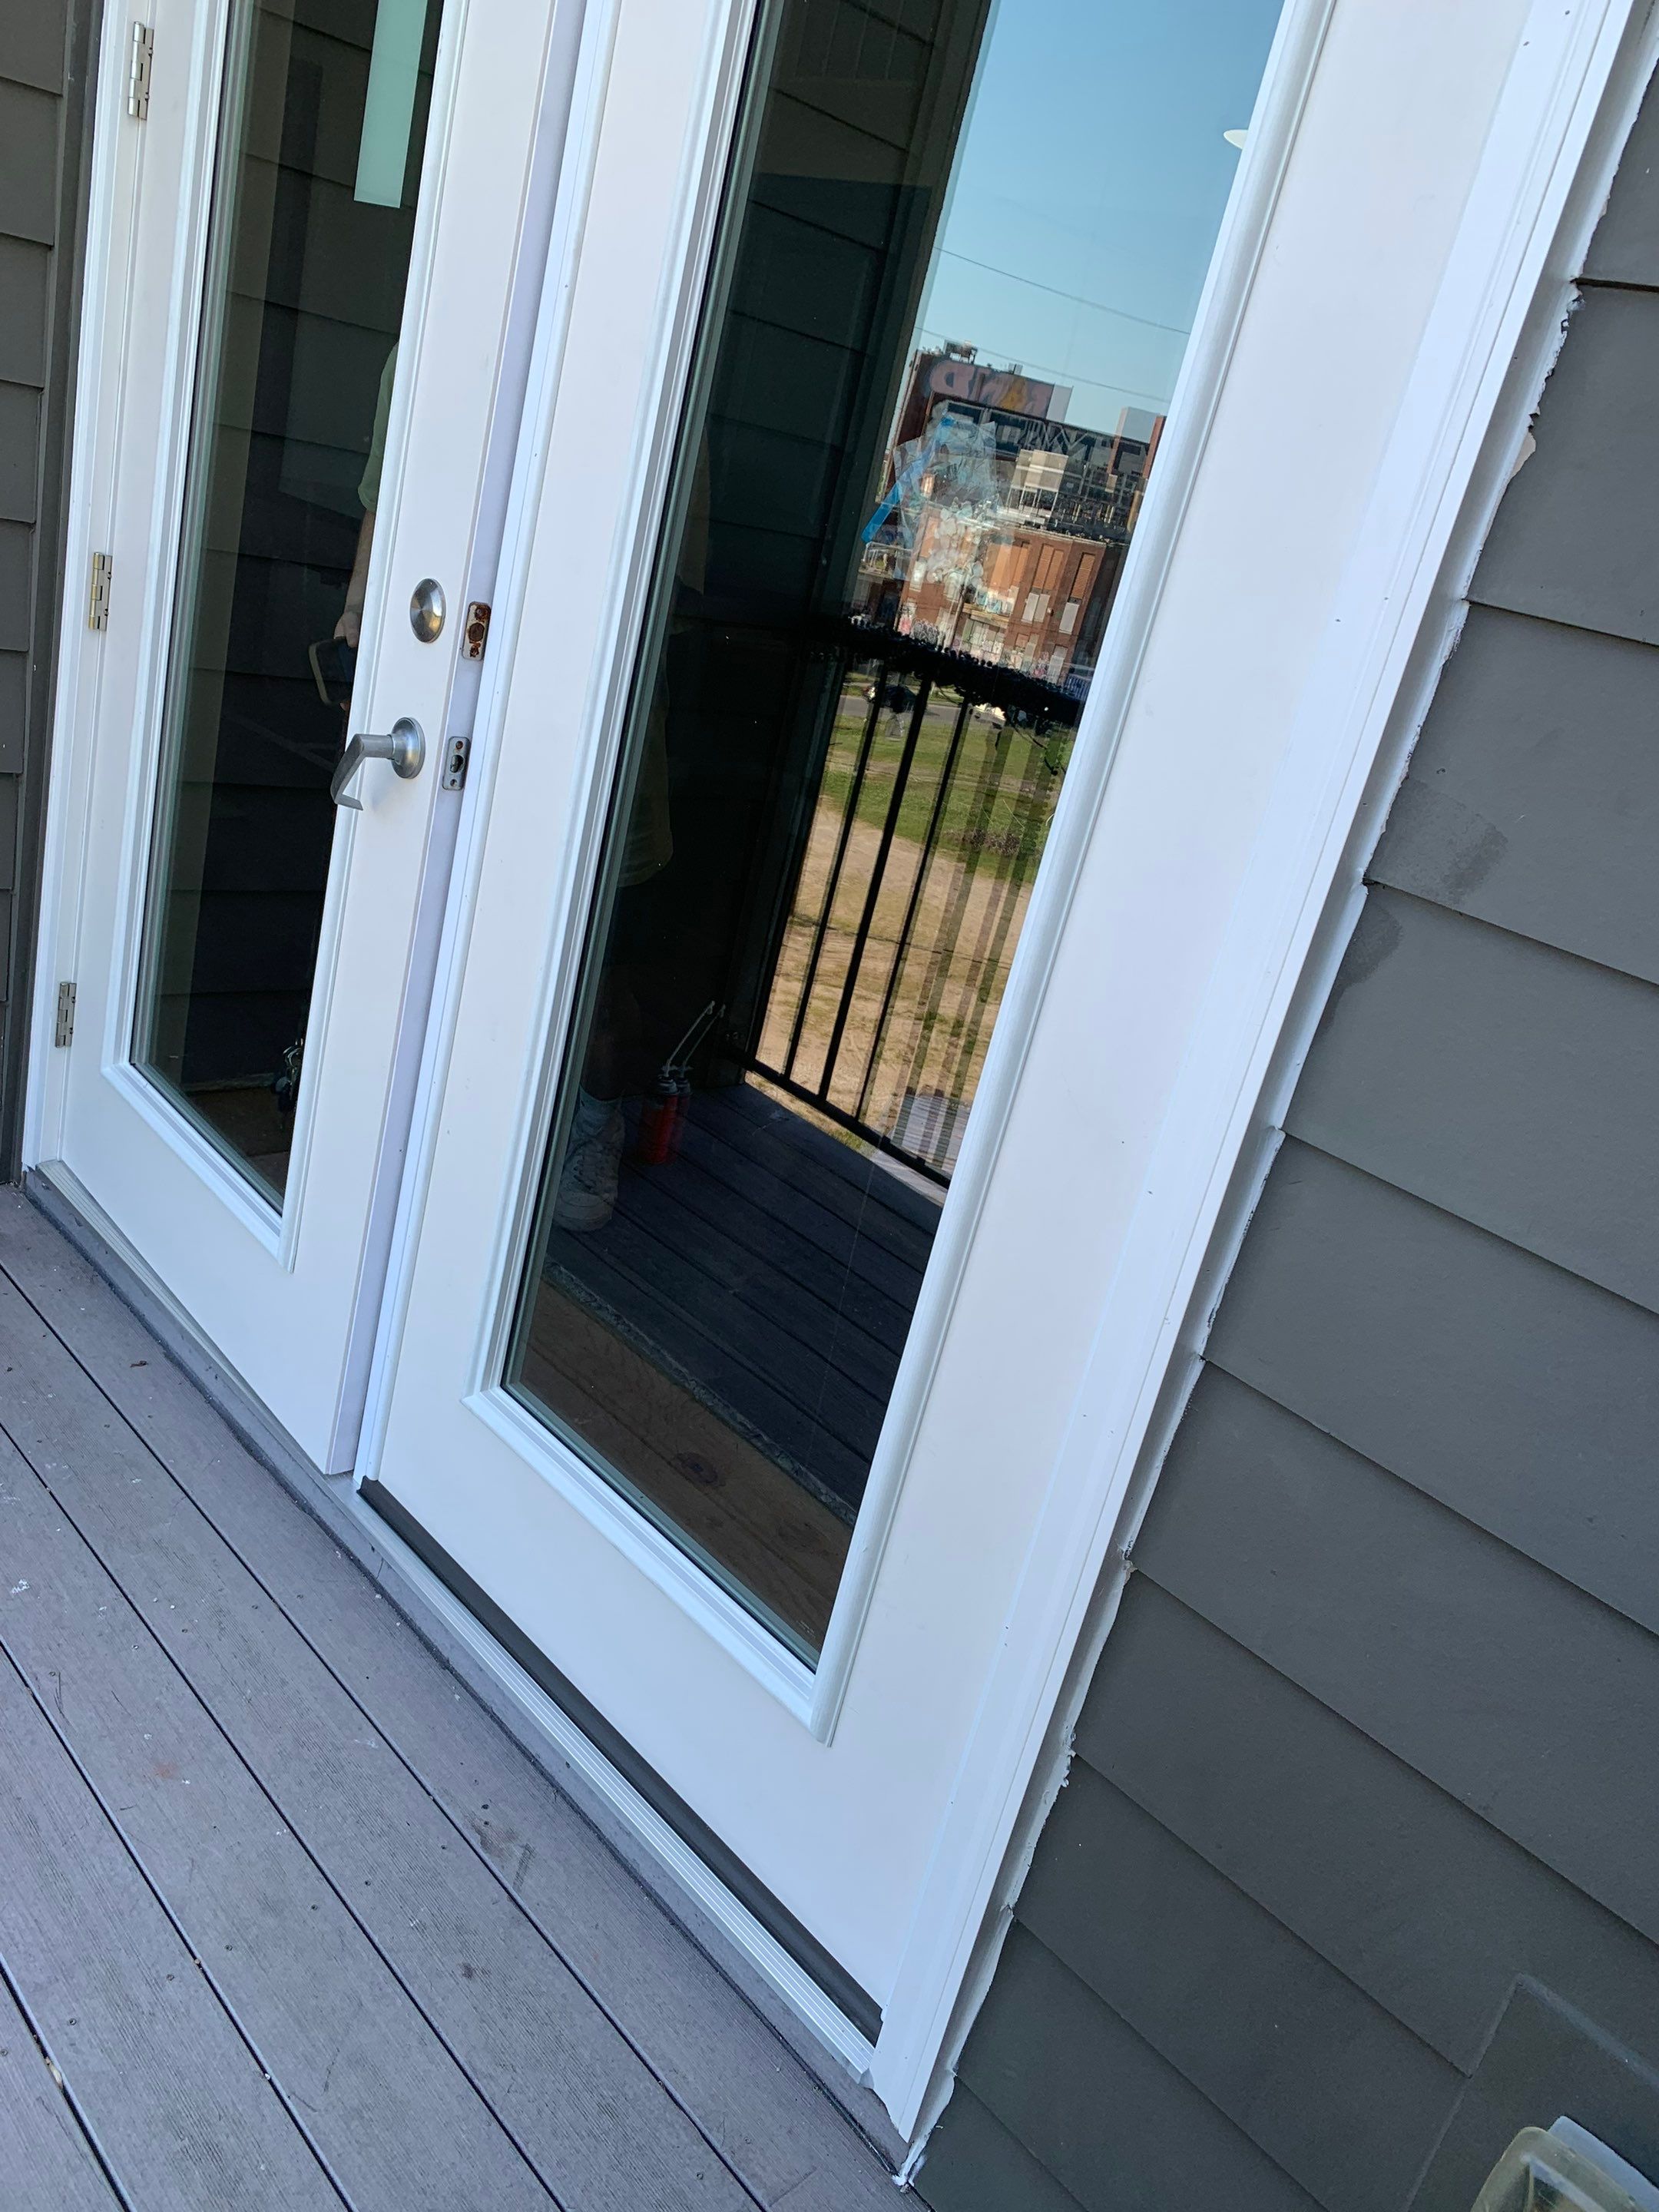
Balcony-side view of the replacement French doors with full-height glass panels.
 During
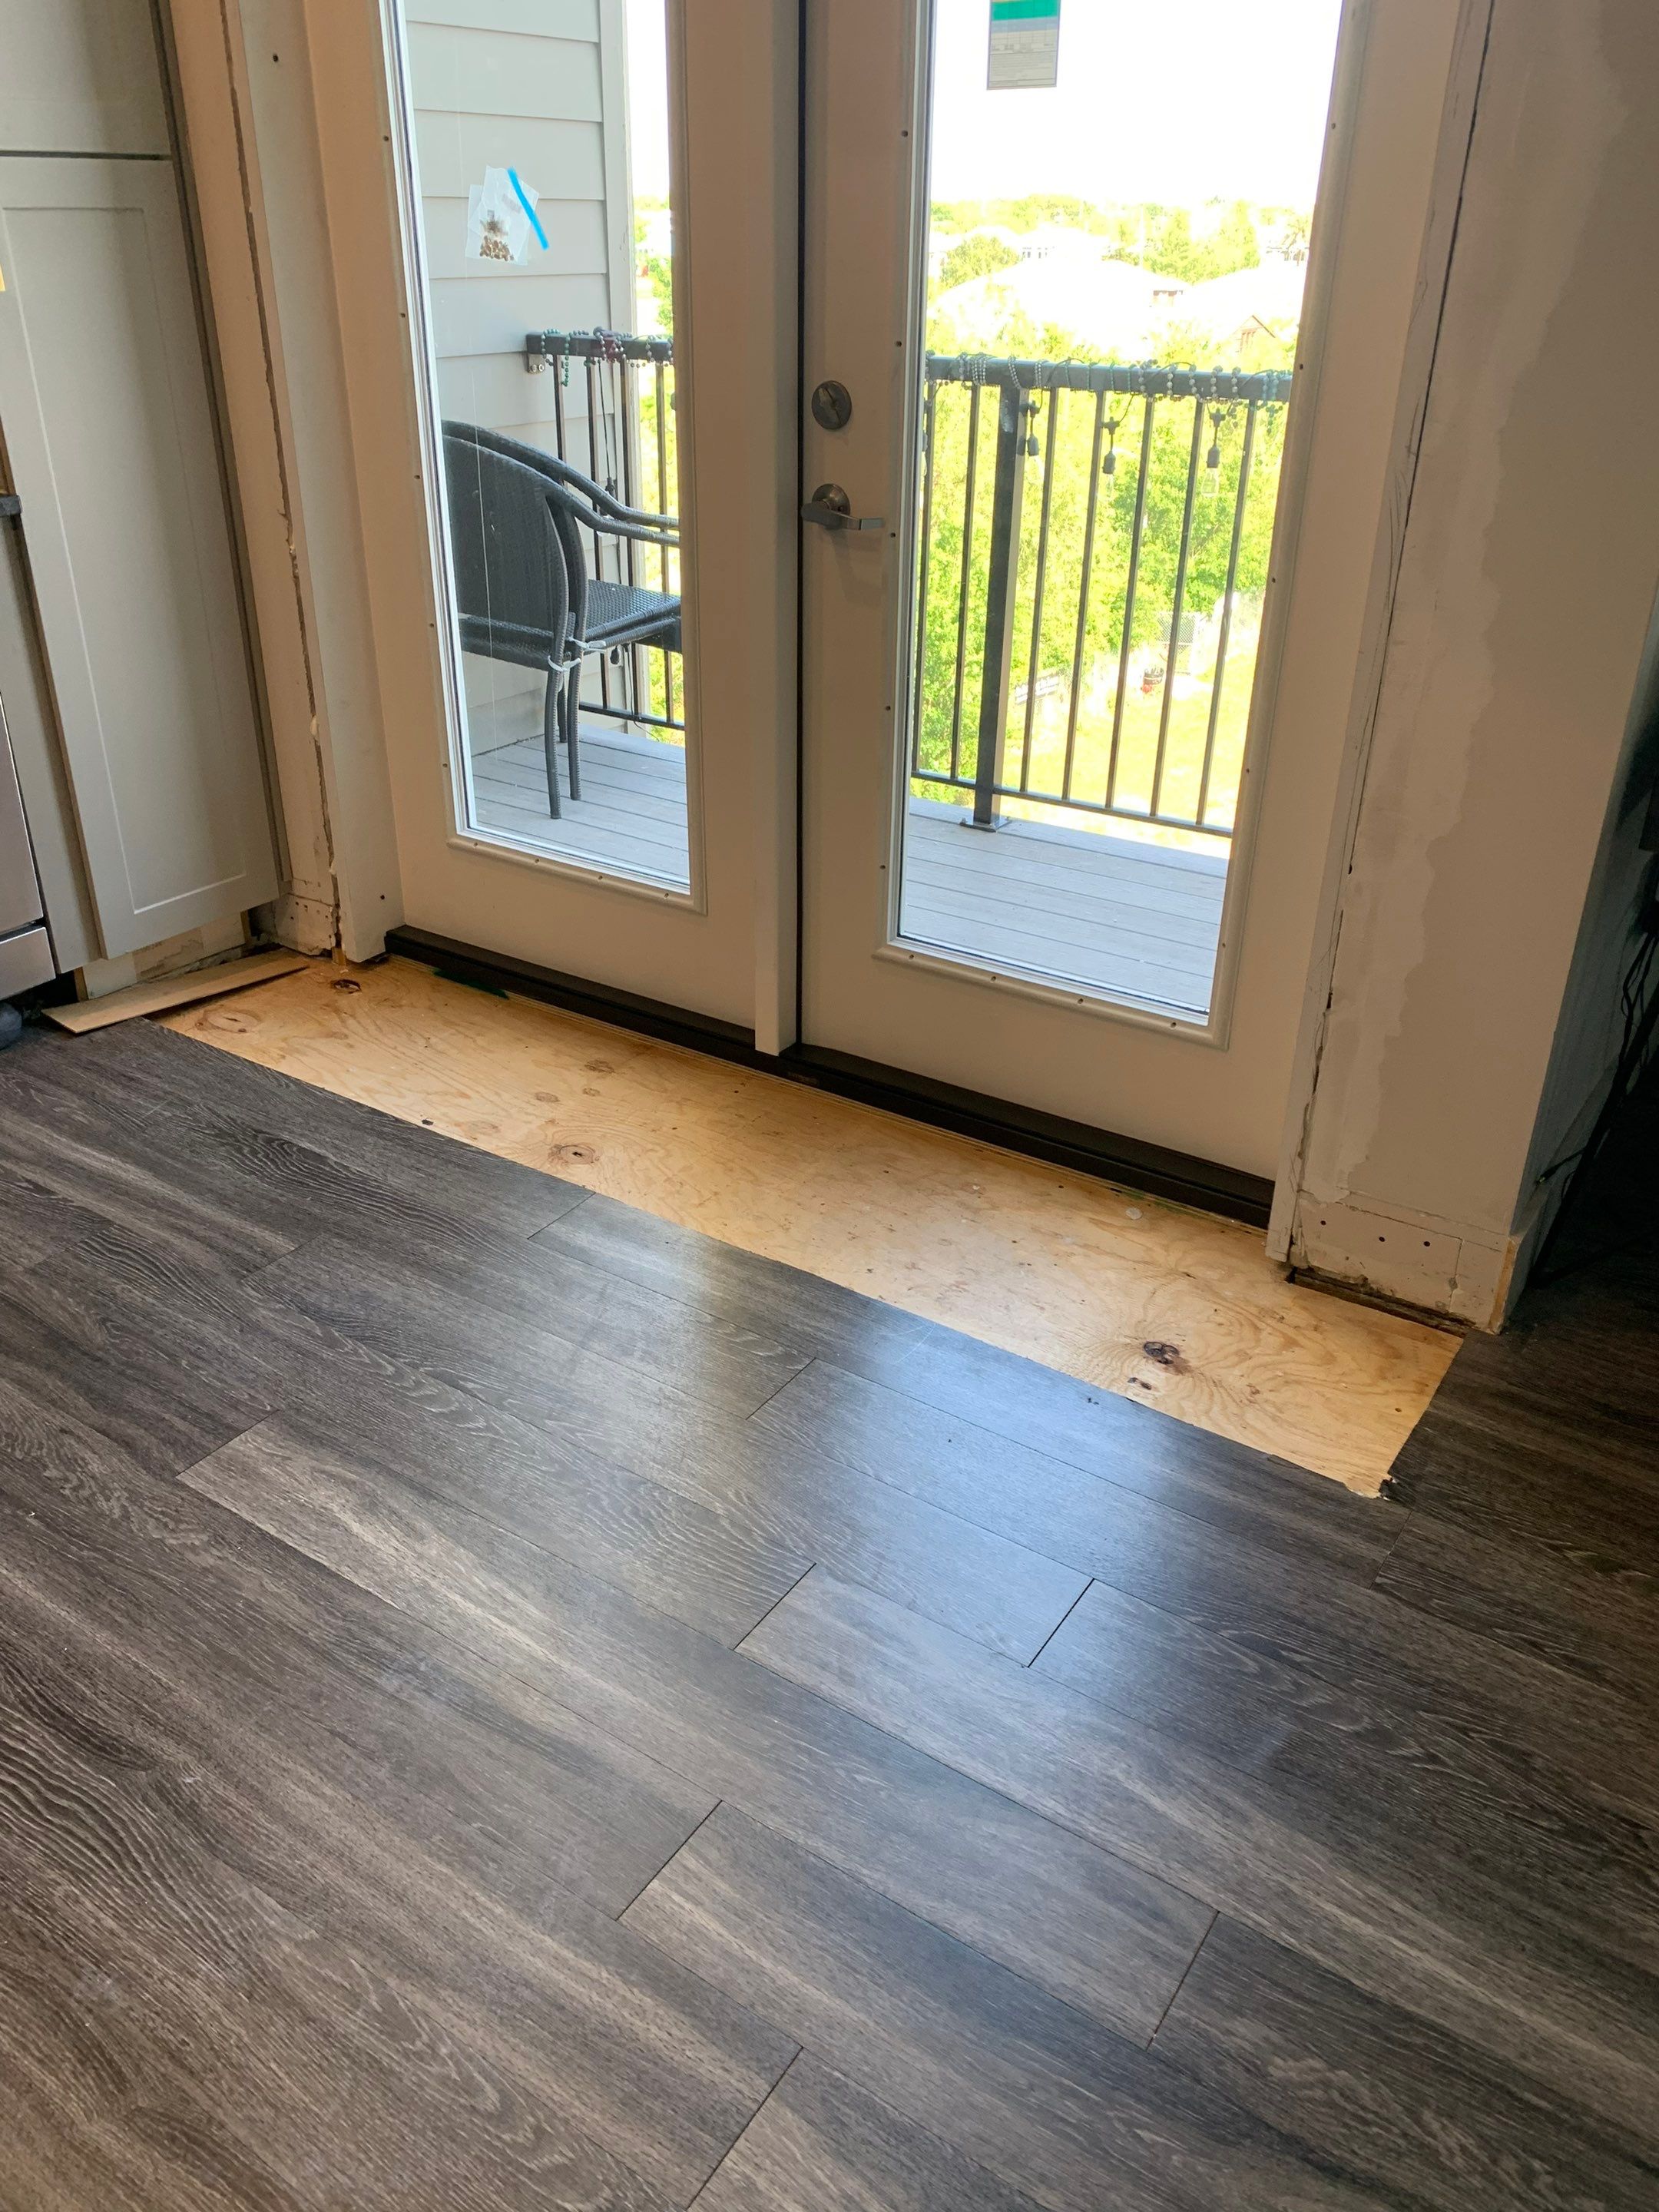
Interior view of the newly installed balcony doors, with flooring restoration still underway.
 During
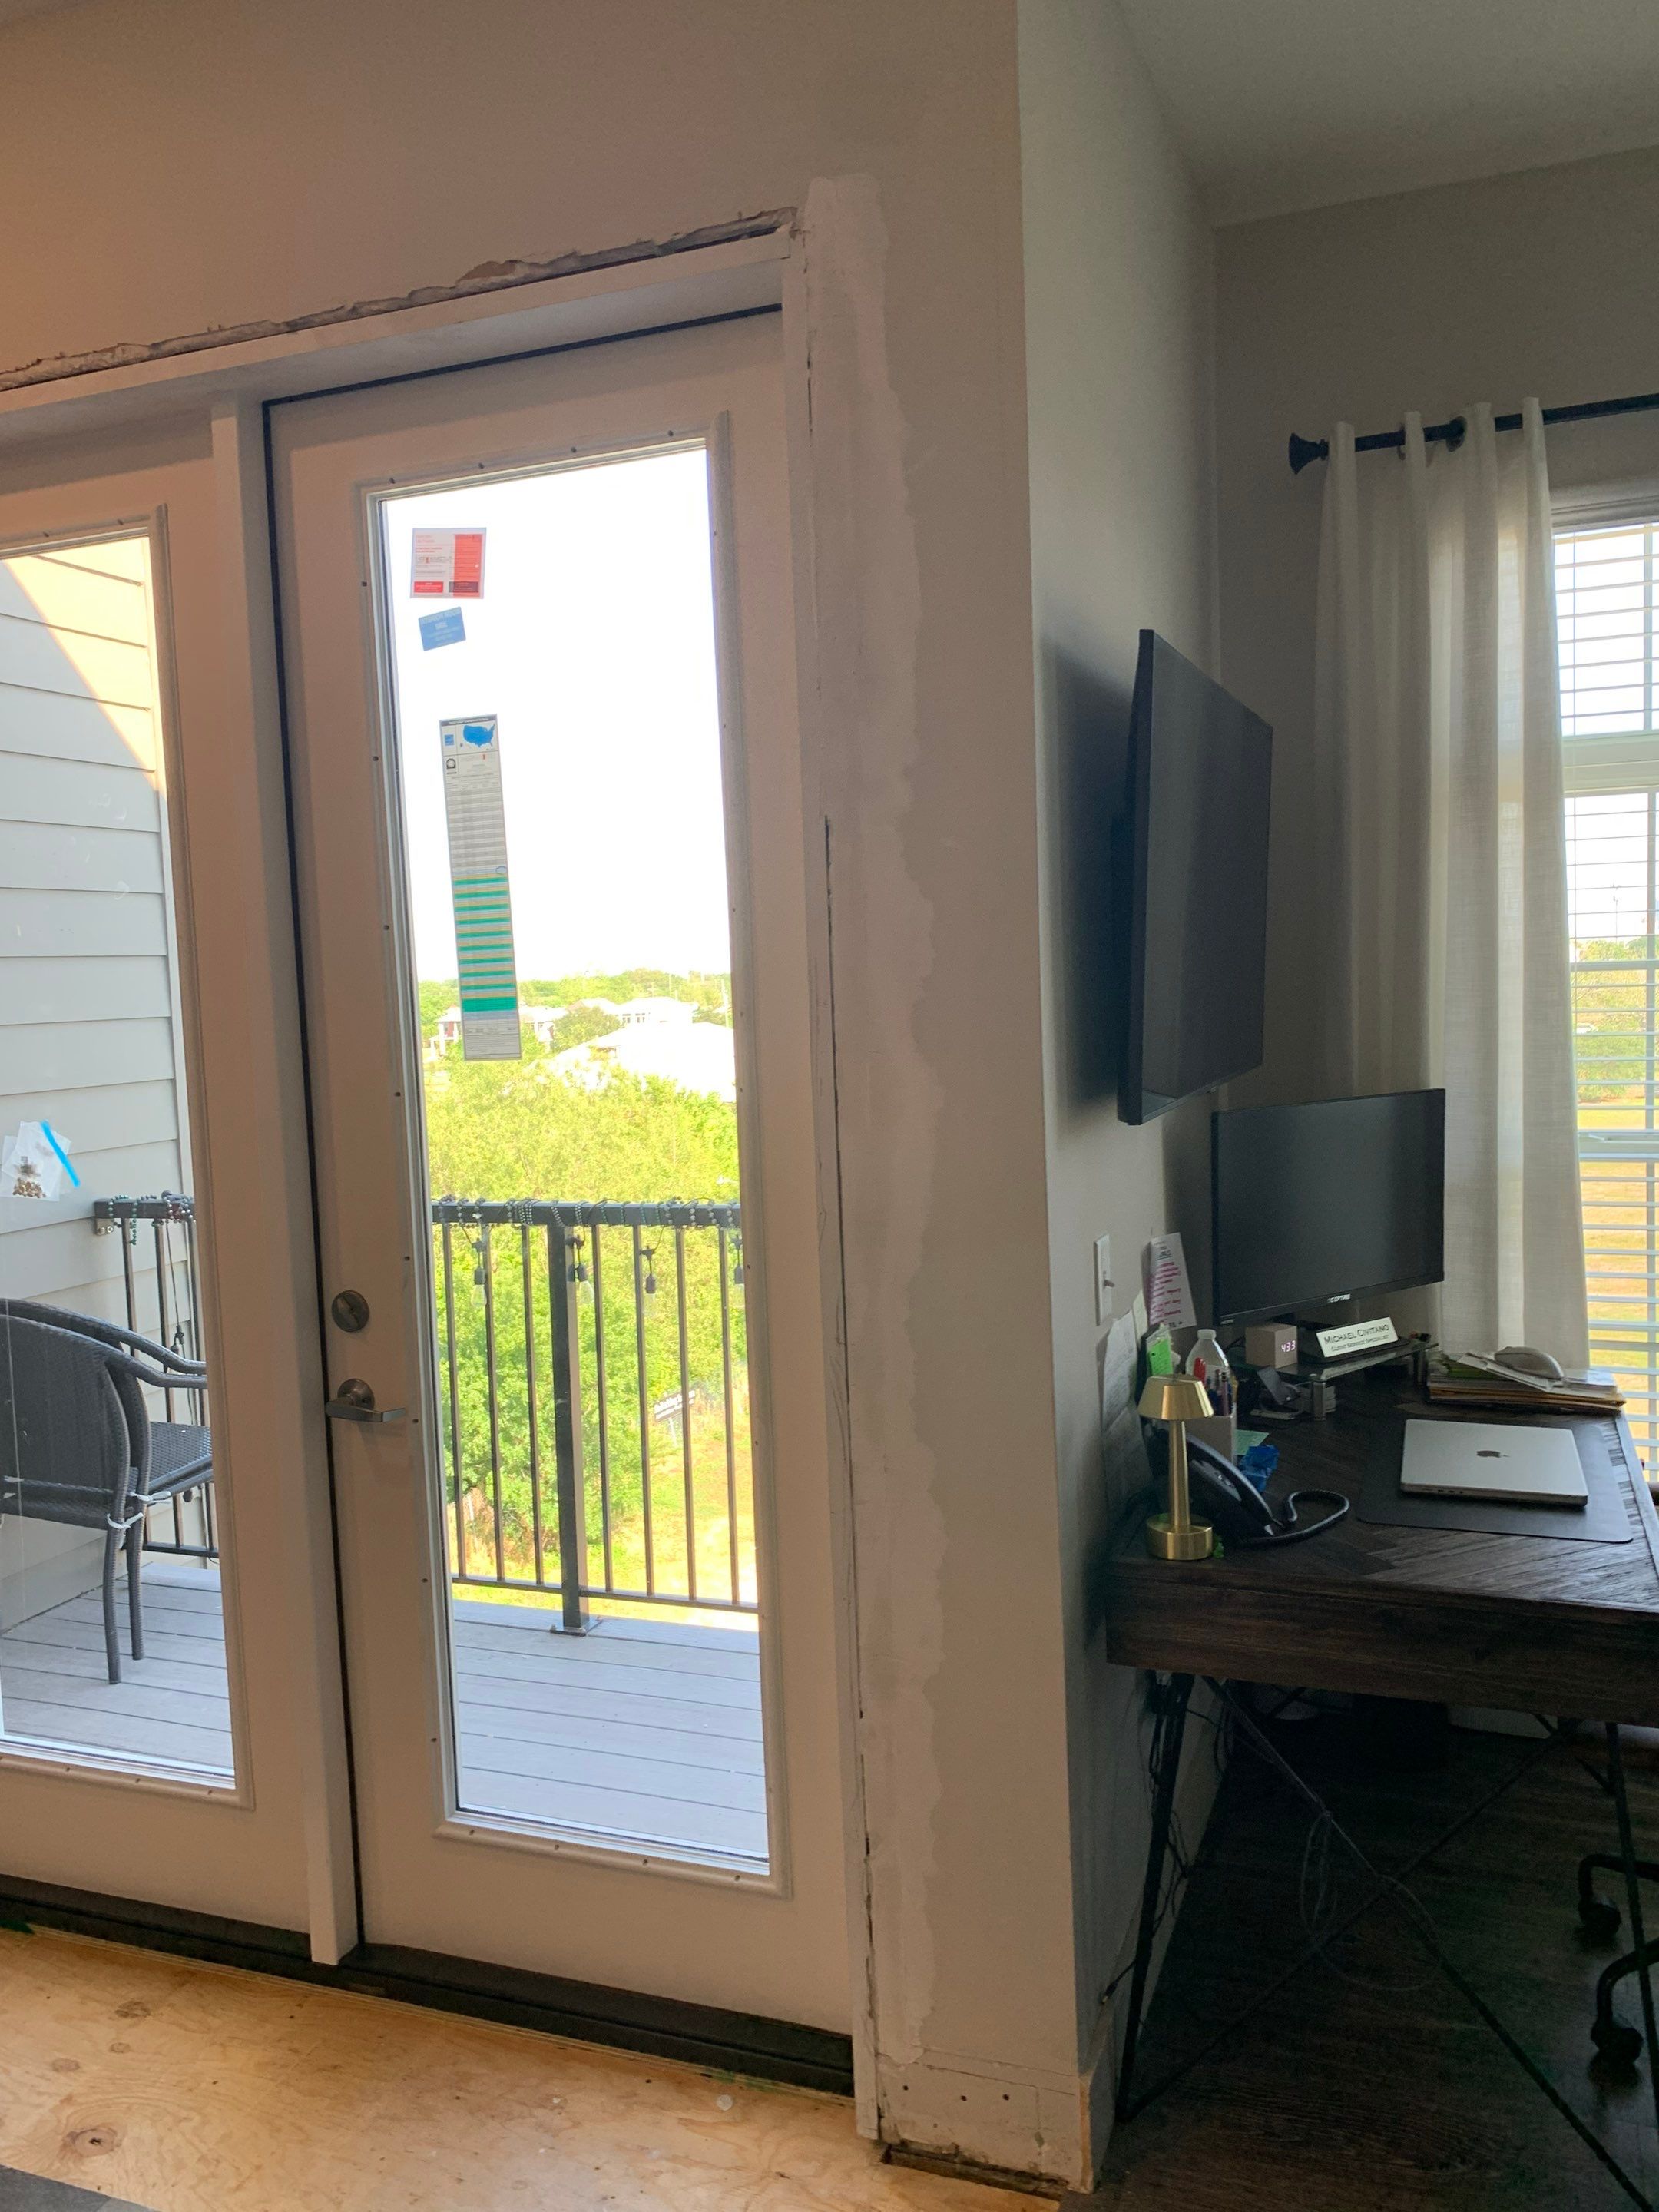
Replacement French doors installed while the surrounding interior wall and trim repairs remain in progress.
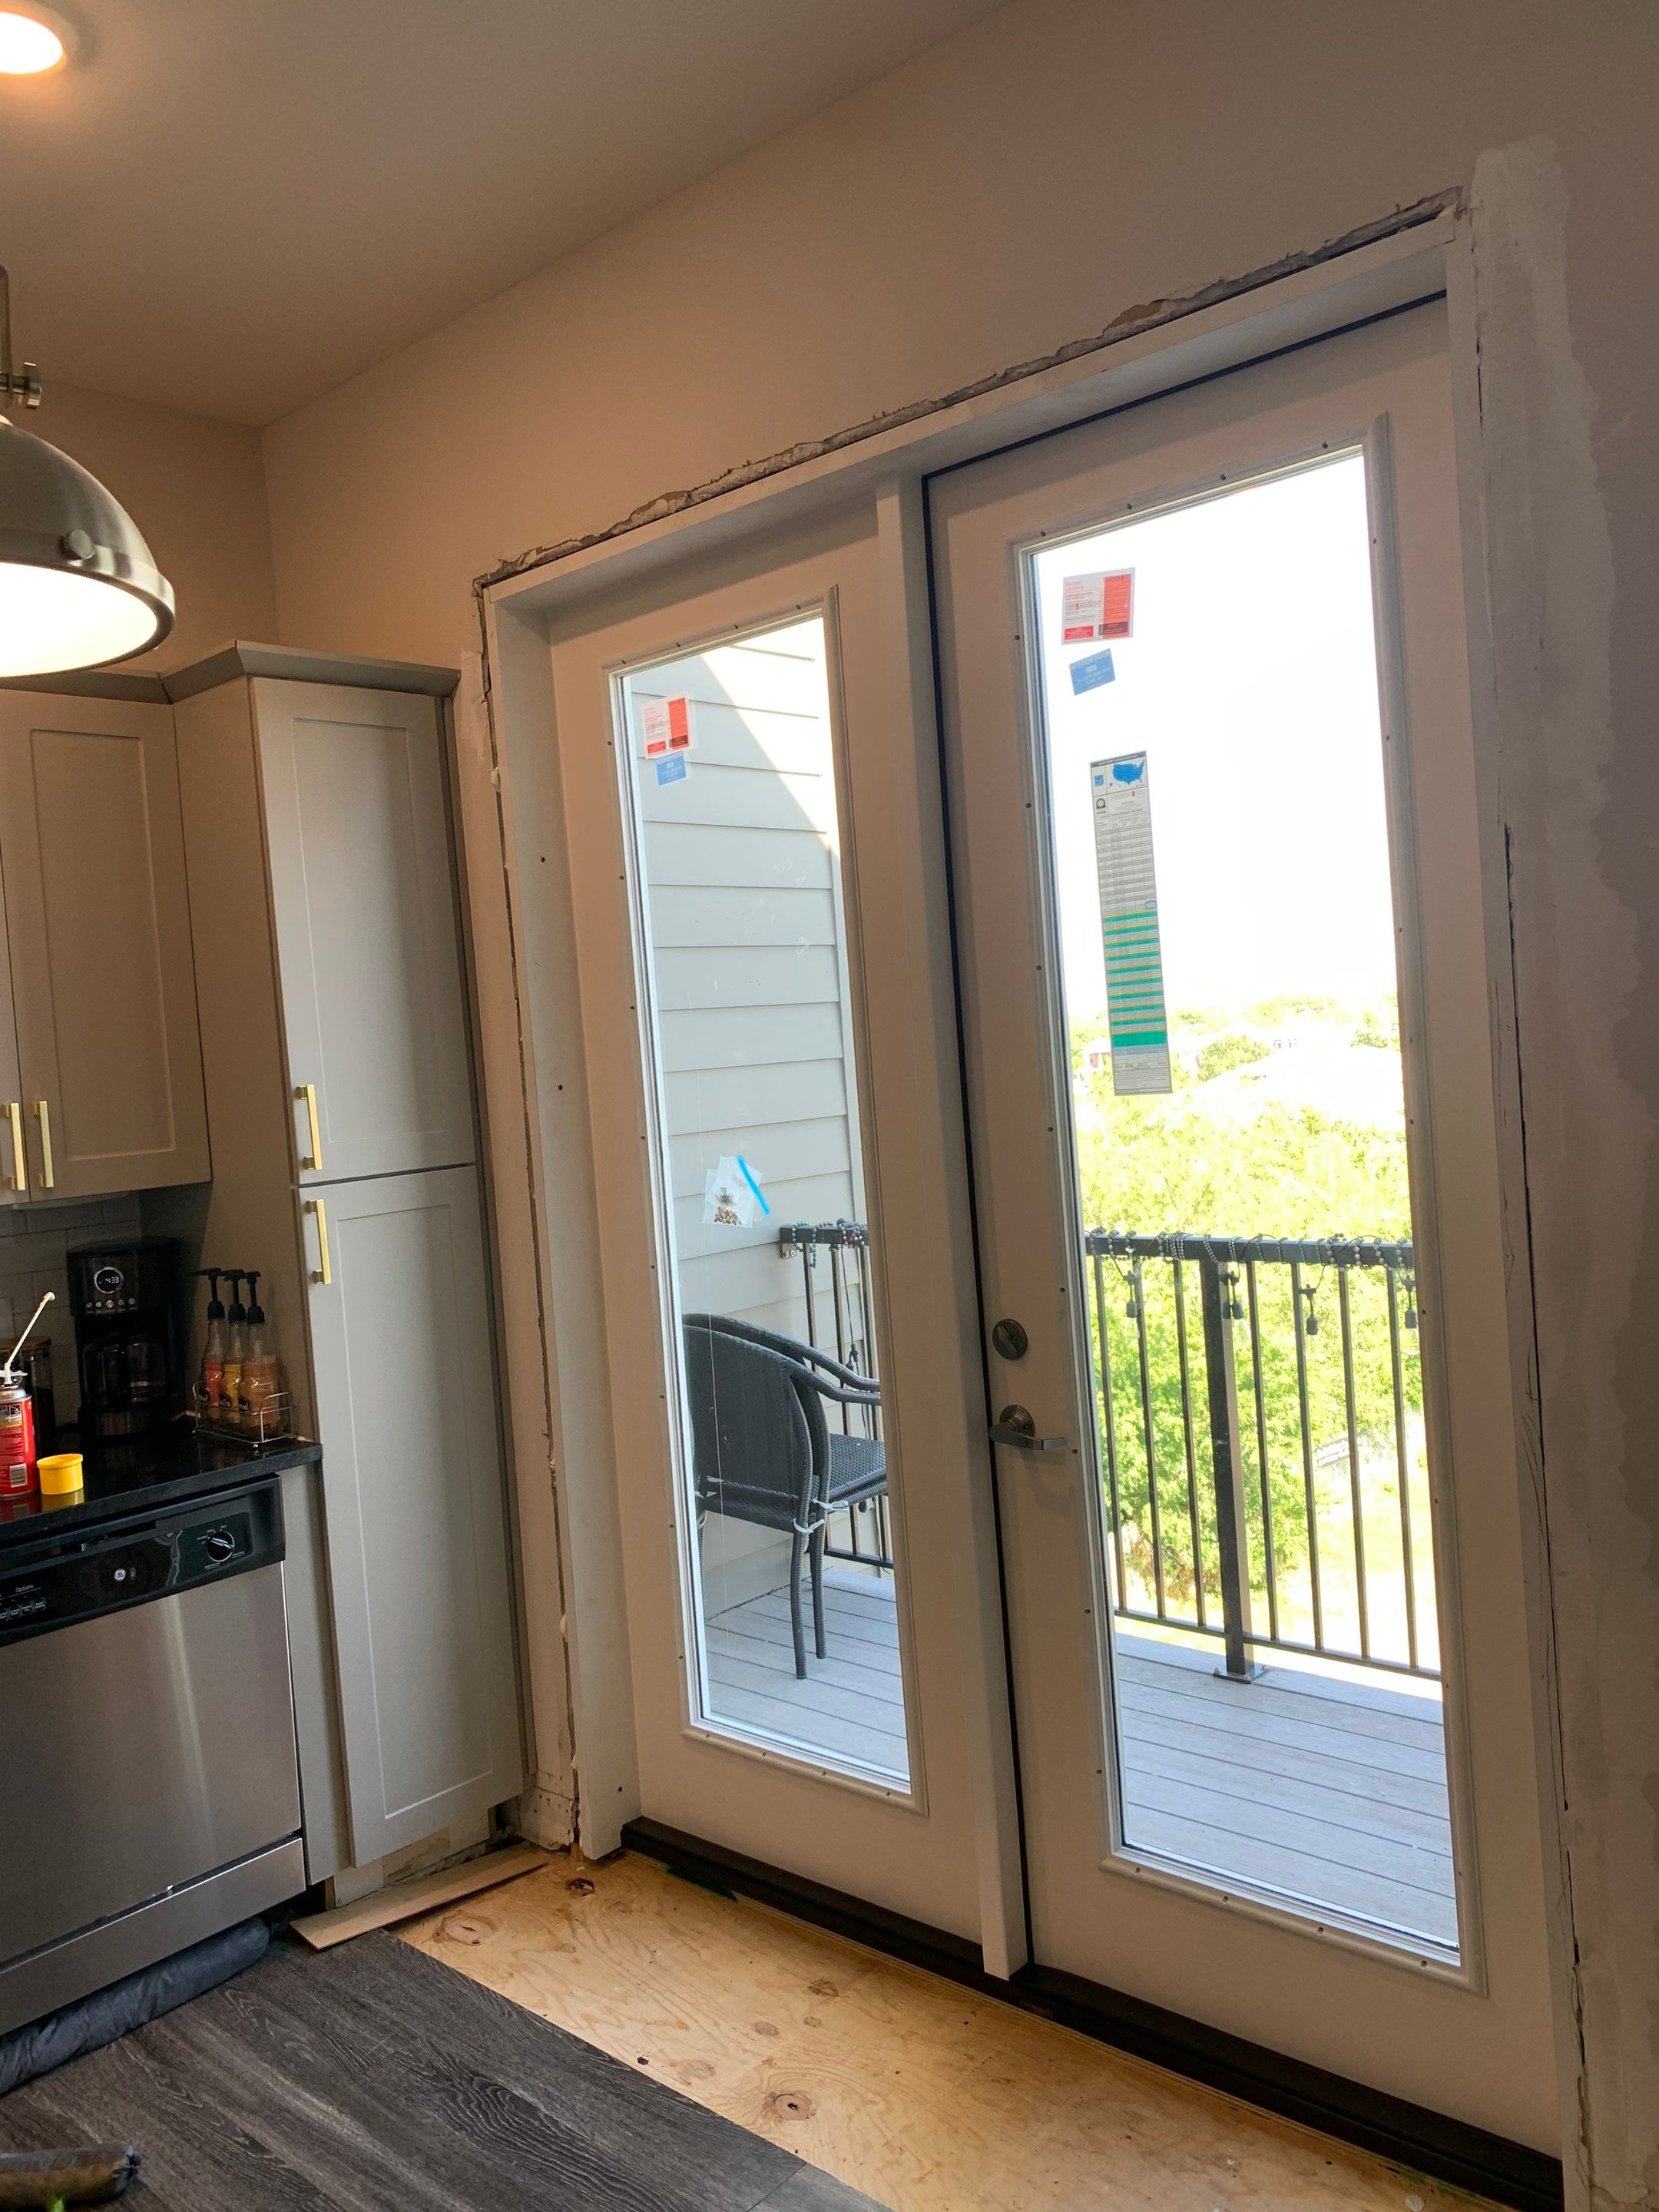 During
New French doors installed at the kitchen balcony entrance, with interior finish repairs still to be completed.
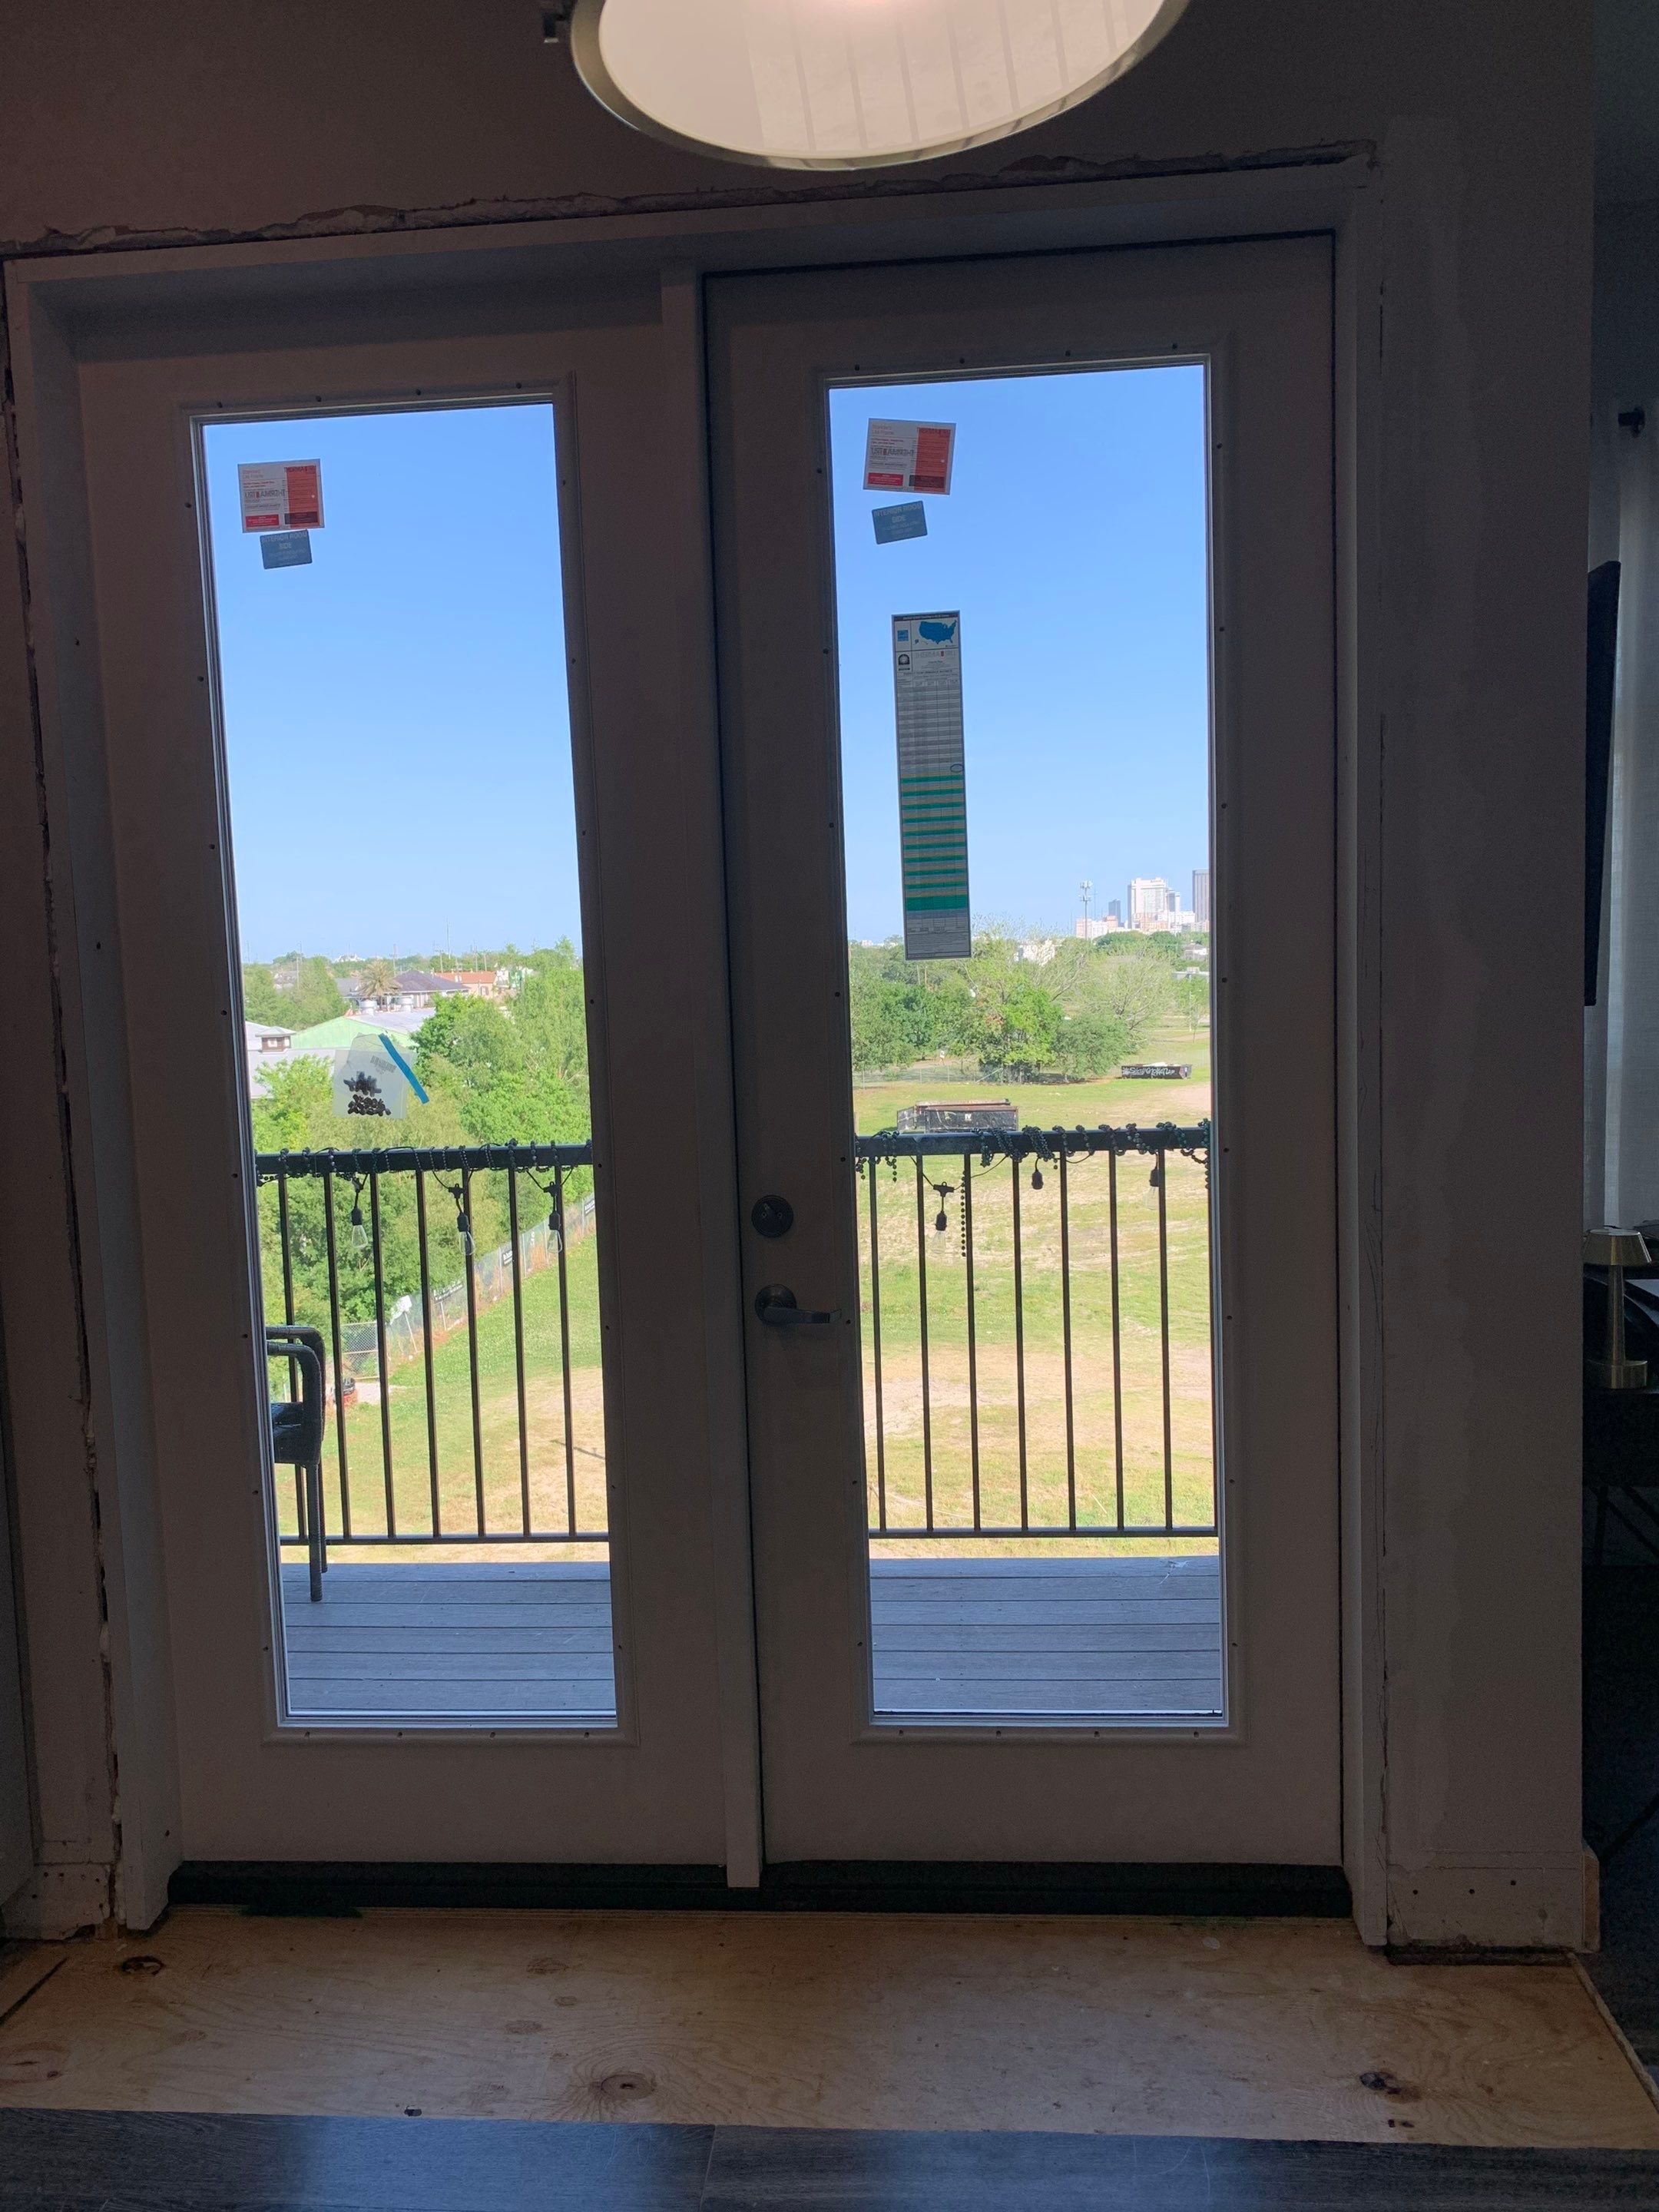 During
Replacement balcony doors installed with the surrounding interior trim and floor repairs still underway.
- After
Completed dark-finished French doors at Lumina Apartments, replacing the original balcony entry with a refreshed appearance.
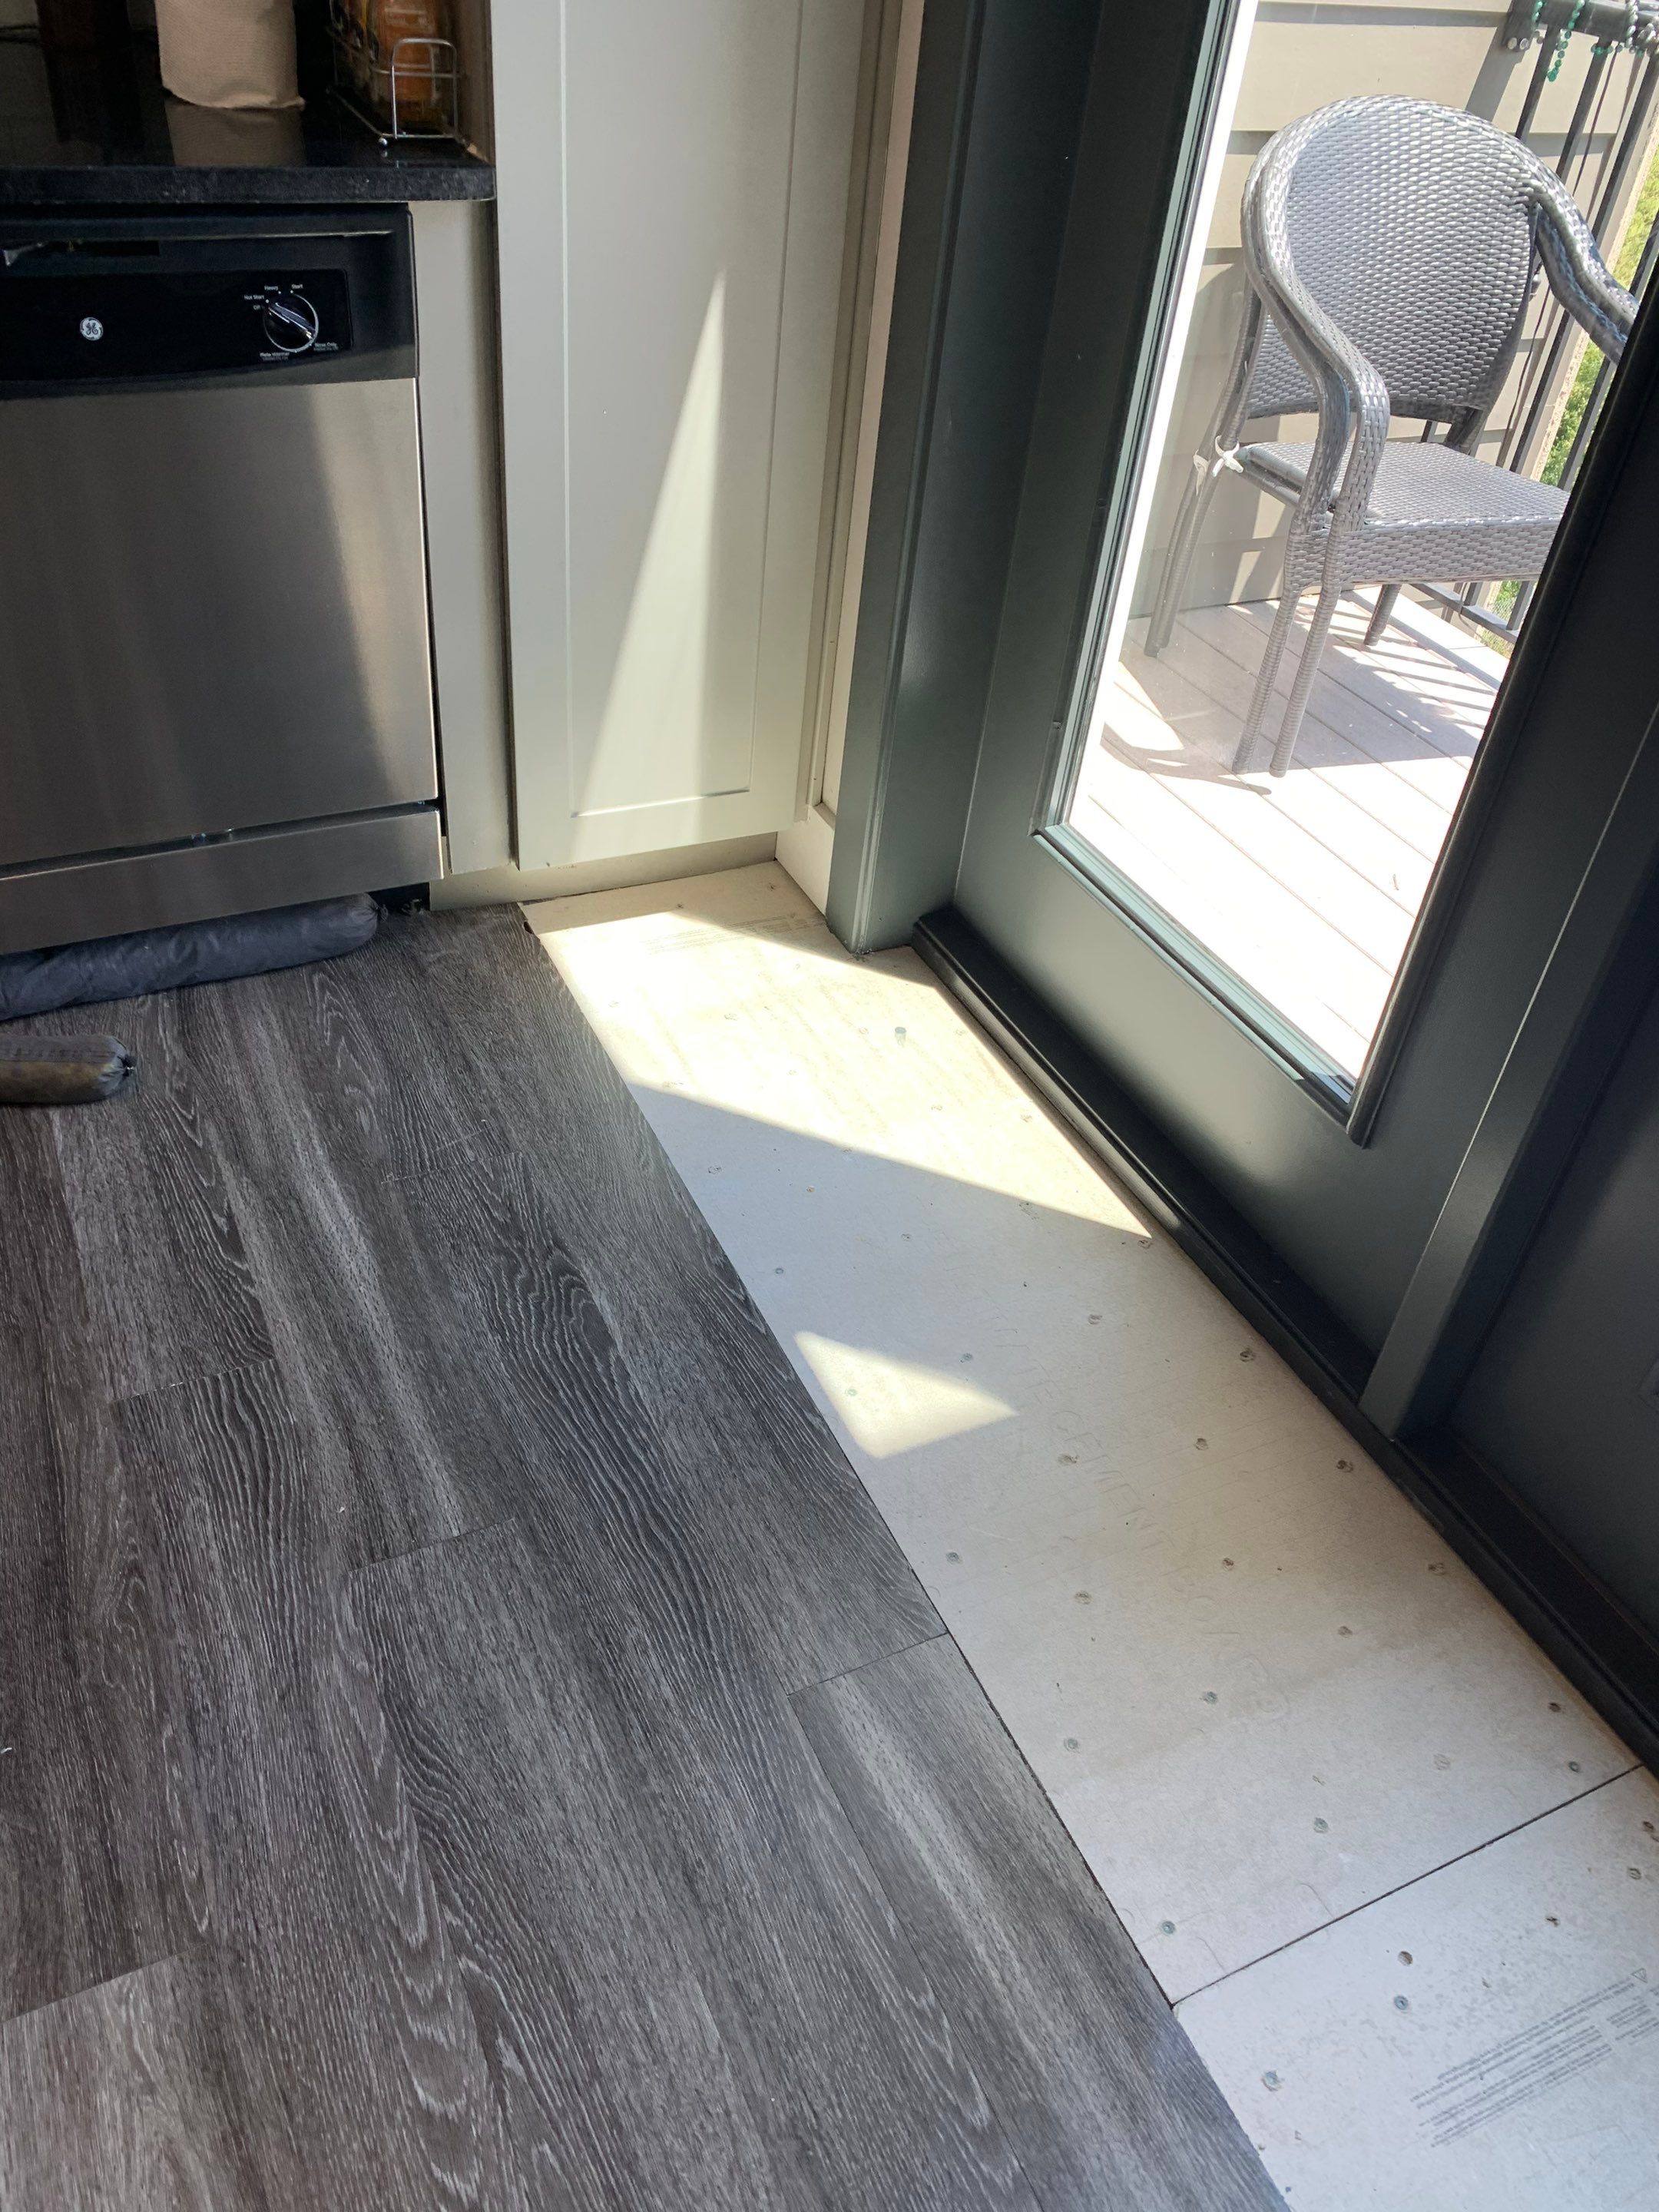 During
Interior flooring repair area beside the newly installed balcony door, showing replacement underlayment before flooring installation.
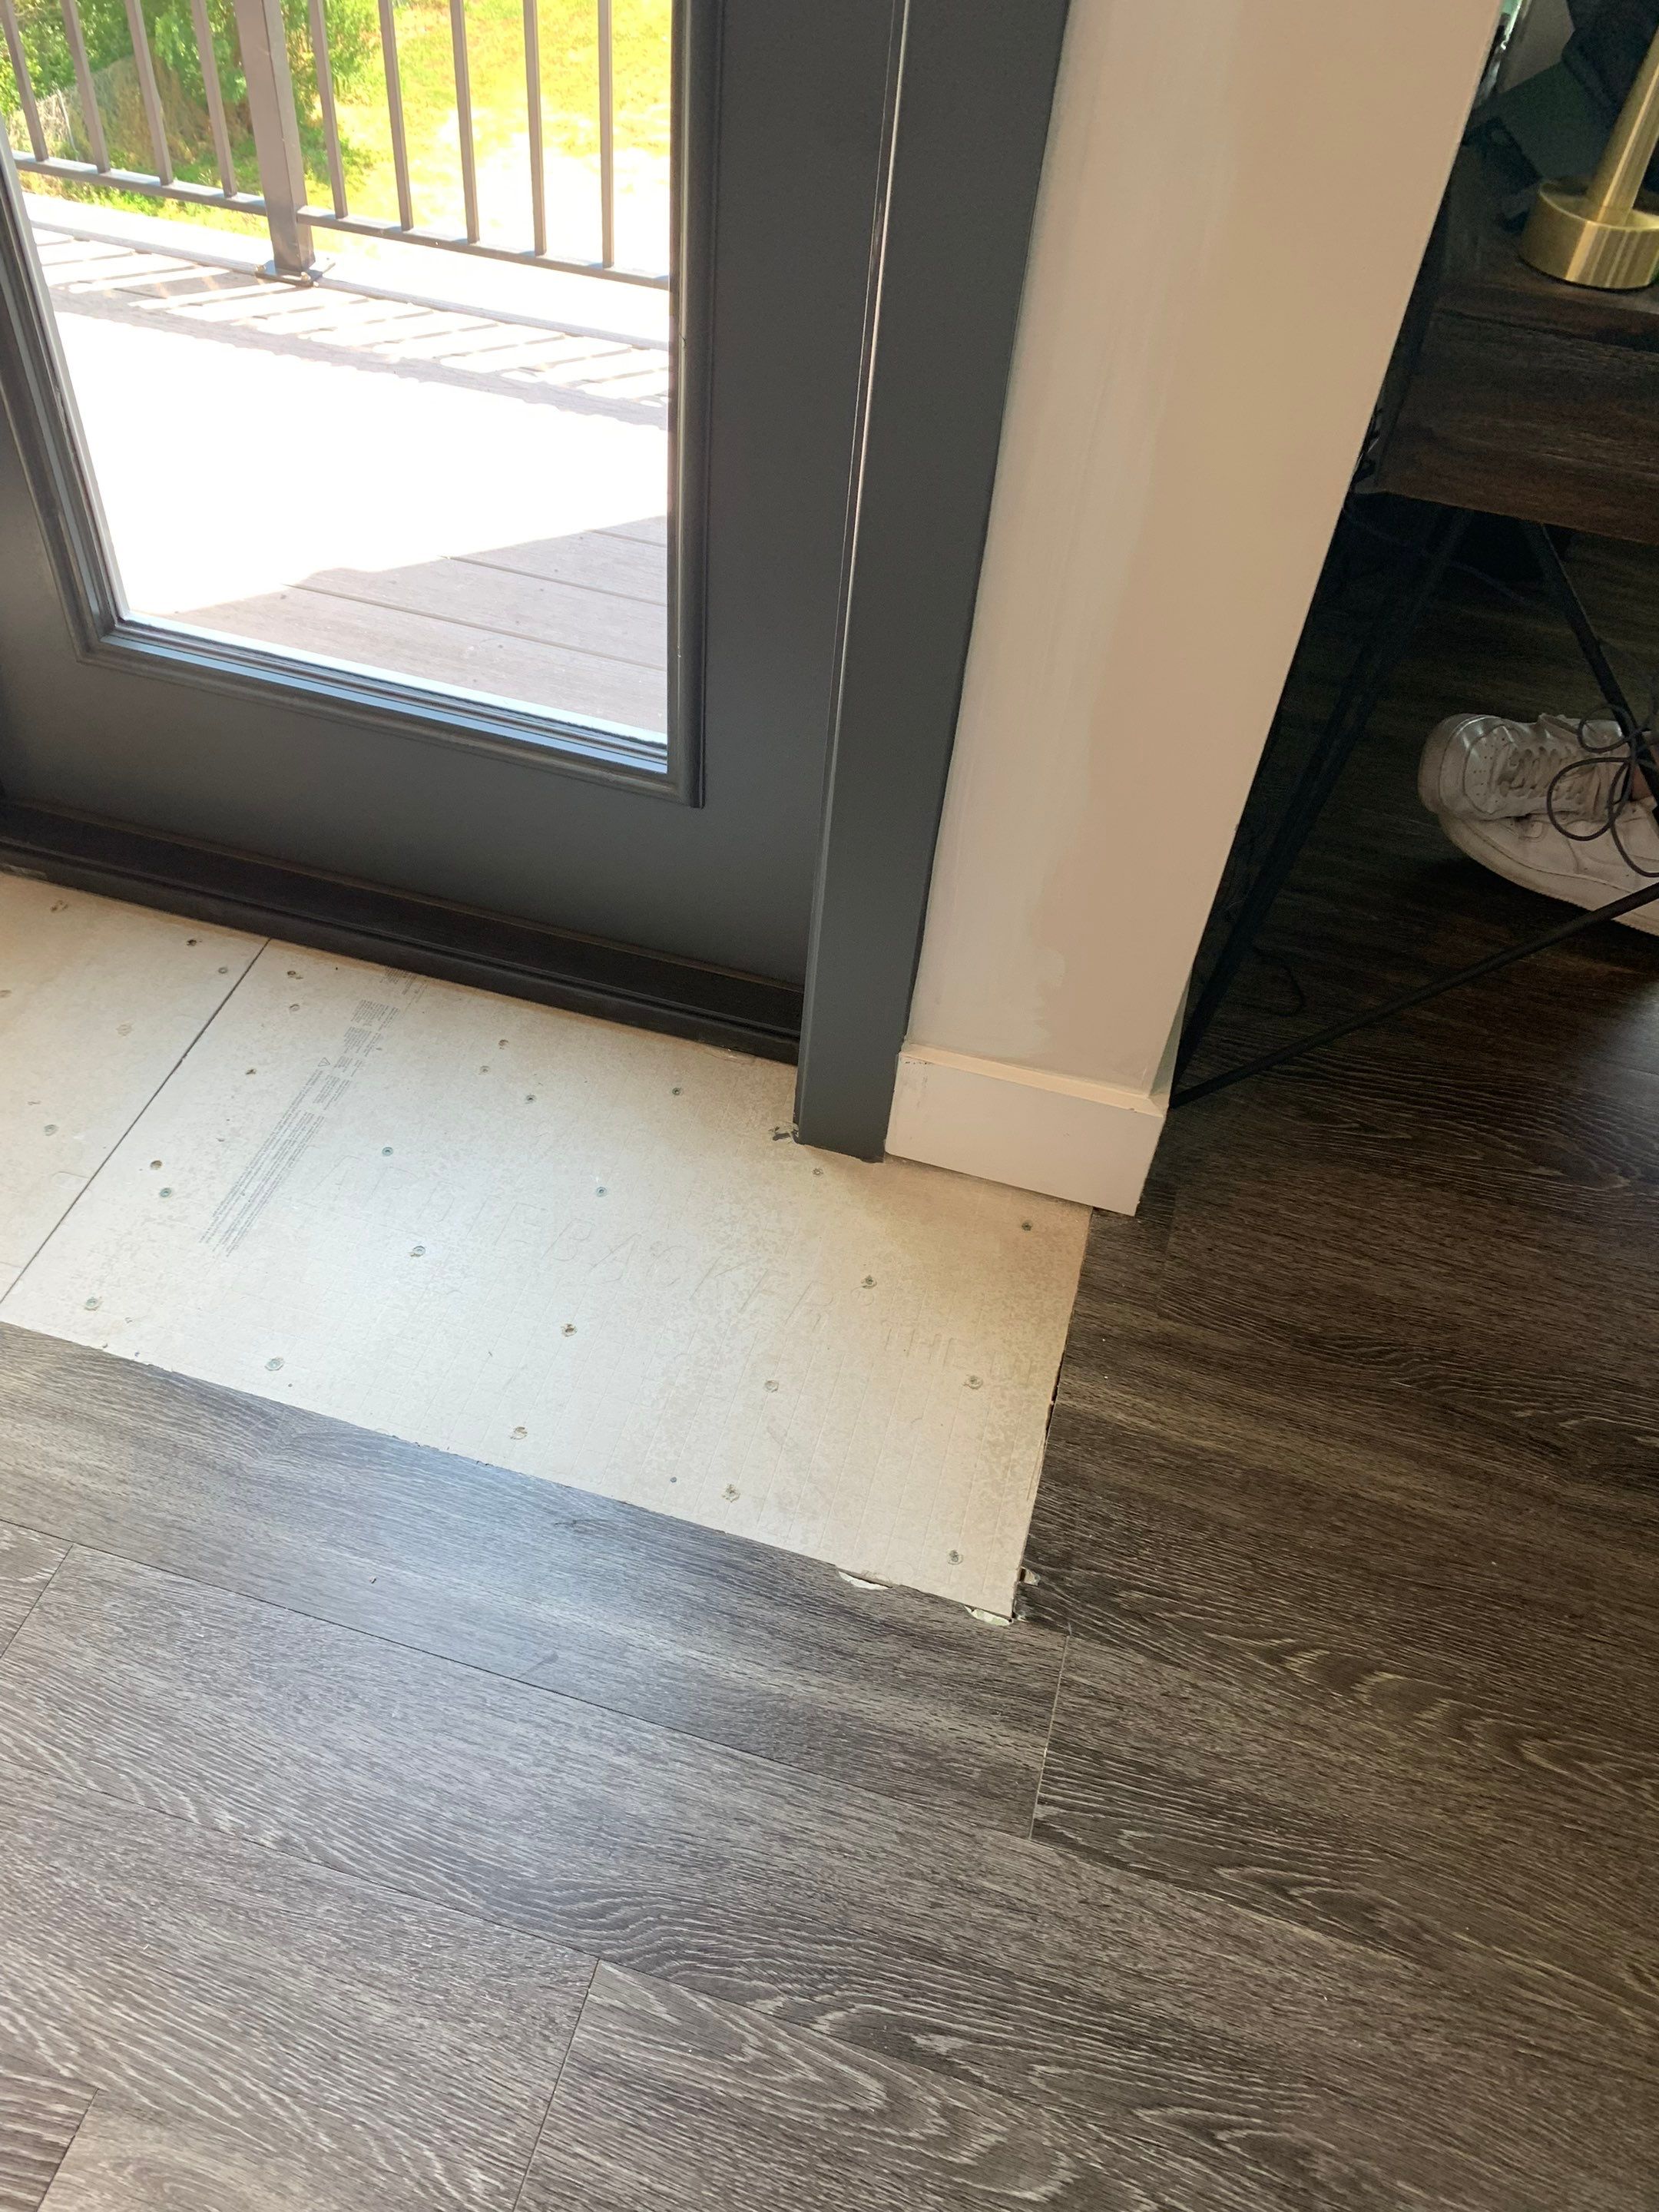 During
Replacement underlayment fitted around the finished door frame in preparation for matching the existing flooring.
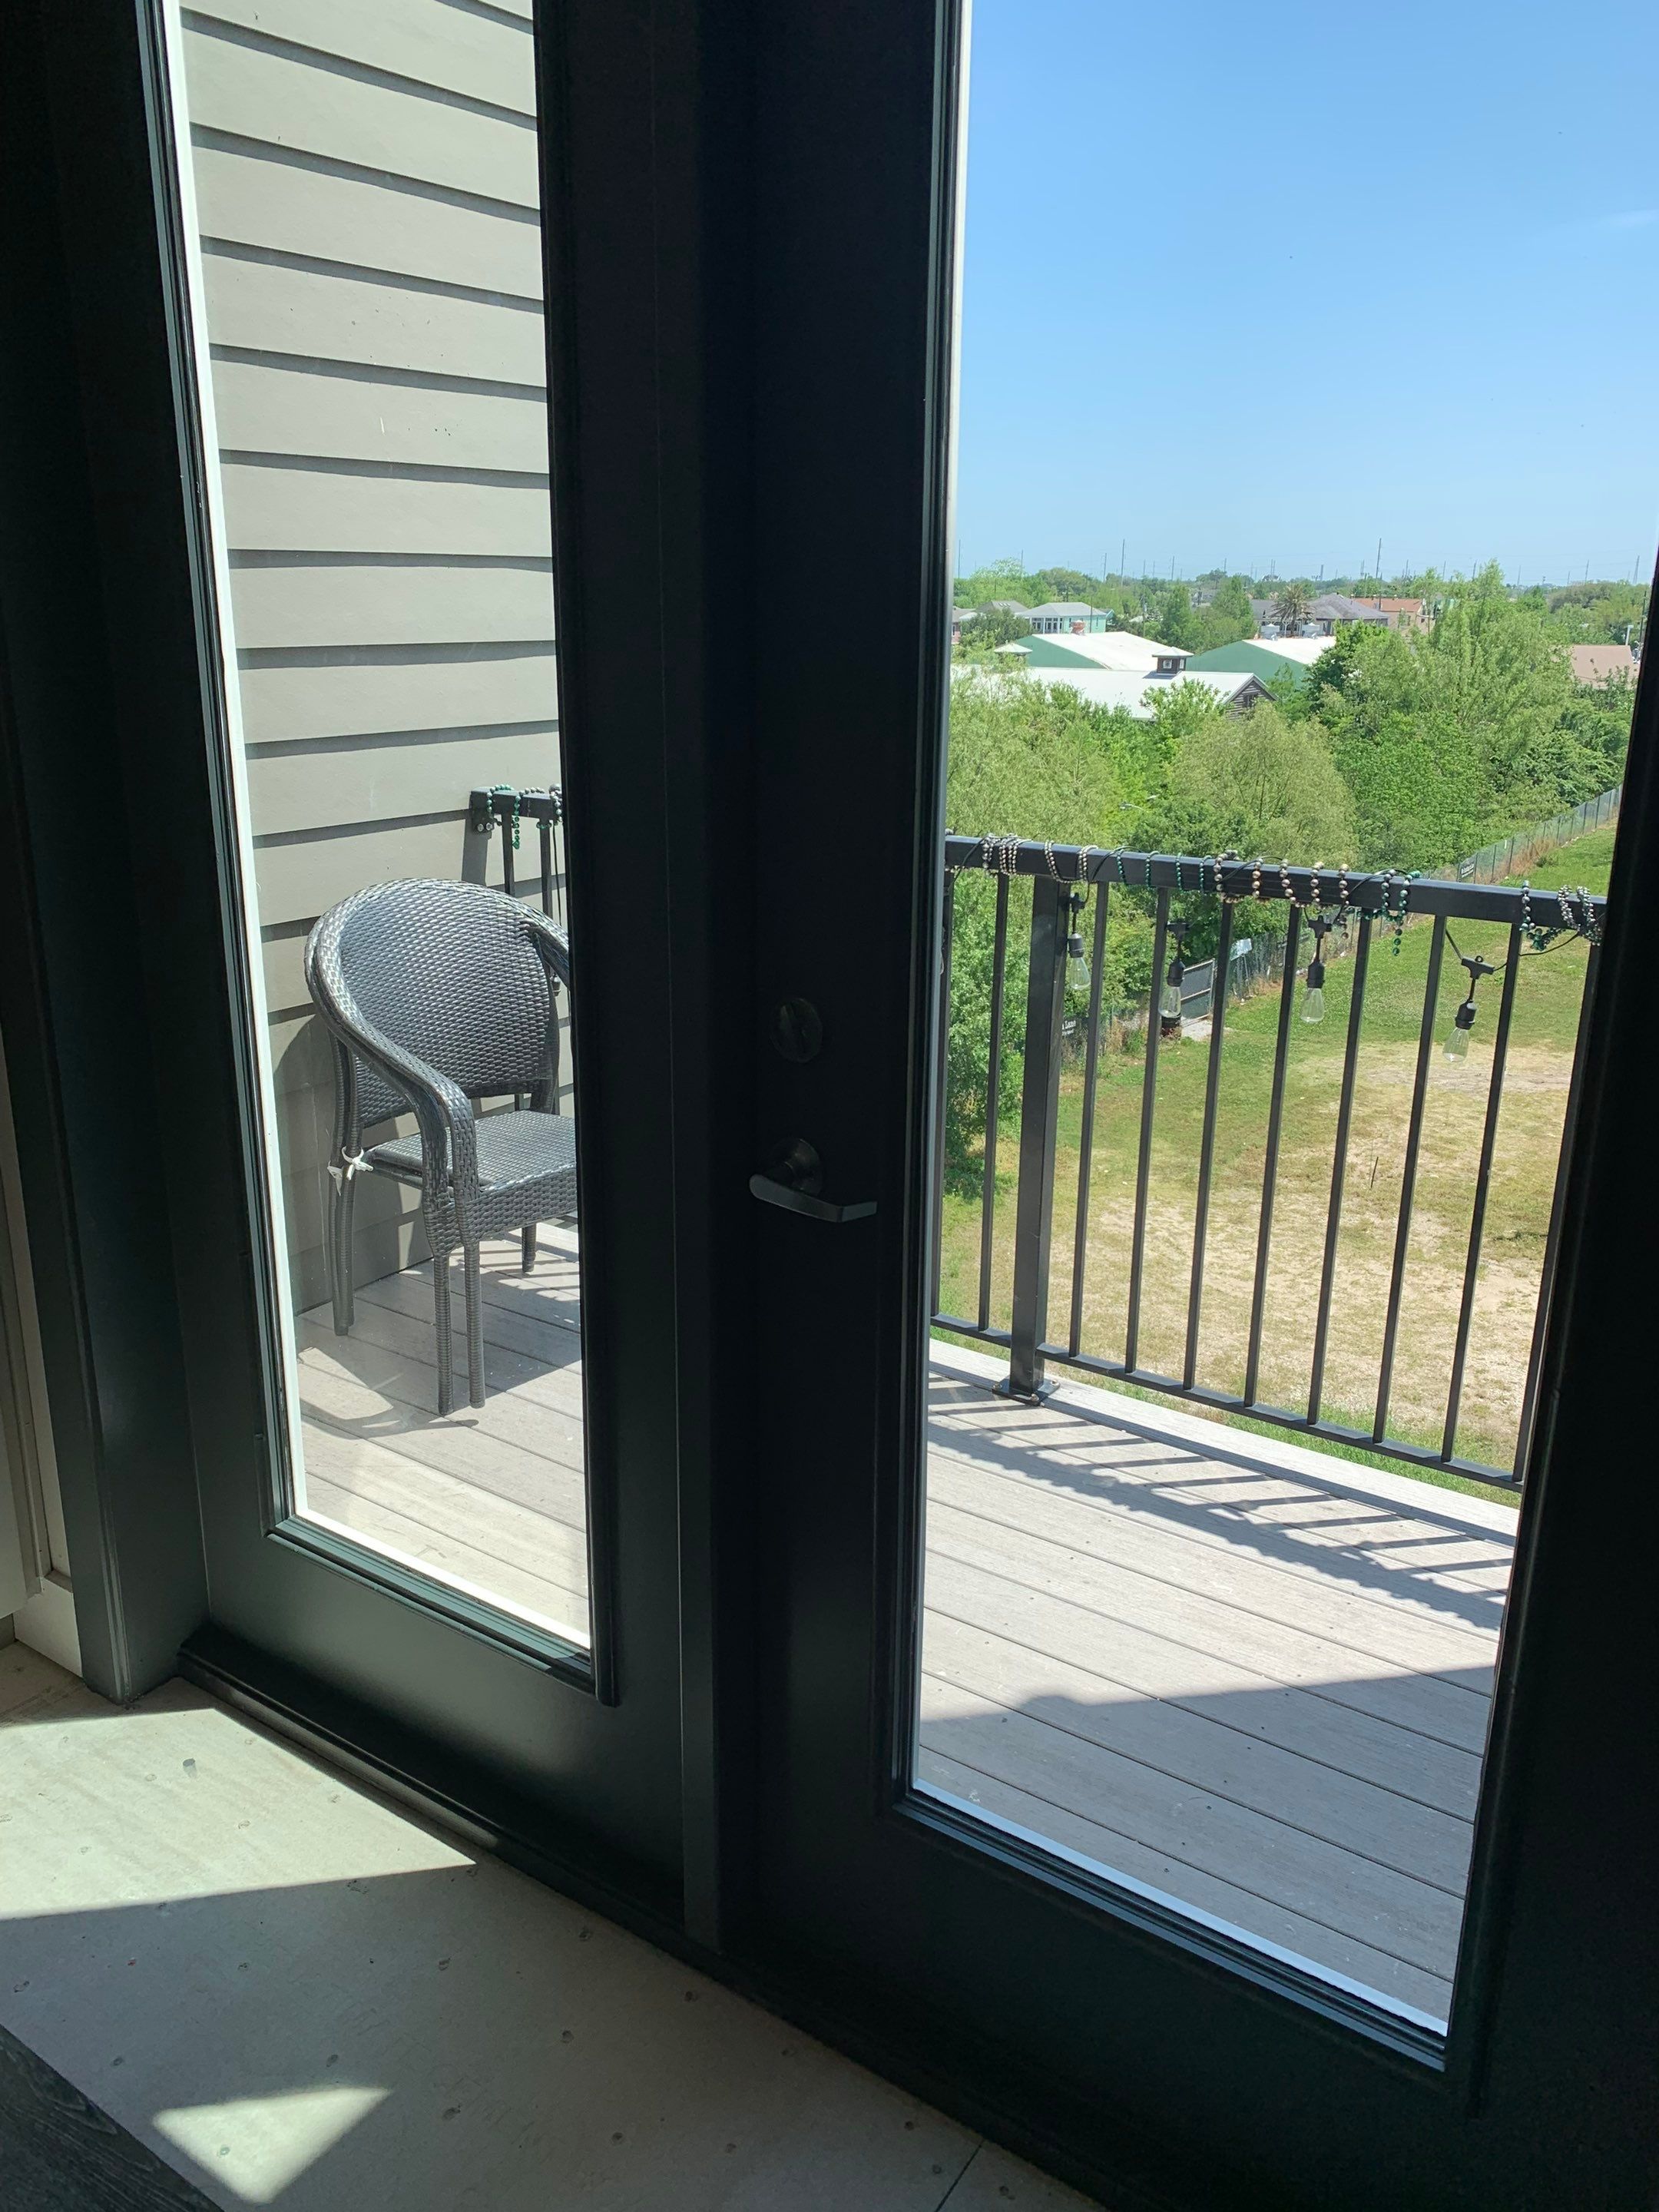 During
Interior view through the replacement French doors toward the balcony, showing the new dark-finished door assembly.
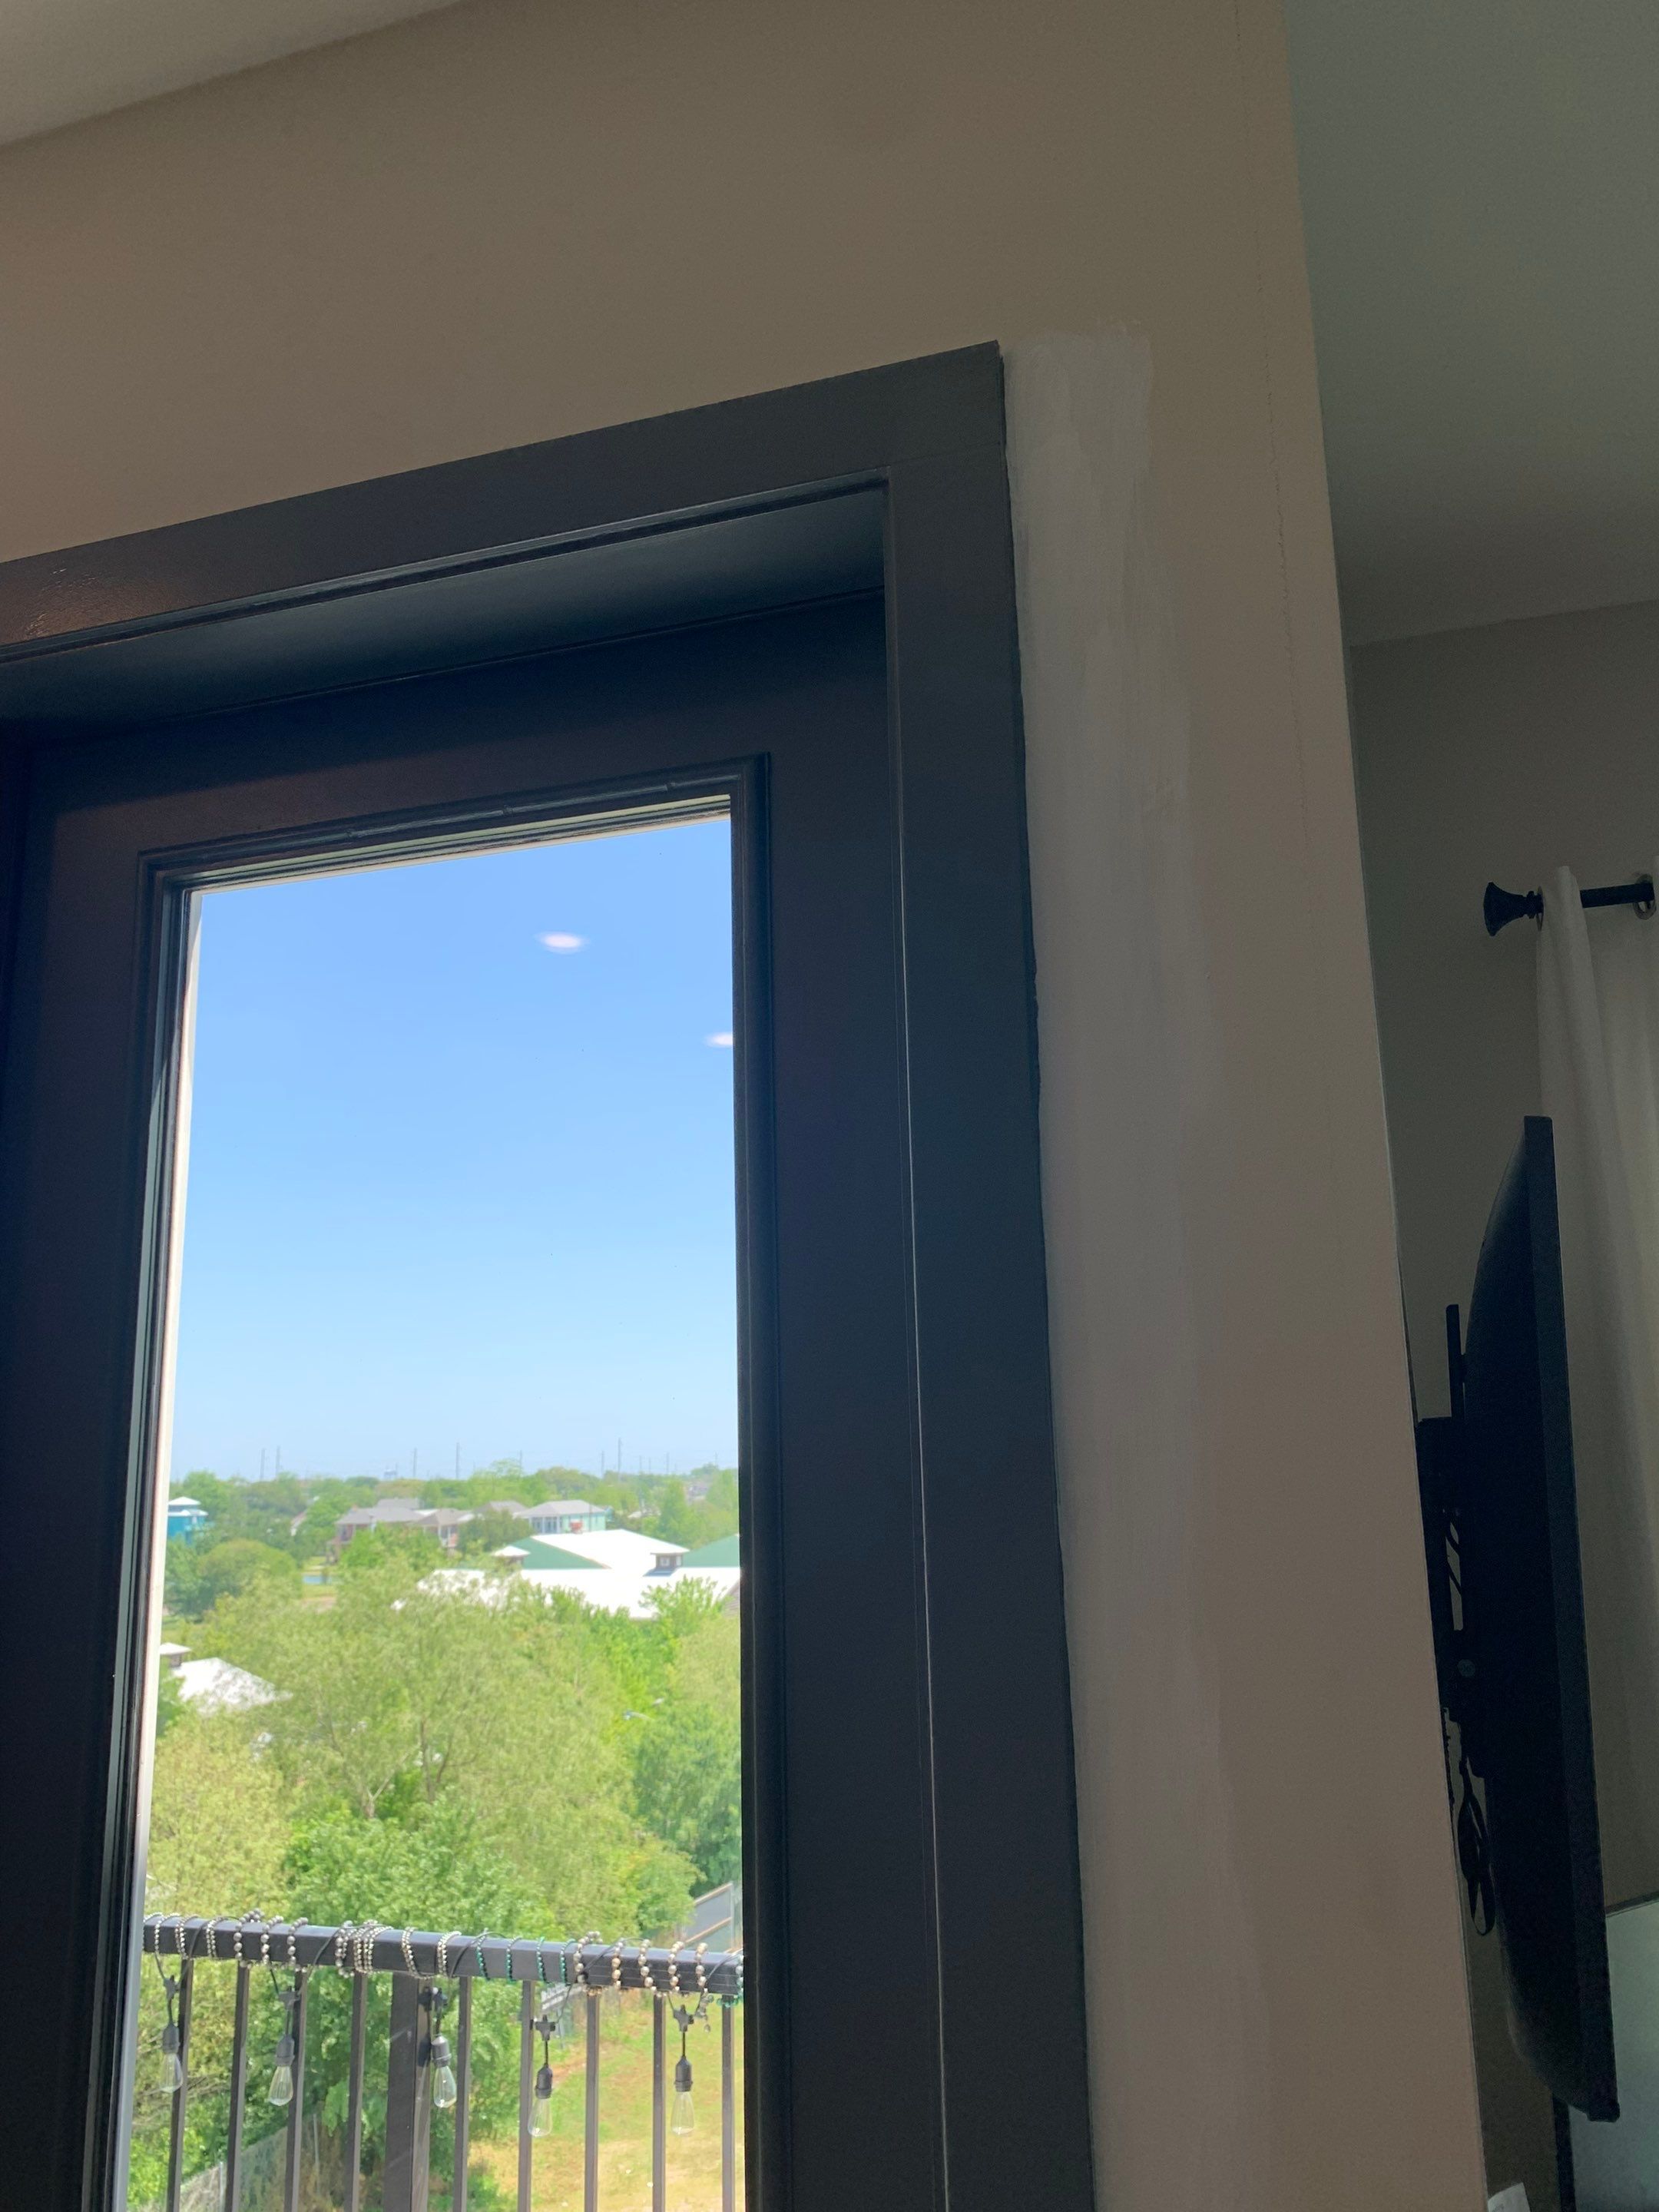 During
Close-up of the finished interior door casing and wall transition at the balcony entrance.
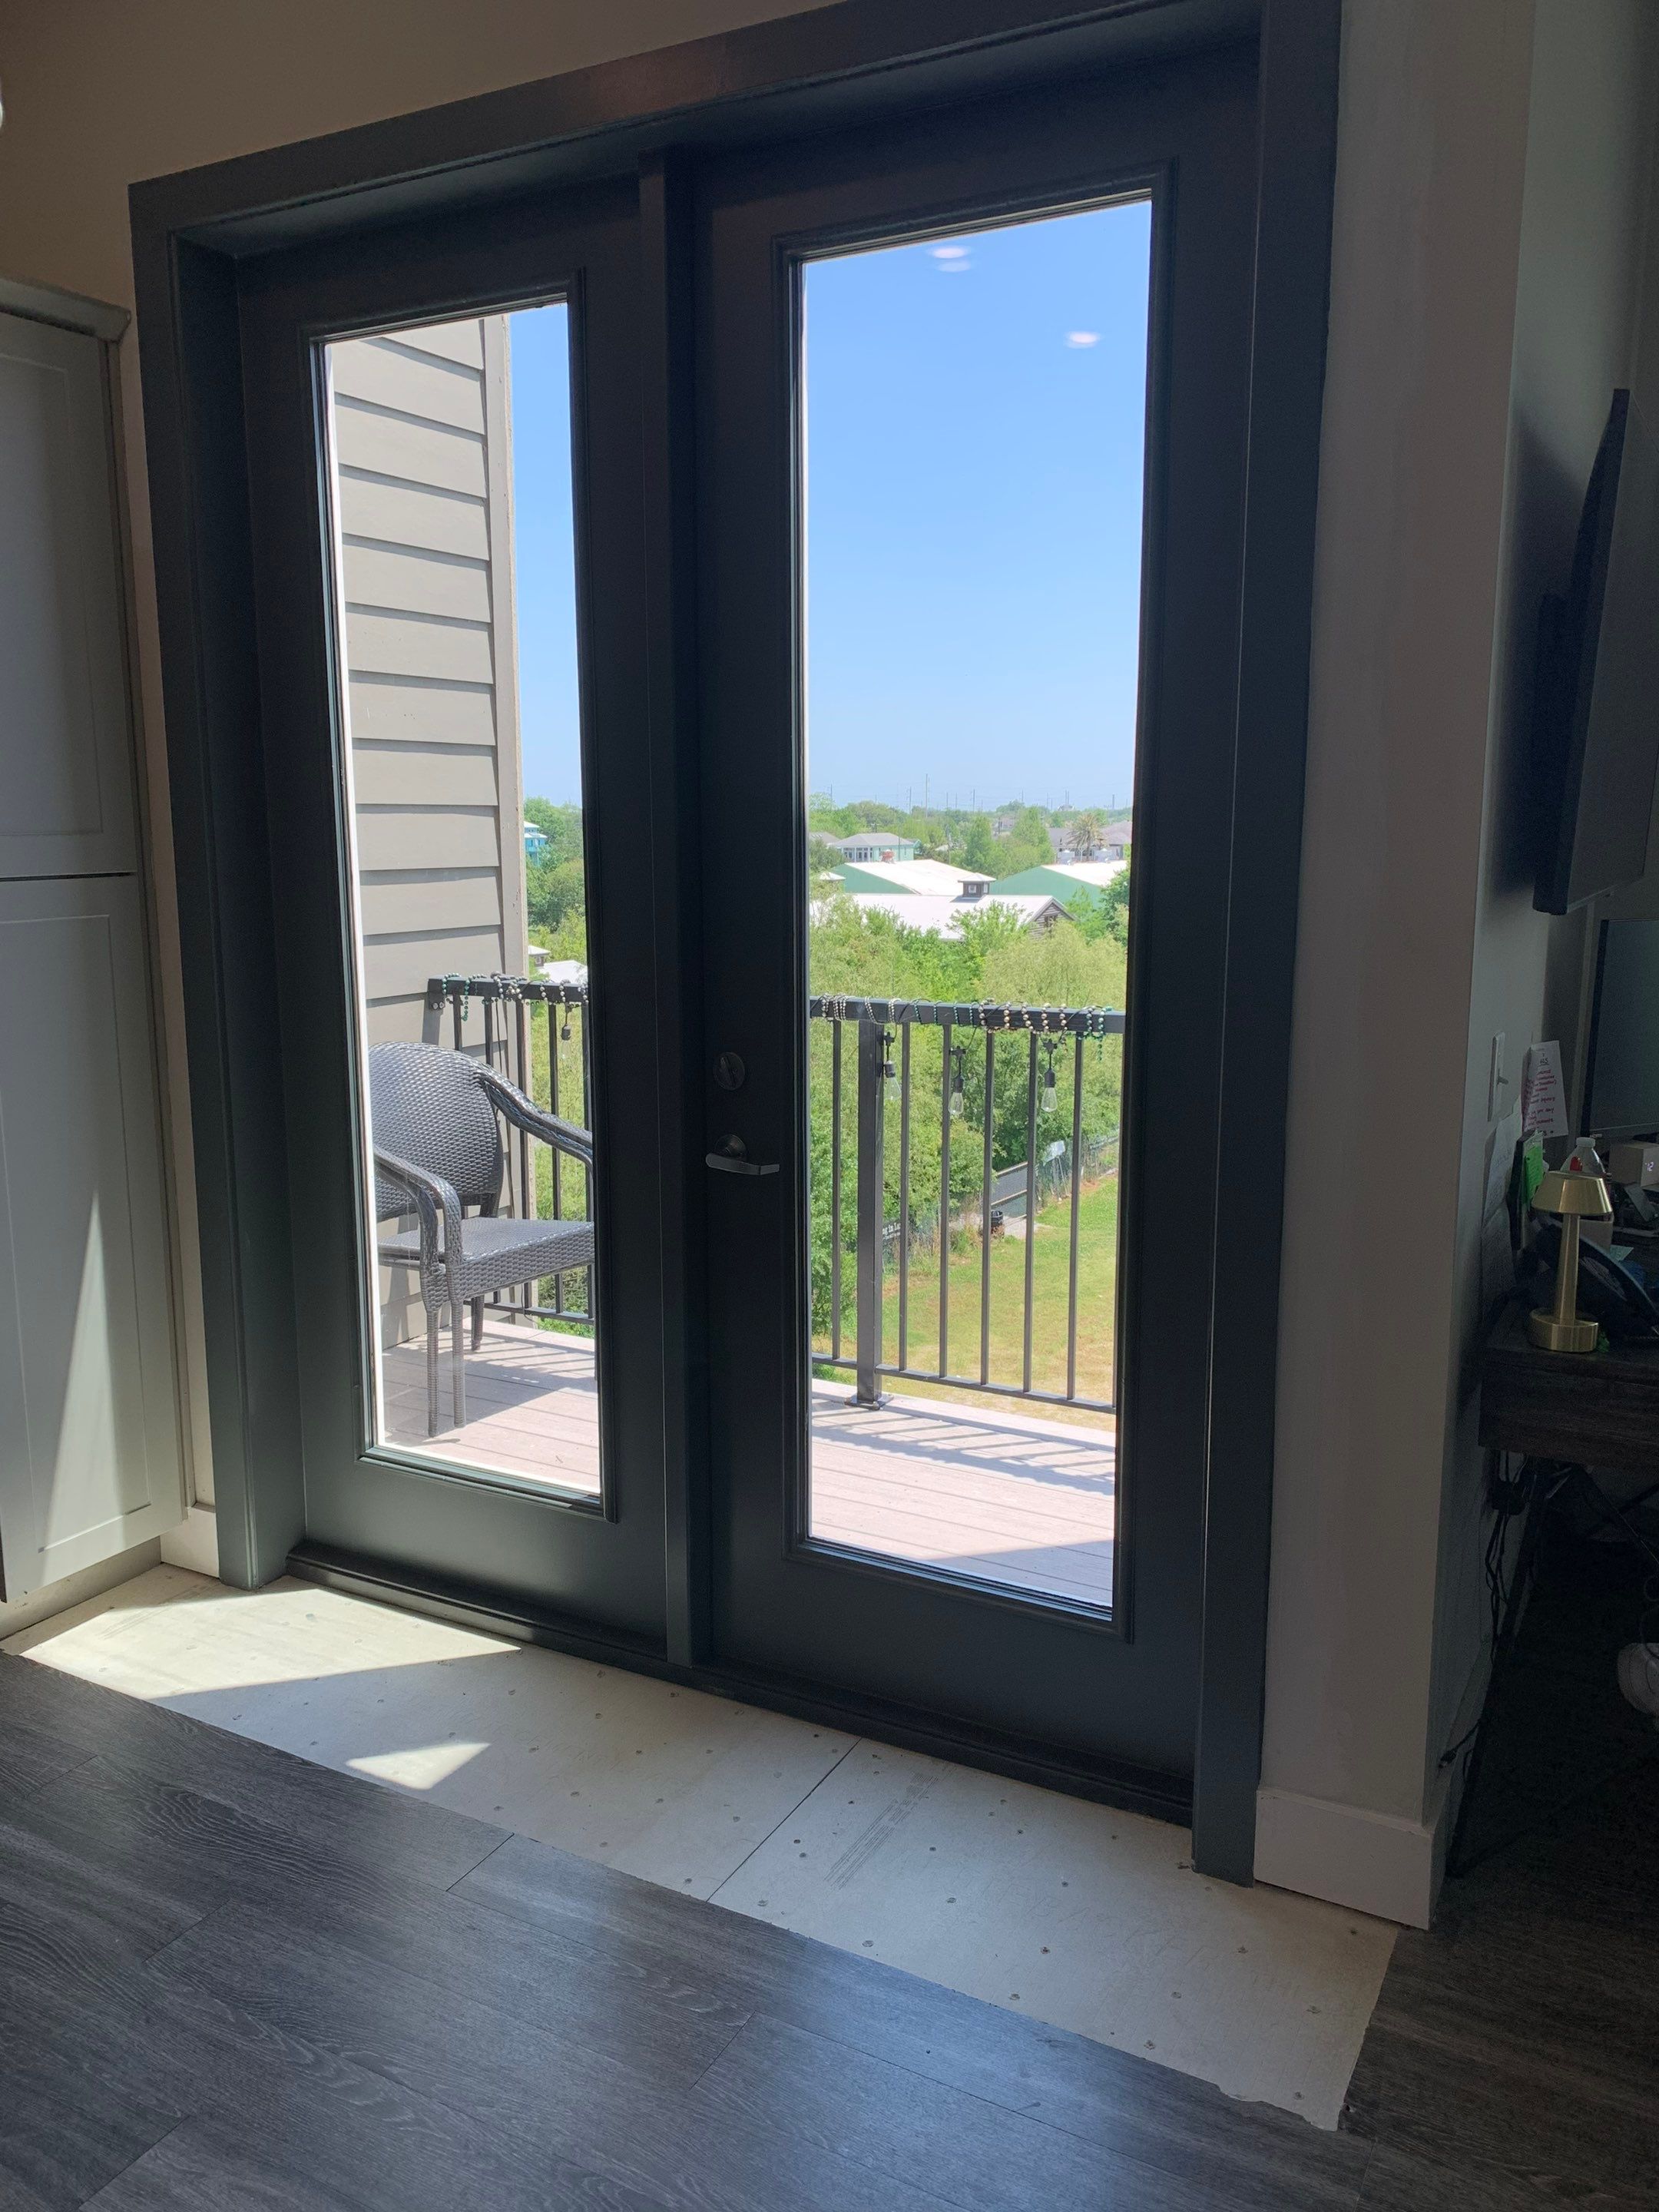 During
Wider interior view of the replacement French doors and completed surrounding trim, with the balcony visible beyond.
Other projects
Let's talk about your project
We start with a conversation and a site visit to define scope before pricing, so you know exactly what to expect.